


A subdomain (for example shop.domain.co.uk) lets you create a separate part of your website, such as a shop, a blog or a test version. In the hosting panel, you can add it in two ways:
Method 1 – Subdomain Management: the subdomain is attached to the main domain. This is the simplest solution for an additional website.
Method 2 – adding it as an additional domain: the subdomain is added in the Domains section, like any other domain, and works independently.
| Method 1: Subdomain Management | Method 2: additional domain | |
| E-mail accounts | You cannot create e-mail addresses in the subdomain | You can create e-mail addresses, for example contact@shop.domain.co.uk |
| Website files | In a subfolder of the main domain (public_html/shop) | In a separate directory, like a main domain |
| Settings | Shared with the main domain | Specific to the subdomain: bandwidth and disk space limits, PHP options, SSL certificate, redirects, etc. |
- Log in to your hosting panel: Log in to your new hosting service
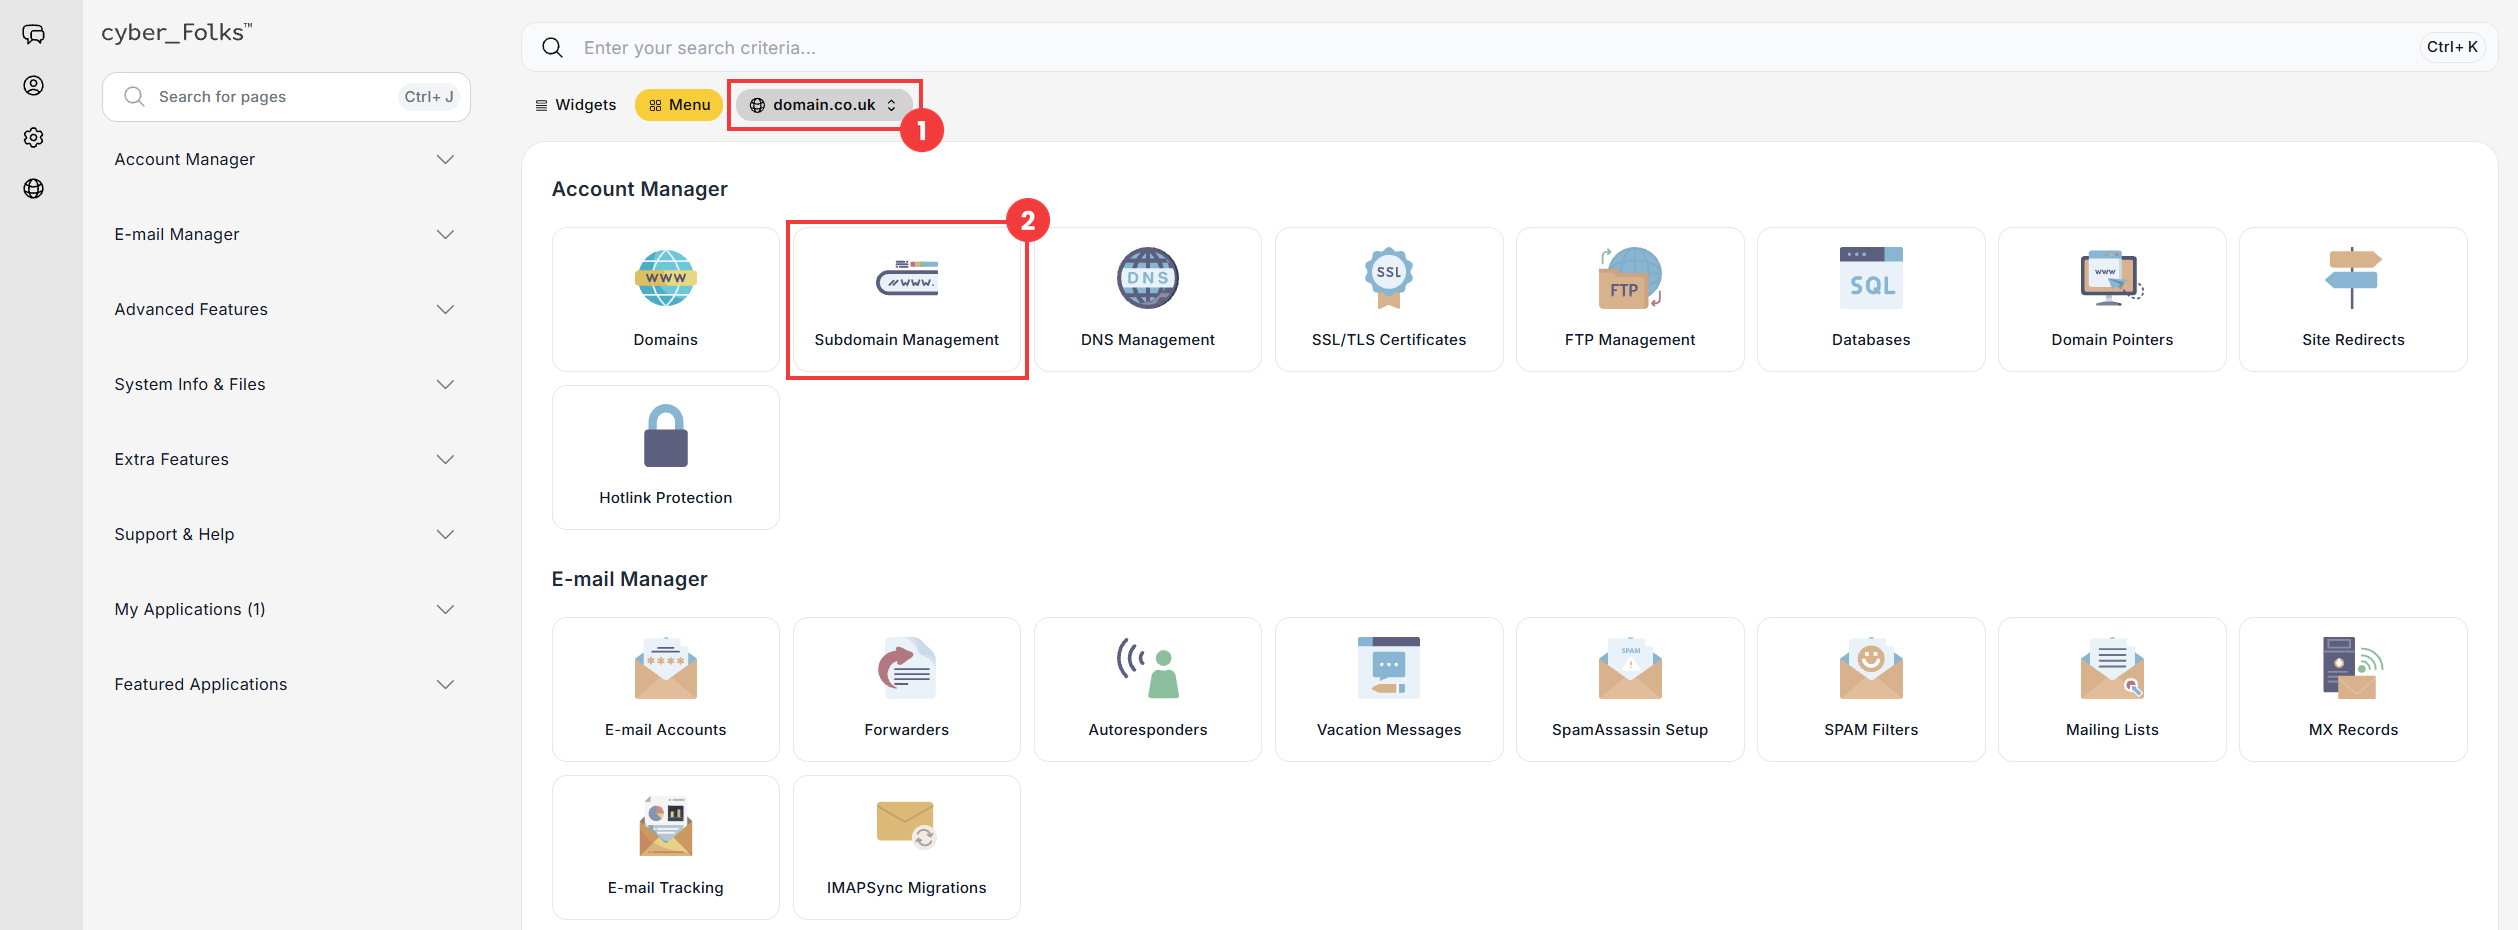
- If you have several domains, select the one in which you want to create the subdomain from the list (1). Then click the Subdomain Management option (2).
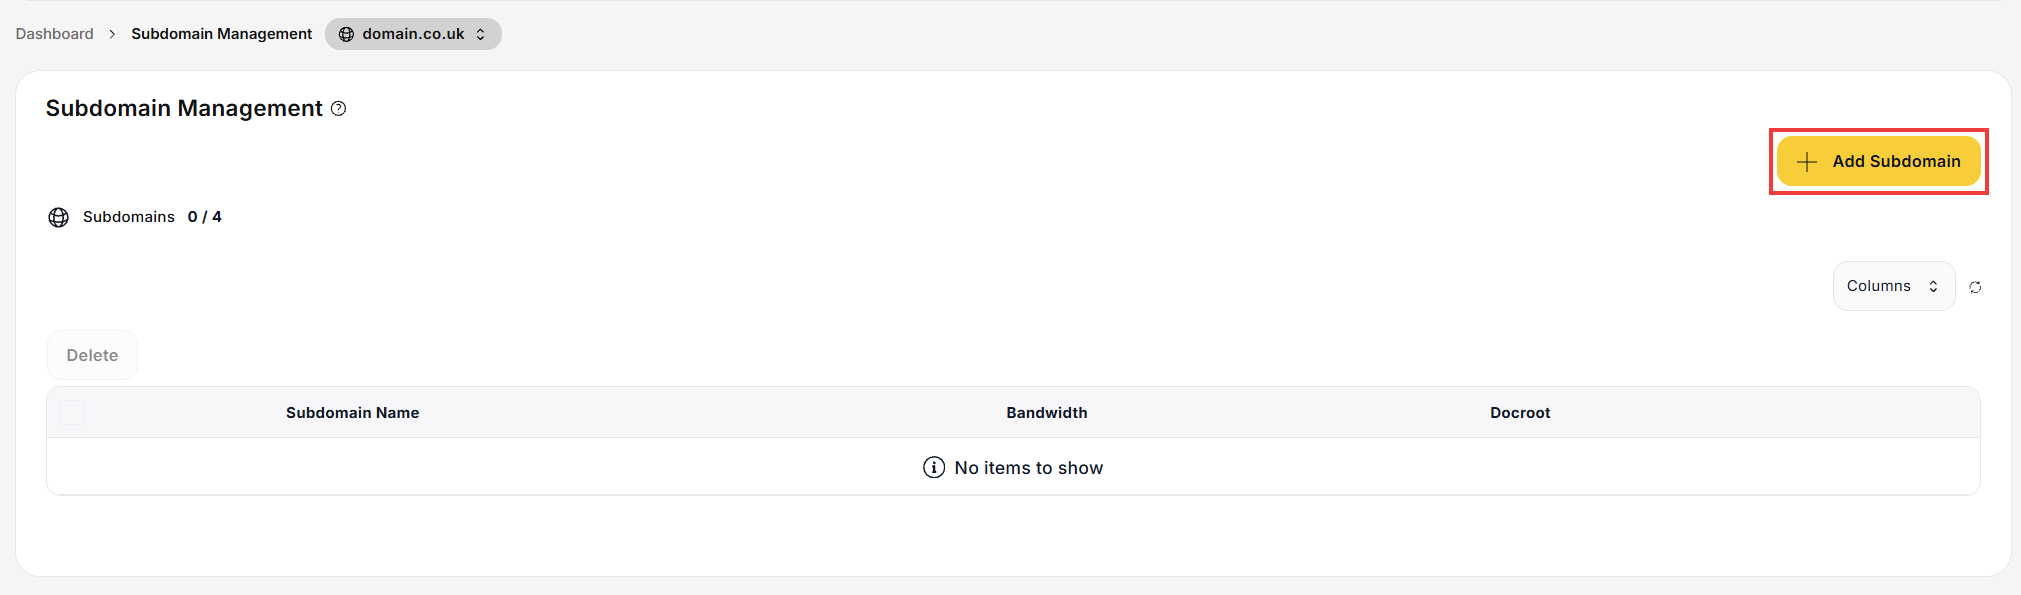
- On the next screen, click the Add Subdomain button.
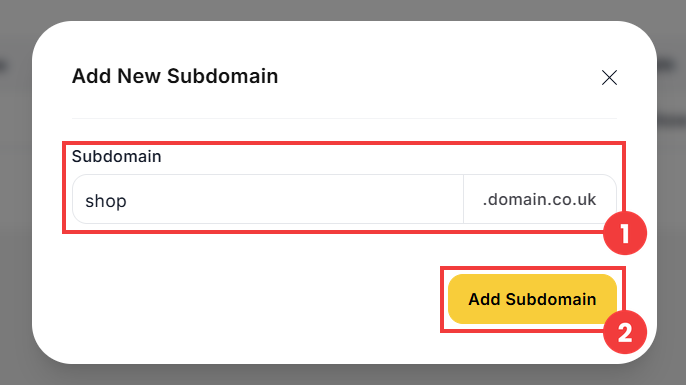
- In the Subdomain field (1), enter only the first part of the name, for example shop: the main domain name is added automatically. Confirm with the Add Subdomain button (2).
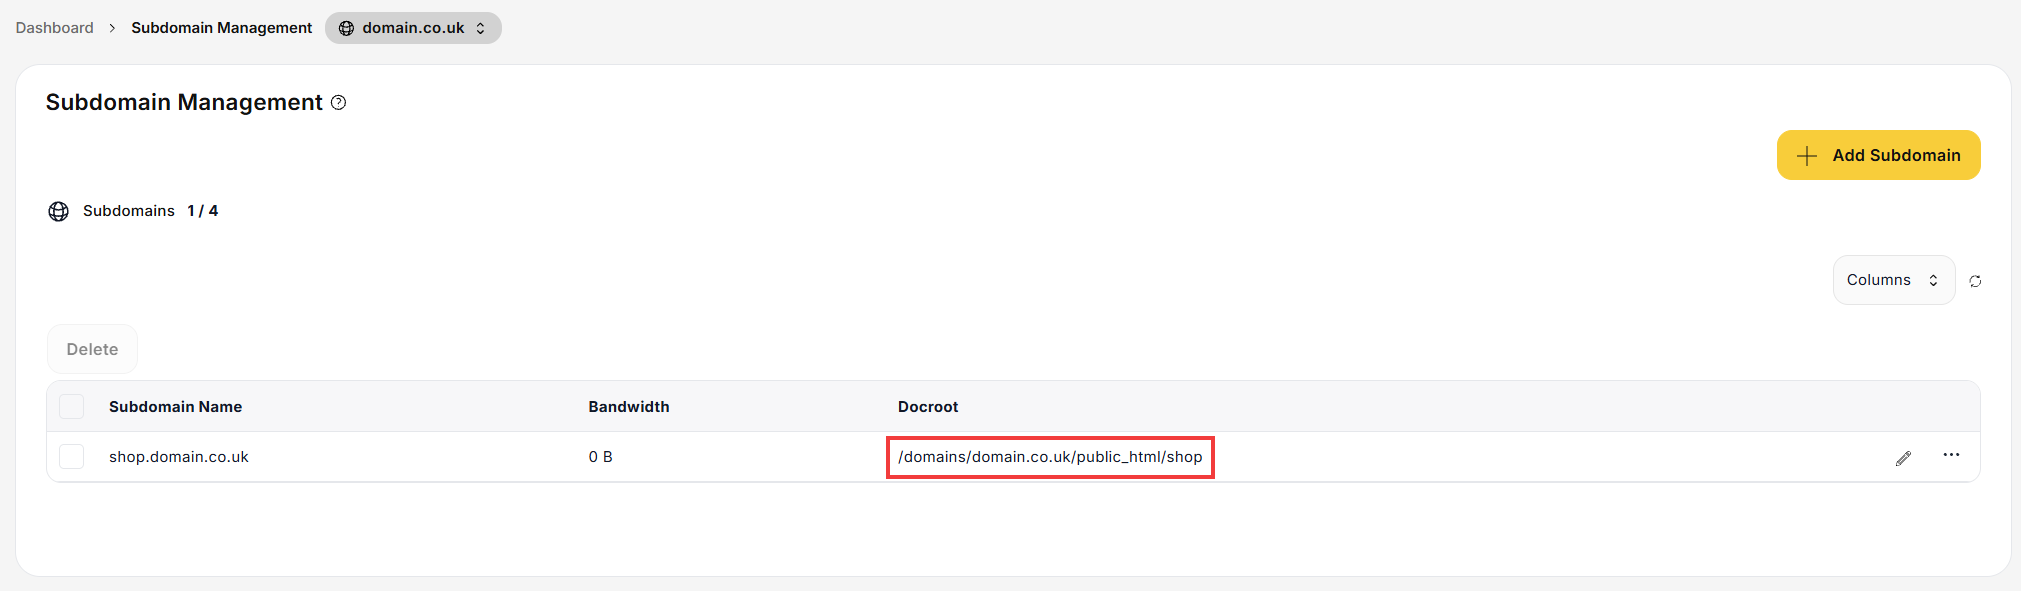
- The subdomain appears in the list. The Docroot column shows the folder for its files: by default, a subfolder of the main domain (public_html/shop).
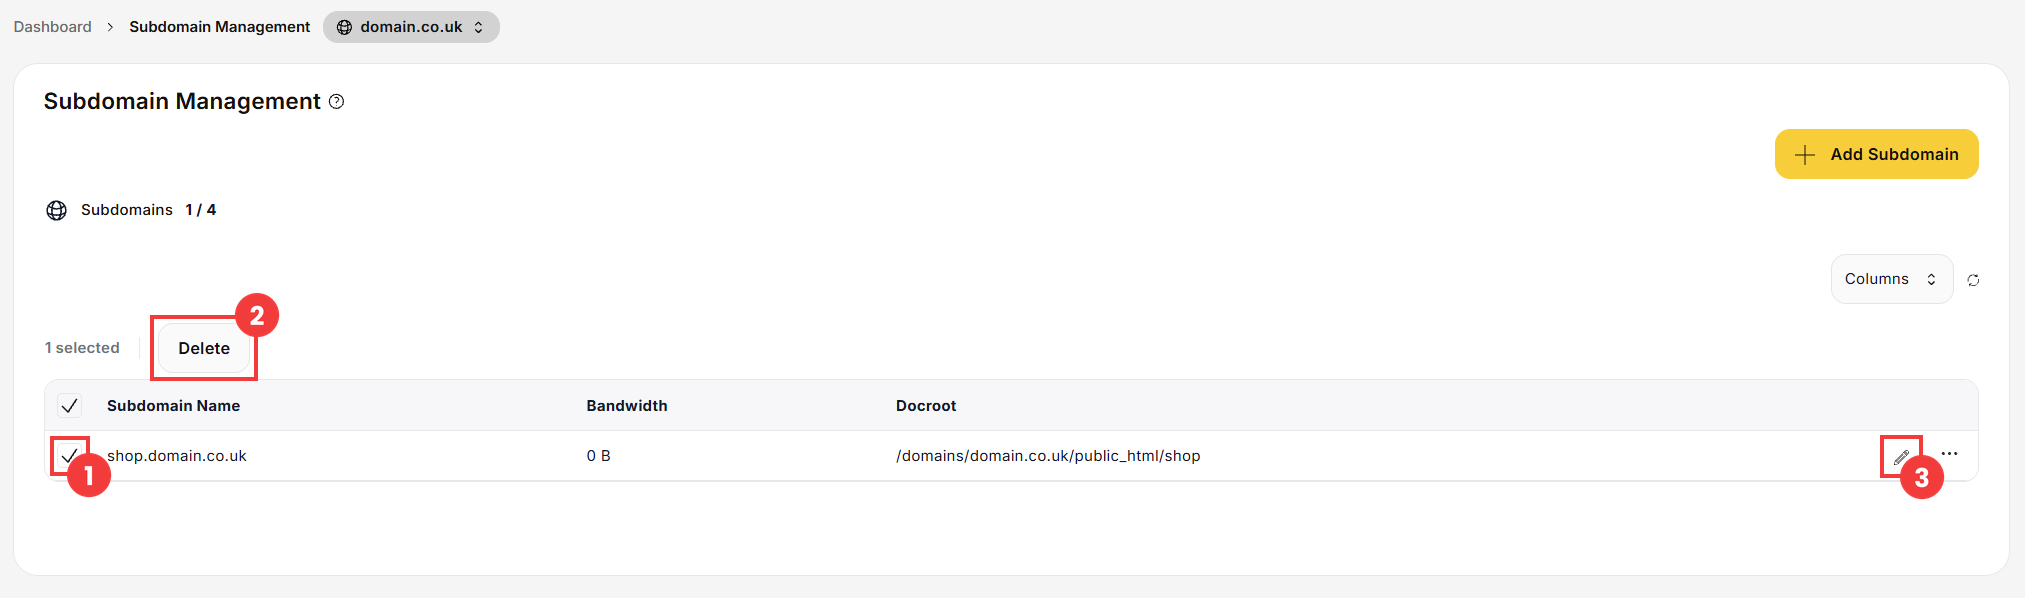
- To delete a subdomain, select the checkbox next to it (1), then click the Delete button (2).
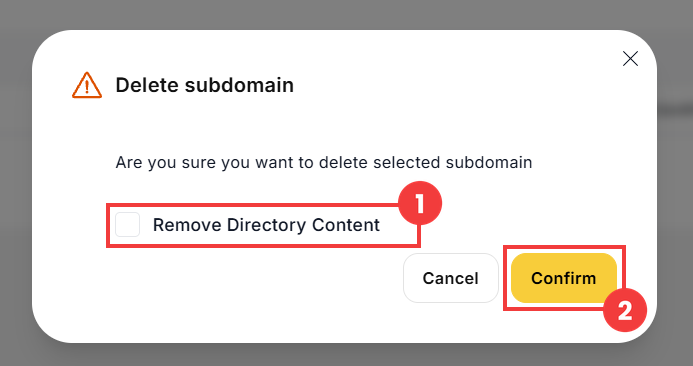
- A confirmation window appears. If you also want to delete the subdomain’s files, select the Remove Directory Content option (1). Then confirm the deletion with the Confirm button (2).
- The pencil icon (3) next to the subdomain (see the screenshot in step 6) opens the Domain docroot change tool, which lets you change the folder for the subdomain’s files. For more details, see the guide How to change a domain directory.
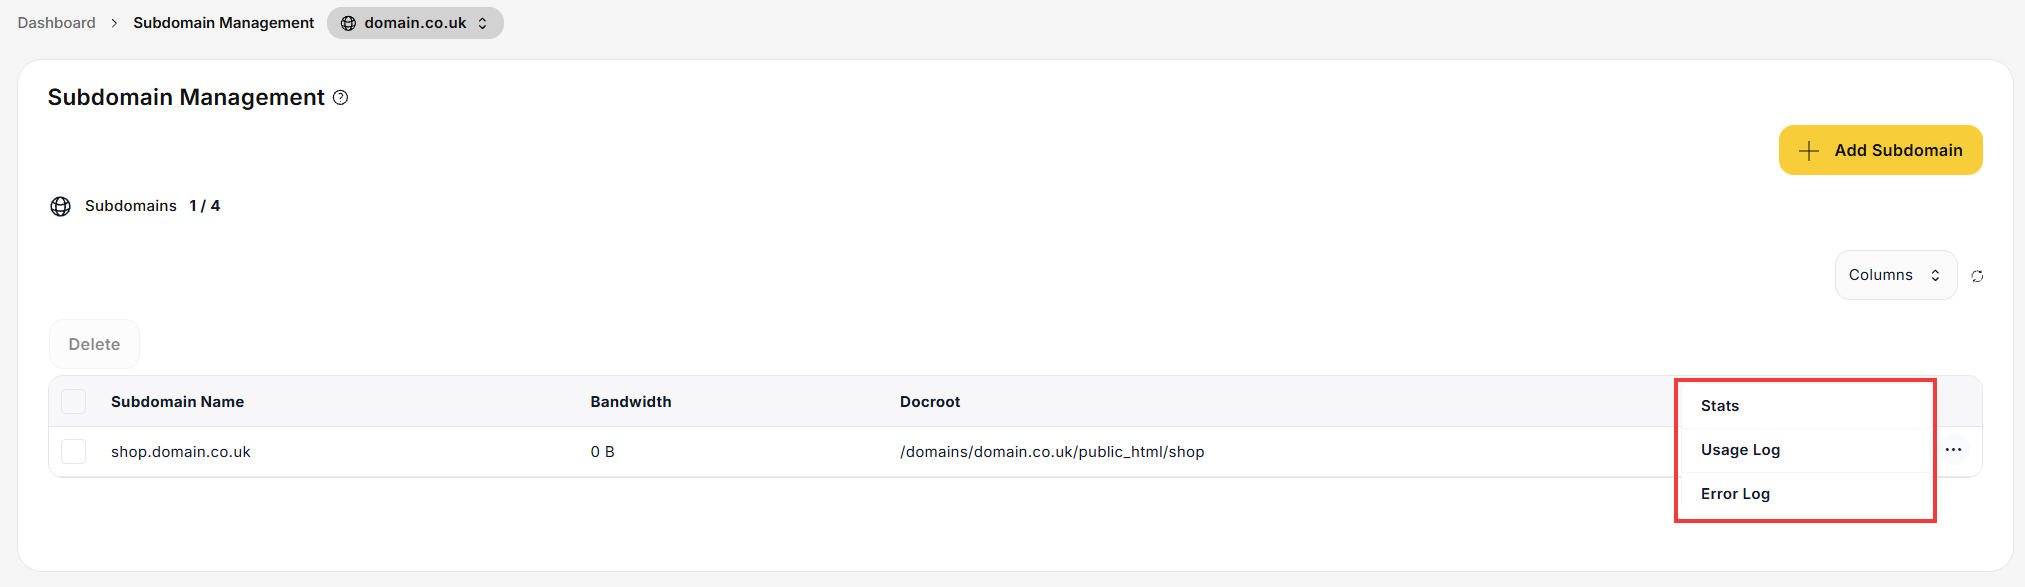
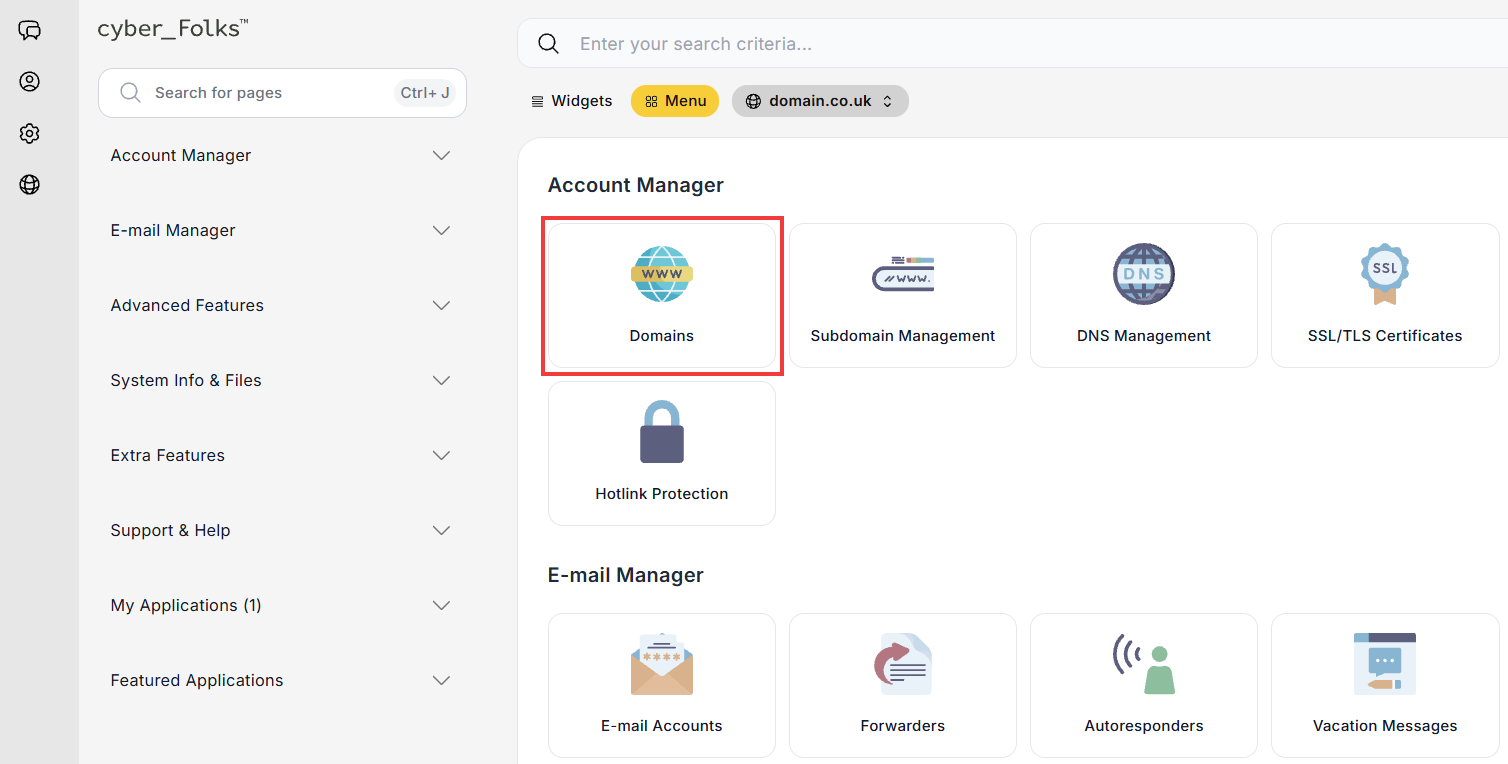
The ⋯ menu next to the subdomain also gives you access to its statistics (Stats) and logs (Usage Log, Error Log). - In the panel, click the Domains option.
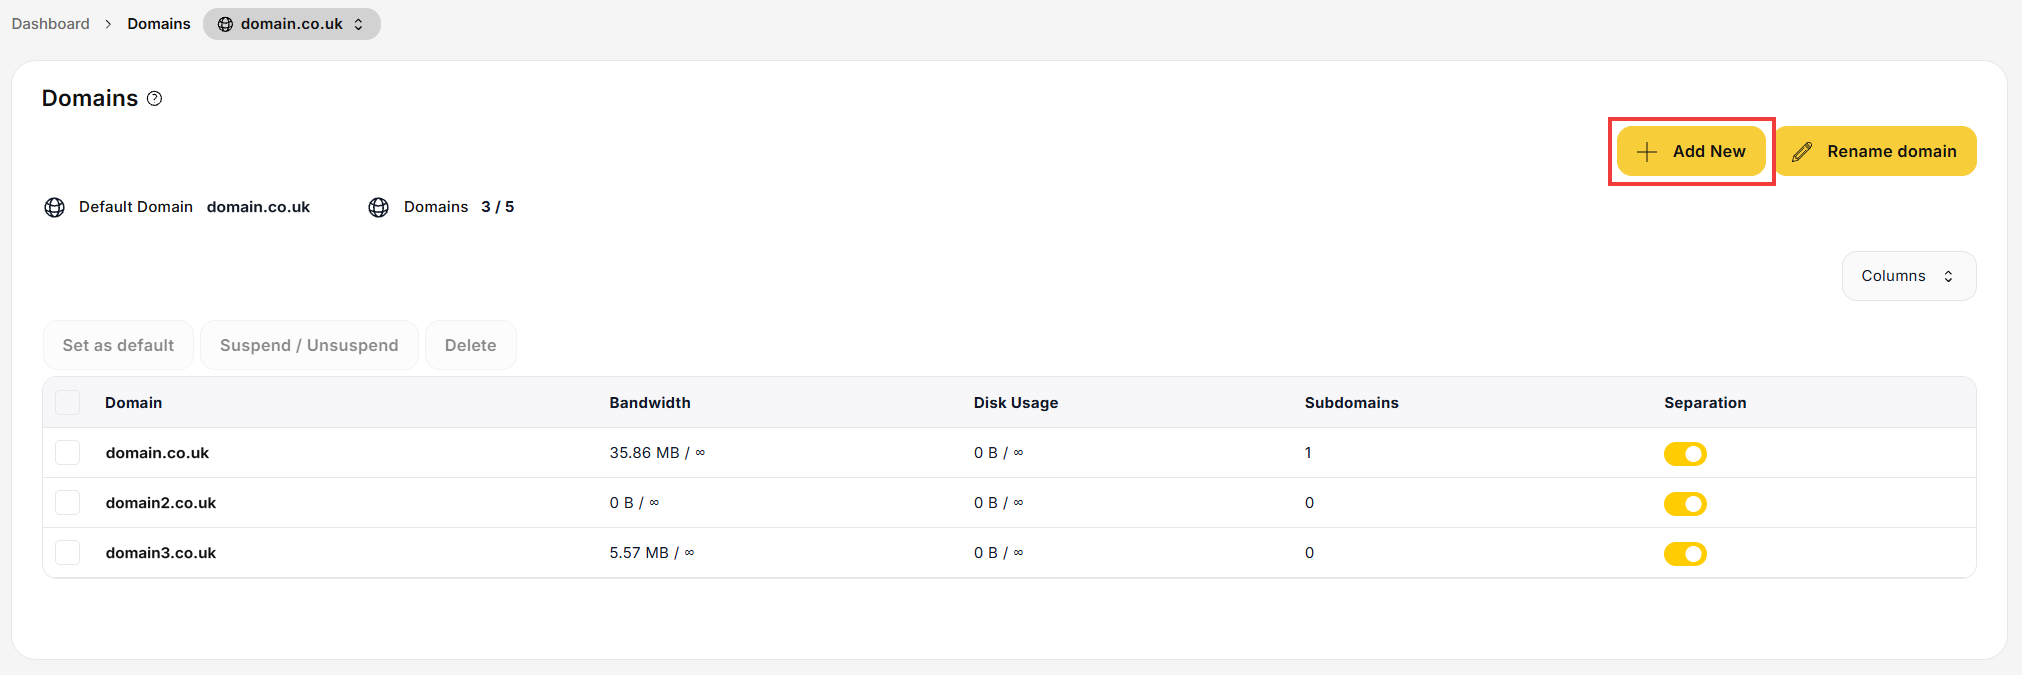
- On the next screen, click the Add New button.
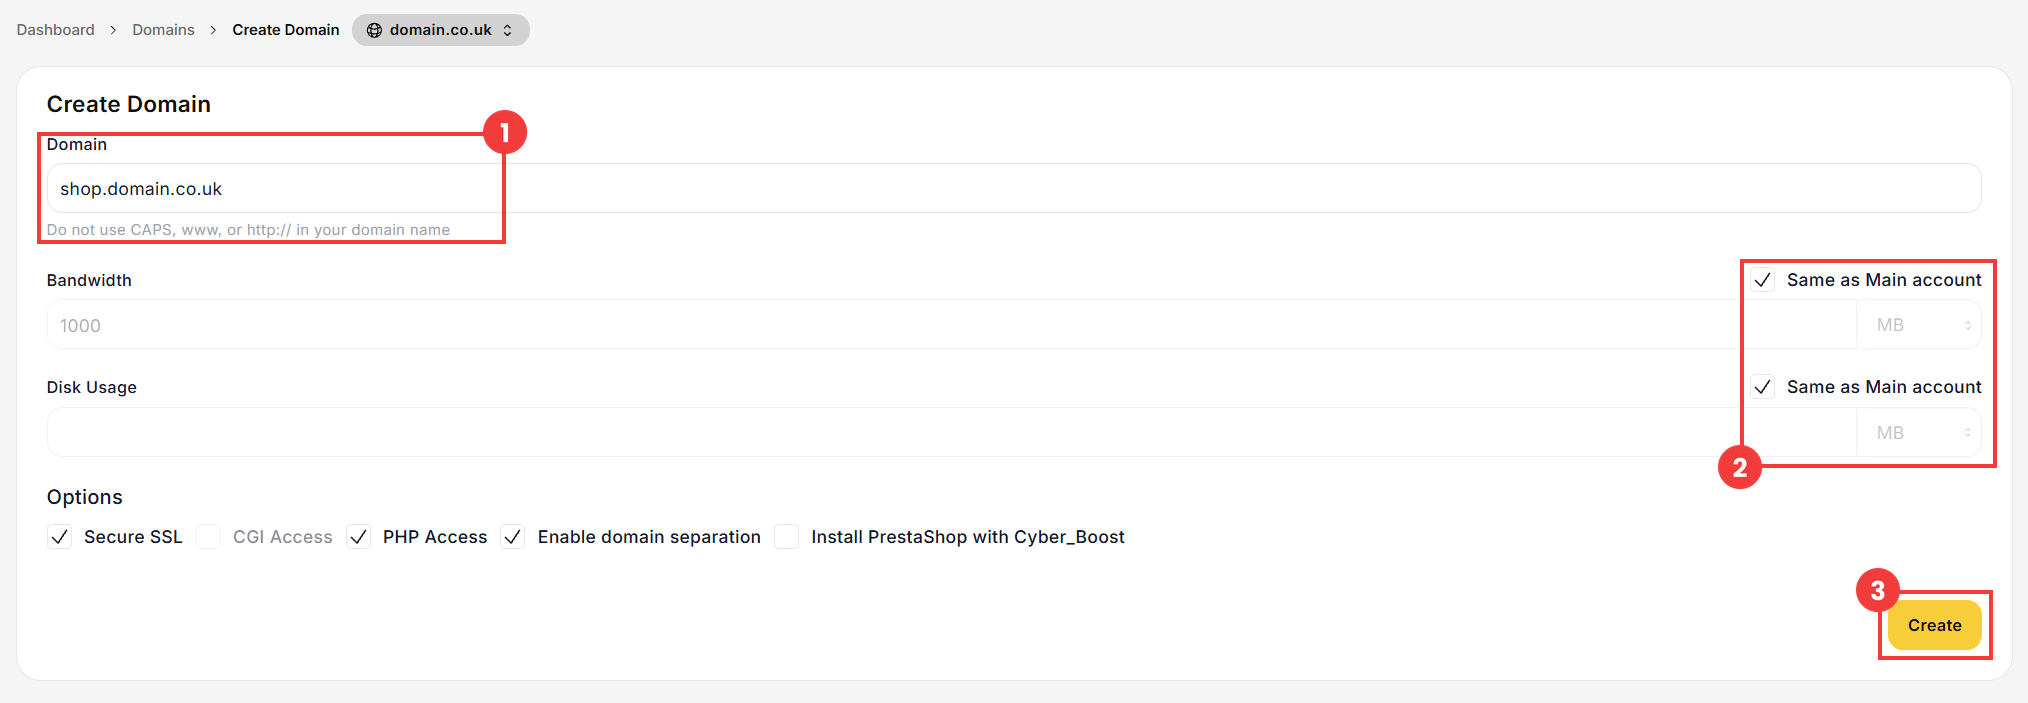
- In the Domain field (1), enter the full name of the subdomain, for example shop.domain.co.uk. If needed, set a bandwidth or disk space limit by unchecking Same as Main account (2). Confirm with the Create button (3).
 Good to know! Once you are logged in to the panel, you can also ask our assistant robo_Folks for help – it can perform many operations for you.
Method 1: add a subdomain in Subdomain Management
Done! The subdomain is ready: upload your website files to the folder shown.
Manage or delete a subdomain
Method 2: add a subdomain as an additional domain
Done! The subdomain appears in the domain list and is managed like a separate domain: for example, you can create e-mail accounts in it. To delete it, follow the guide How to delete or suspend a domain.
