


To create a vacation message:
- Log in to your hosting panel: Log in to your new hosting service
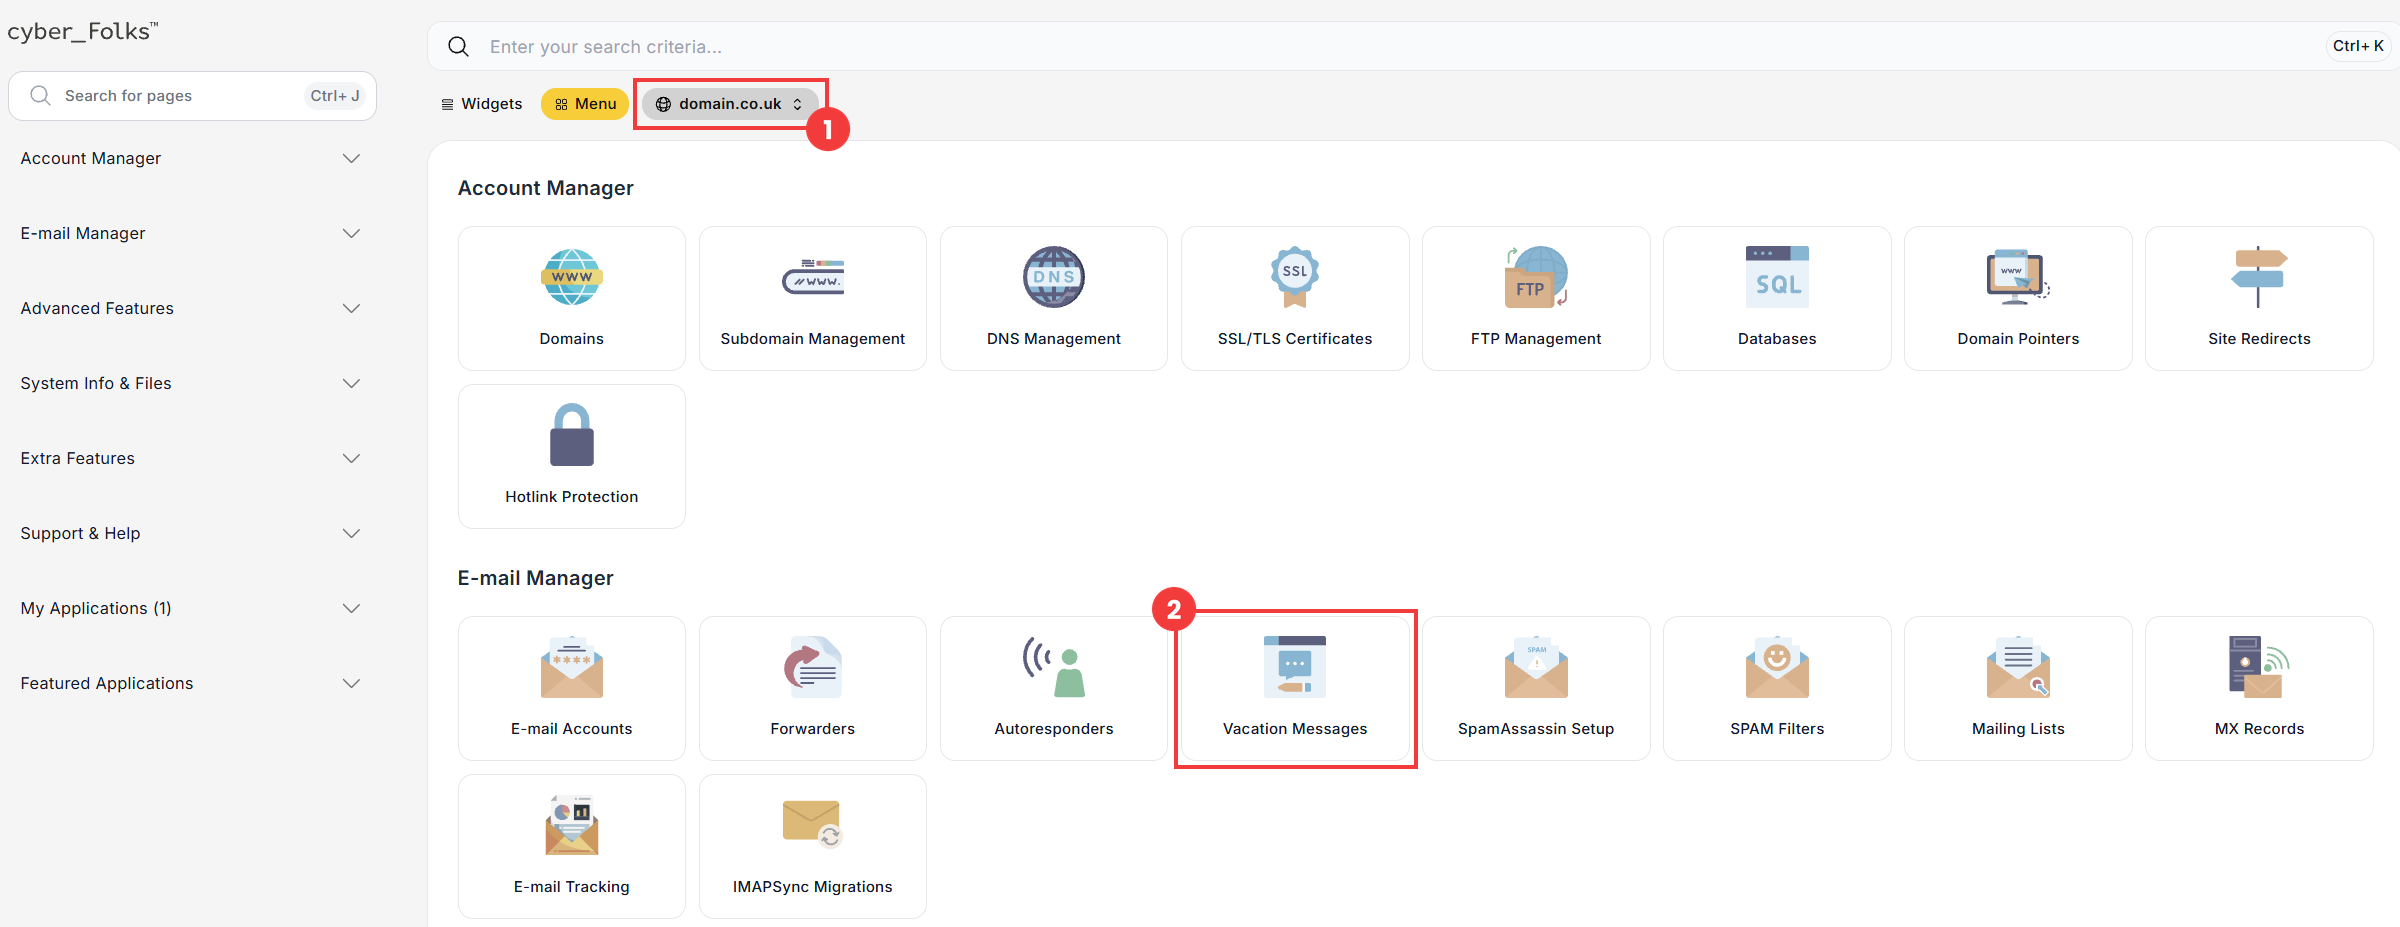
- If you have several domains, select the one for which you want to set up the vacation message from the list (1). Then click the Vacation Messages option (2).
- On the next screen, click the Set Vacation Message button.
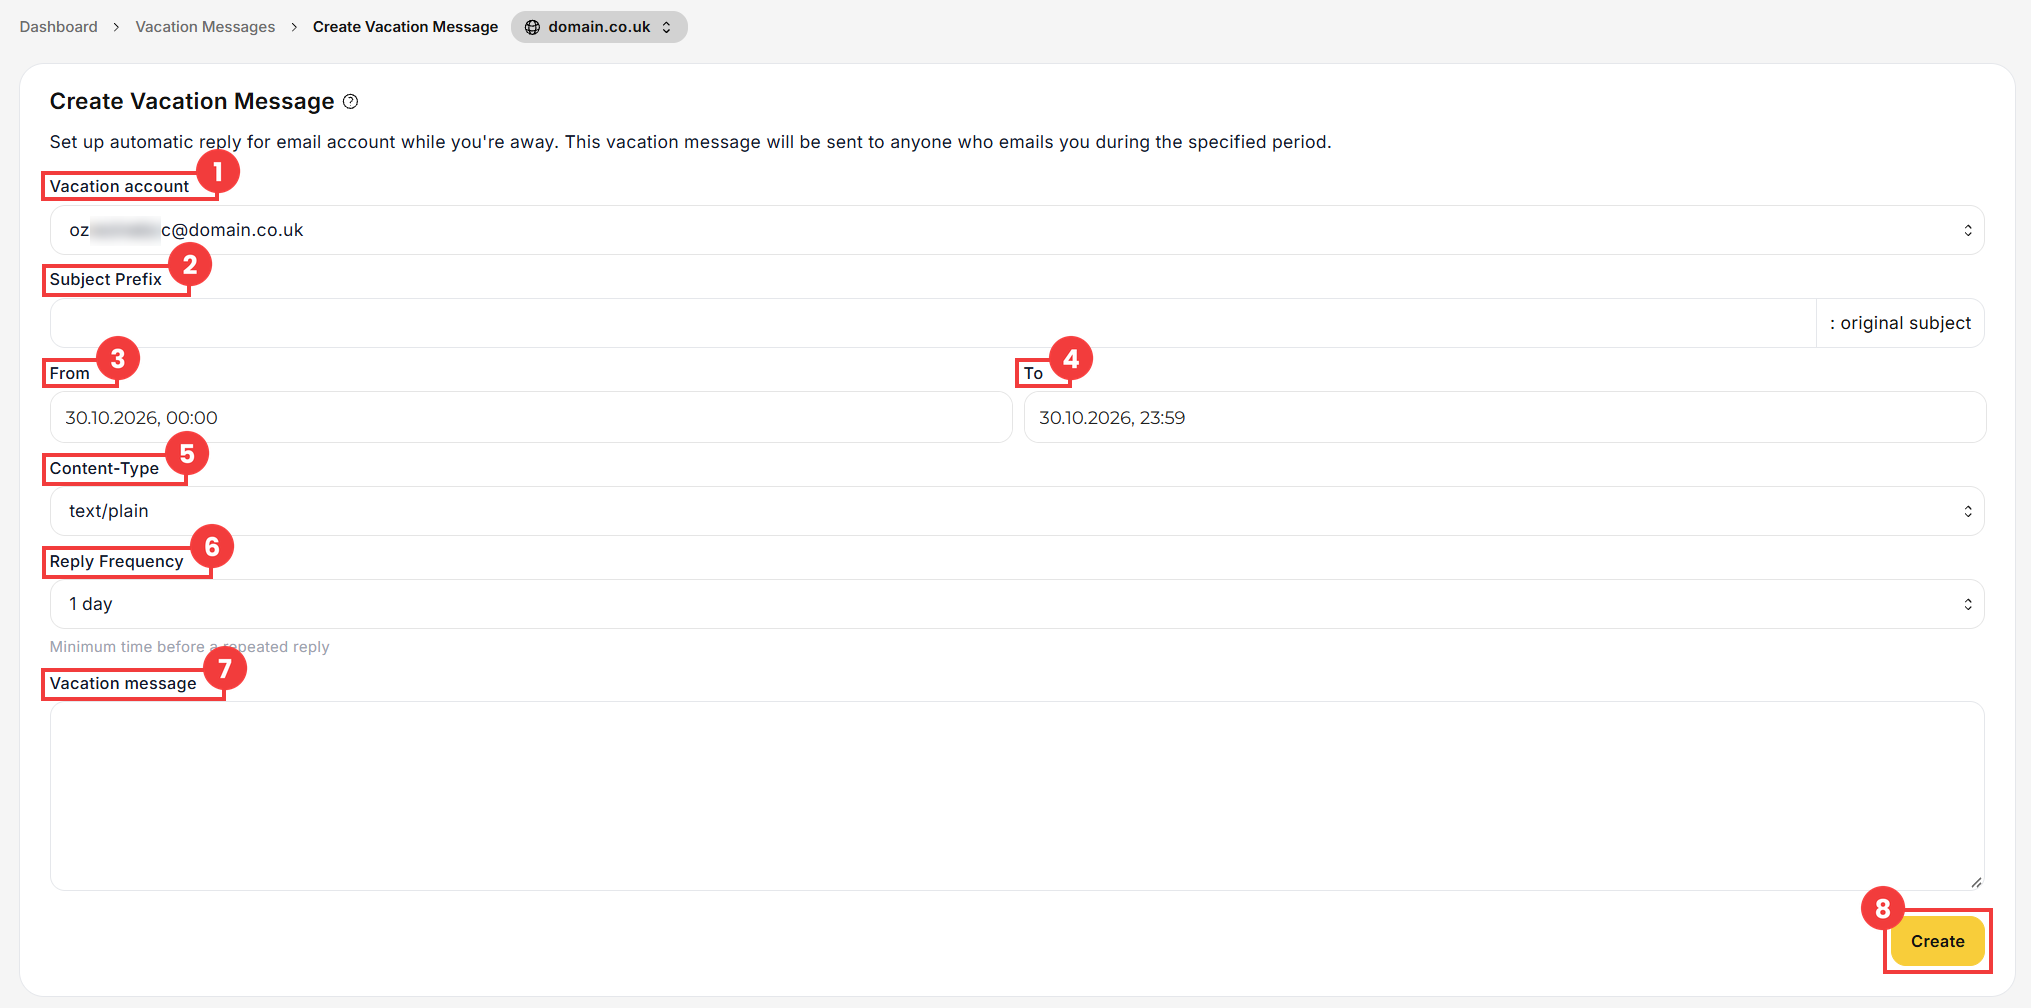
- Now fill in the form. It contains a number of options, described below:
 Good to know! Once you are logged in to the panel, you can also ask our assistant robo_Folks for help – it can perform many operations for you.

| Field | Description |
| 1 Vacation account | Select the e-mail account for which the vacation message will be active. |
| 2 Subject Prefix | You can set an additional prefix: in the reply, it is added before the subject of the original message. This field is optional. |
| 3 From | The start date of the vacation message. This means you can prepare it in advance: it will only become active from the date entered here. |
| 4 To | The end date of the vacation message, so you don’t have to remember to turn it off manually. |
| 5 Content-Type | Choose between plain text and HTML code. |
| 6 Reply Frequency | Sets how often the automatic reply is sent to the same sender. Within the selected period, the reply is sent only once, no matter how many messages the sender sends. |
| 7 Vacation message | The content of the message the sender will receive. |
Finally, save with the Create button (8).
Once the date in the To field (4) has passed, the vacation message stops working, but it stays visible in the list. You can edit it later, set a new period and activate it again.
