


A cron job lets you run a command or script automatically at regular intervals, for example to start a backup, send a newsletter or run your website’s scheduled tasks. Here is how to add one in the hosting panel.
- Log in to your hosting panel: Log in to your new hosting service
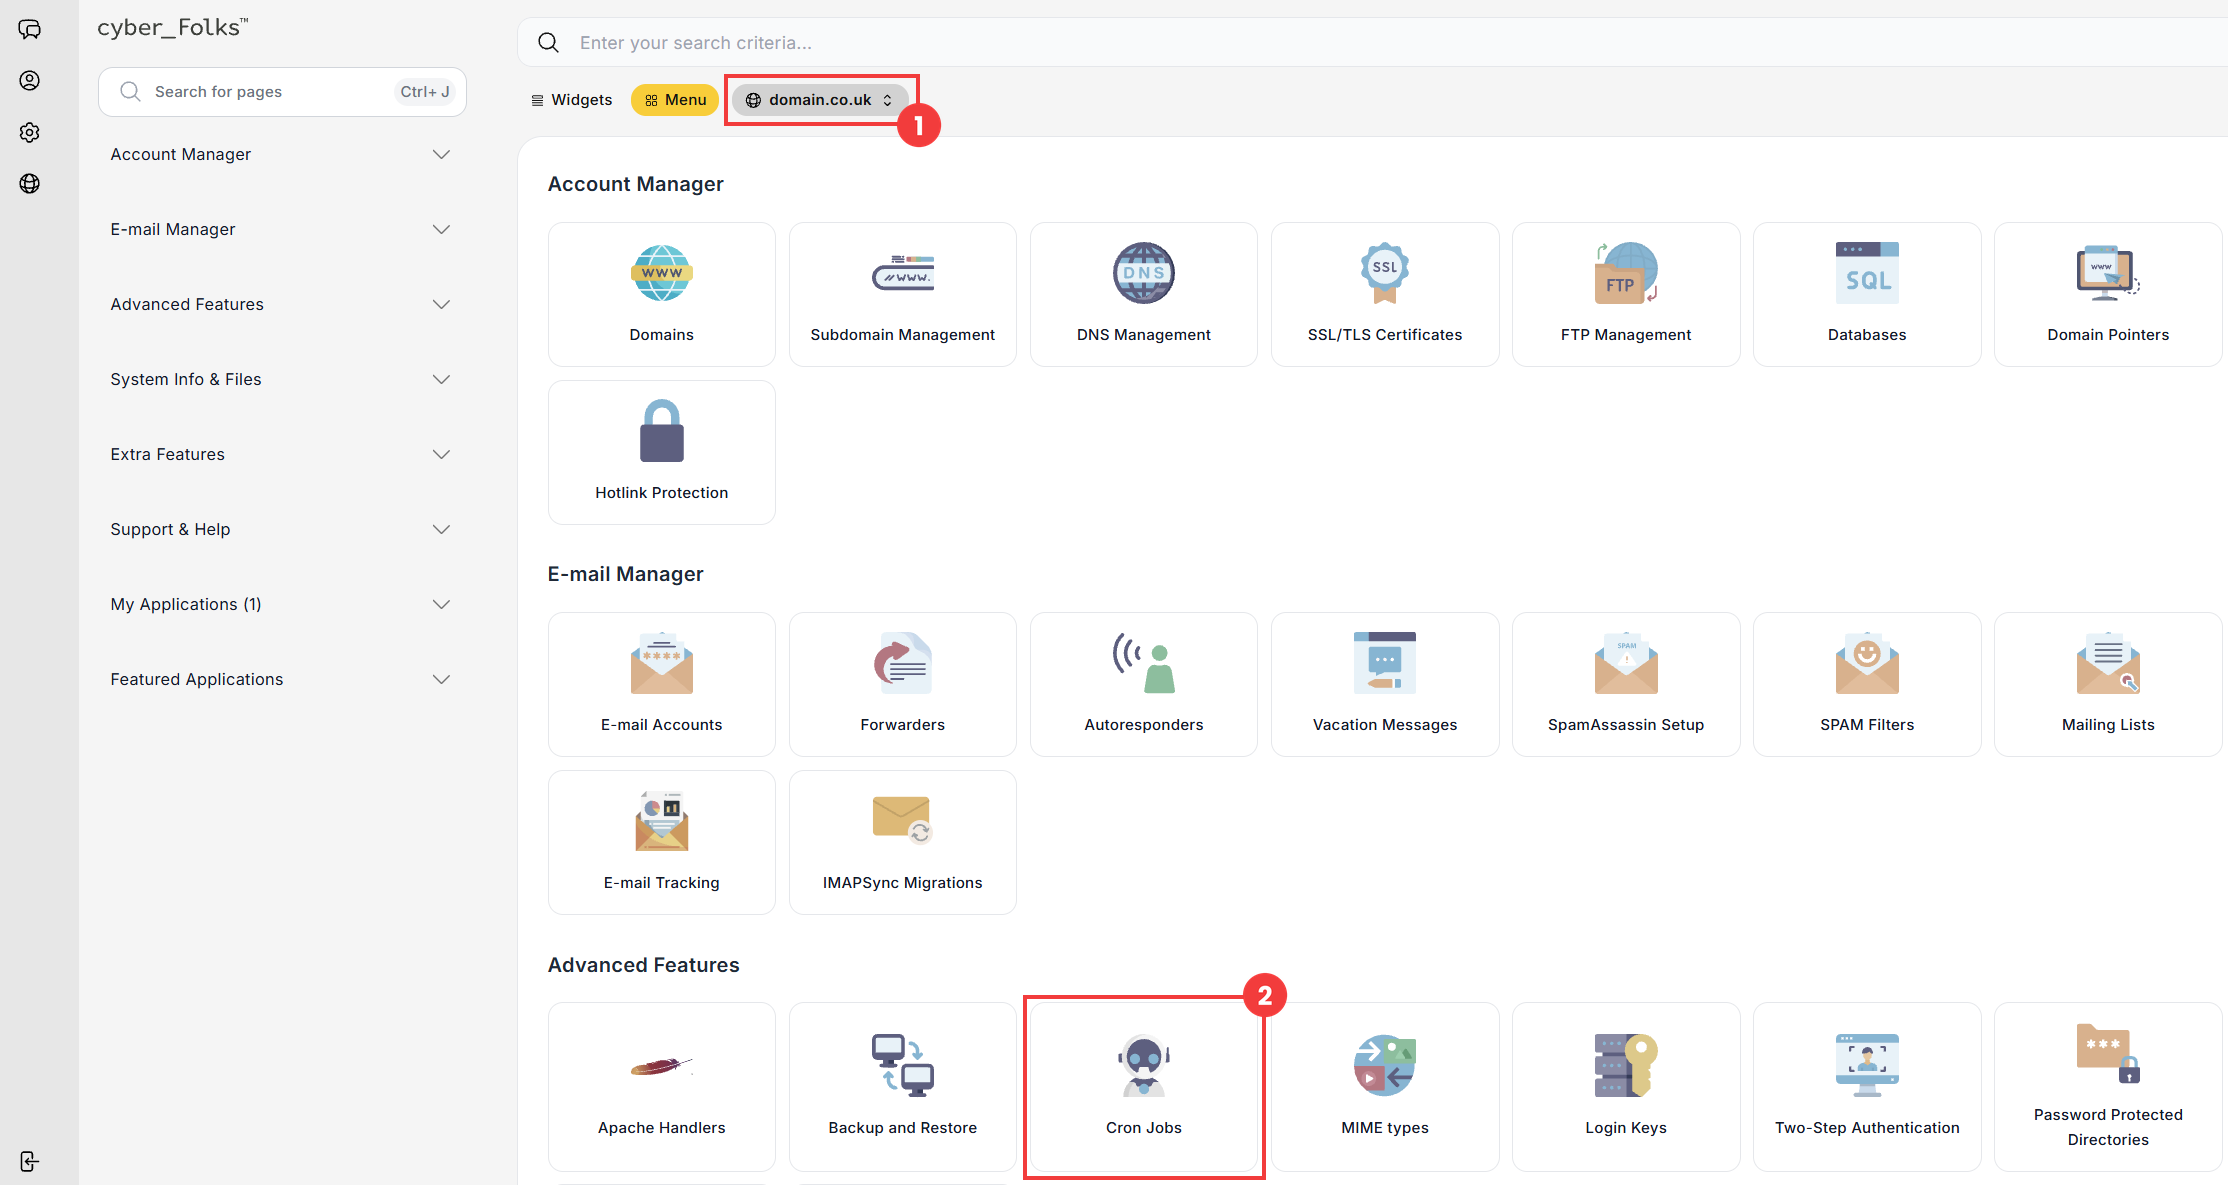
- If you have several domains, select the one for which you want to create the cron job from the list (1). Then click the Cron Jobs option (2).
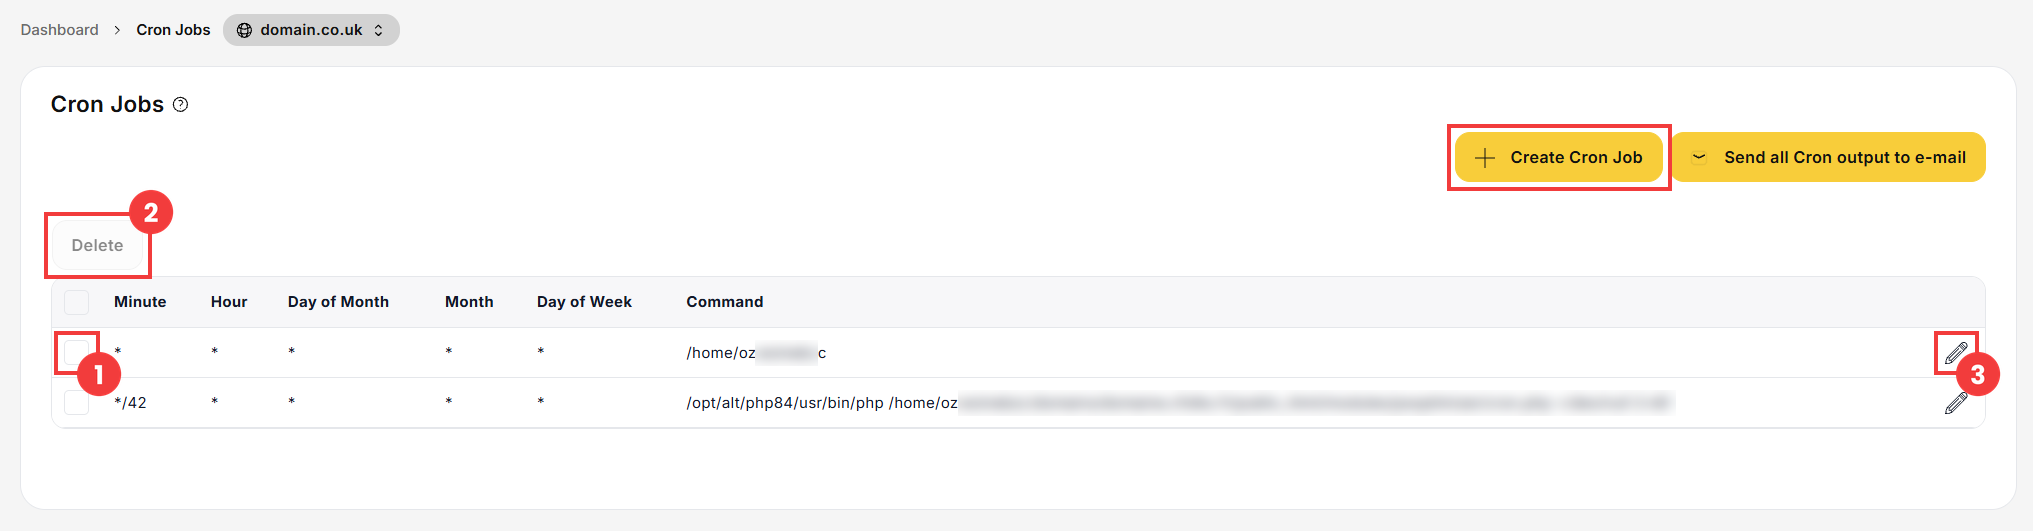
- On the next screen, click the Create Cron Job button.
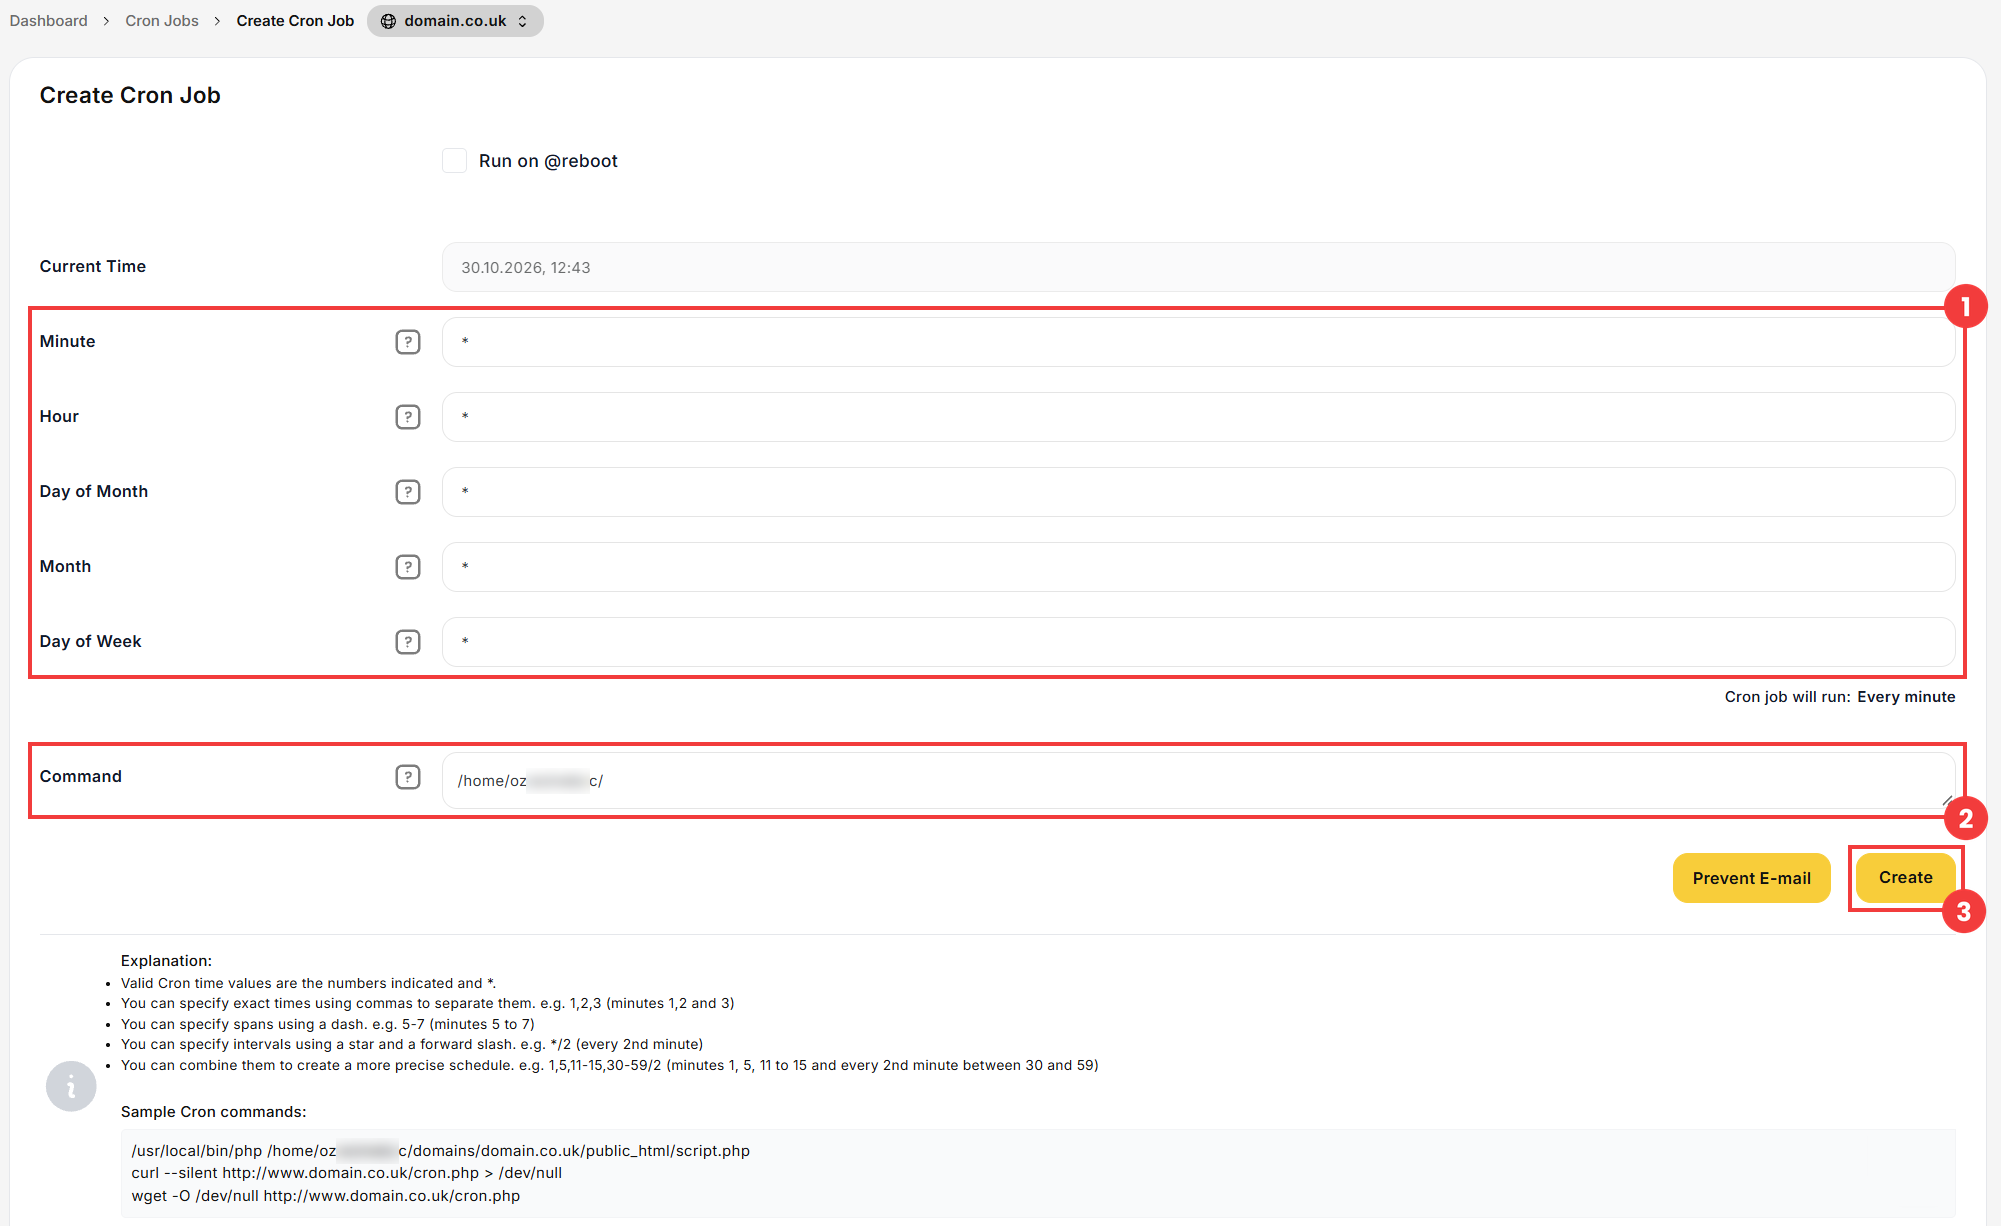
- Set how often the job runs in the Minute, Hour, Day of Month, Month and Day of Week fields (1). The “*” character means “every” (every minute, every hour, etc.). Below the fields, the panel shows a summary of the selected frequency (Cron job will run:).
Then enter the command to run in the Command field (2). Sample commands are shown at the bottom of the form.
If you don’t want to receive an e-mail after each run of the job, click the Prevent E-mail button. - Confirm with the Create button (3).
- To delete a cron job, select the checkbox next to it in the list (1), then click the Delete button (2).
- To edit a cron job, click the pencil icon next to it (3). The cron job form appears: change the details you want and save the changes.
 Good to know! Once you are logged in to the panel, you can also ask our assistant robo_Folks for help – it can perform many operations for you.
| Field | Possible values |
| Minute | 0 to 59 |
| Hour | 0 to 23 |
| Day of Month | 1 to 31 |
| Month | 1 to 12 |
| Day of Week | 0 to 7 (0 and 7 = Sunday, 1 = Monday, etc.) |
Done! The cron job appears in the list and will run at the frequency you set.
Example
To run a PHP script every day at 3:00 a.m., fill in the form as follows (replace username and yourdomain.co.uk with your own details):
Minute: 0
Hour: 3
Day of Month: *
Month: *
Day of Week: *
Command: /usr/local/bin/php /home/username/domains/yourdomain.co.uk/public_html/script.php
Edit or delete a cron job
