The File restore tool lets you restore your website files from the backups available on your account, for example after files have been deleted or changed by mistake.
To restore your website files:
- Log in to your hosting panel: Log in to your new hosting service
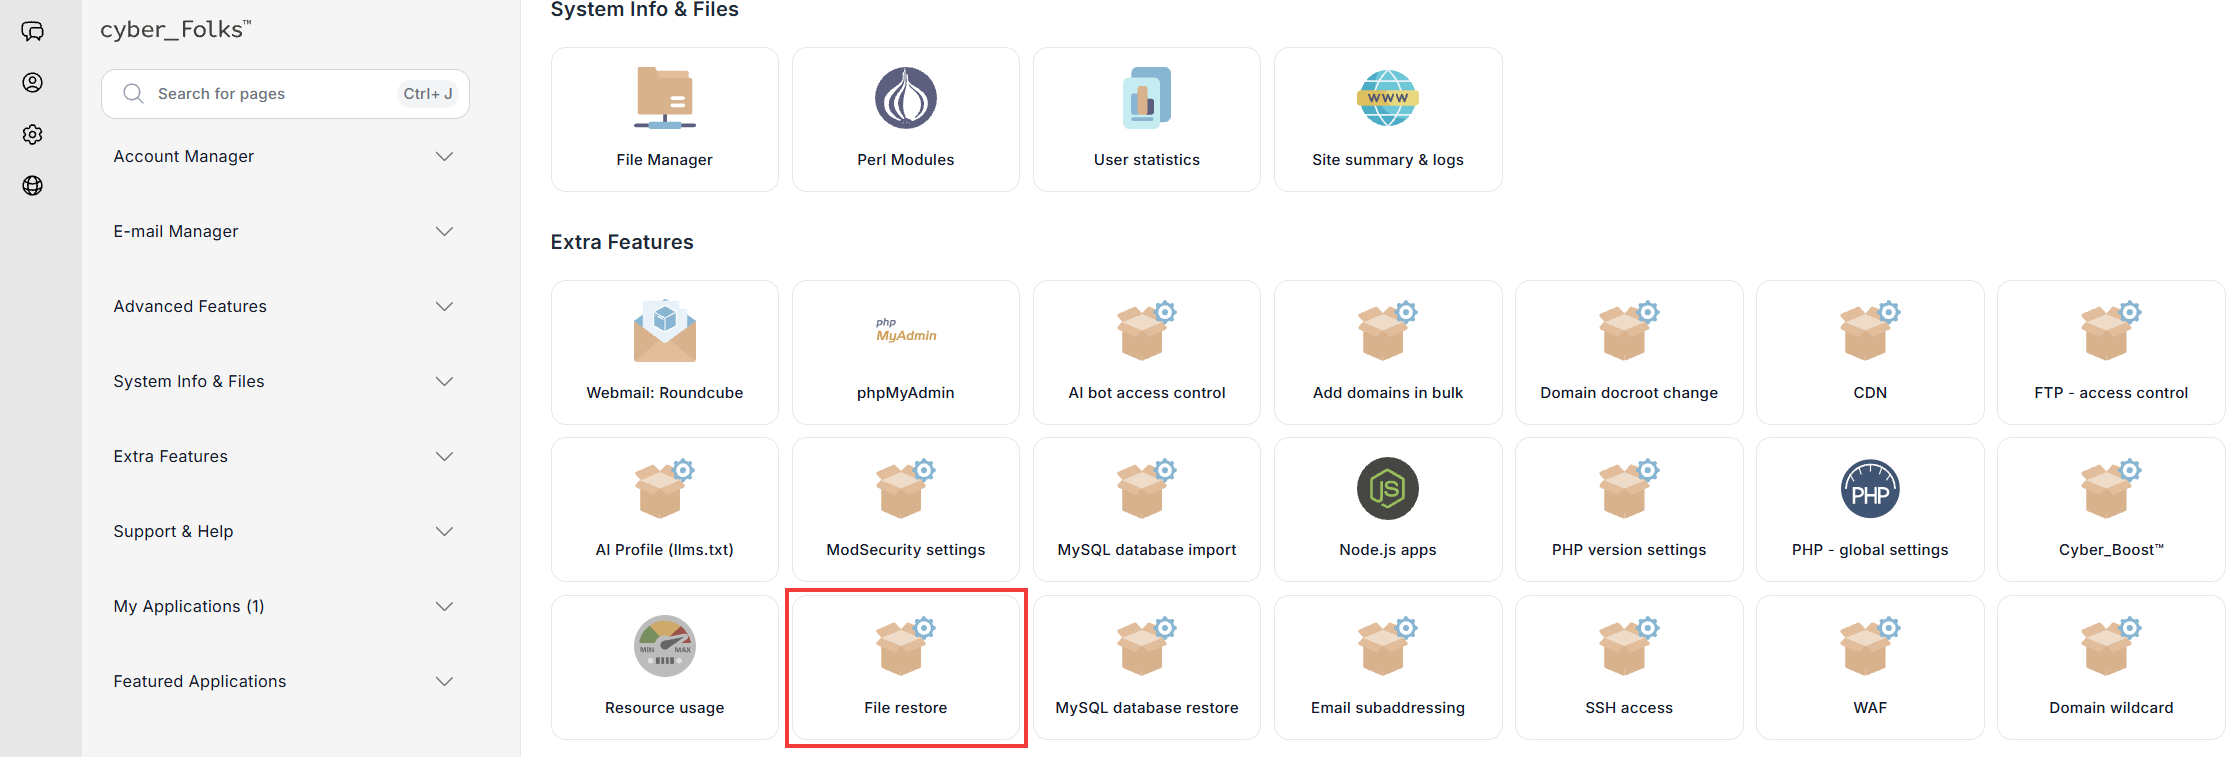
- In the Extra Features section, click File restore.
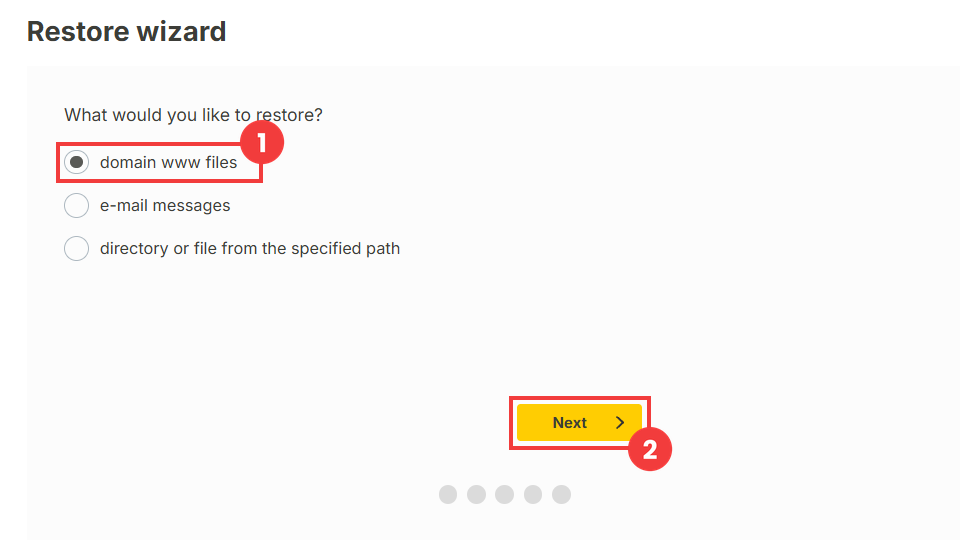
- In the Restore wizard, under What would you like to restore?, select domain www files (1), then click Next (2).
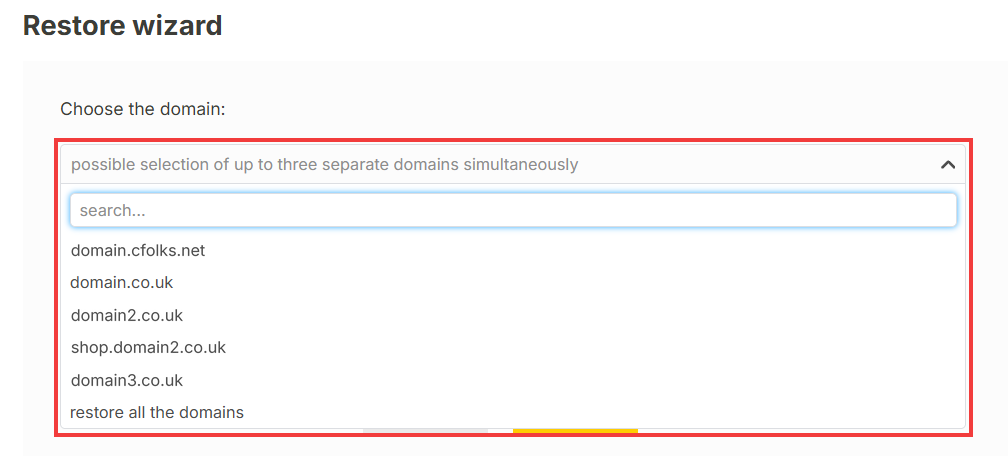
The e-mail messages and directory or file from the specified path options let you restore email messages or a specific file or folder. - From the Choose the domain: list, select the domain whose files you want to restore. You can select up to three domains at once, or all domains with restore all the domains. Then click Next.
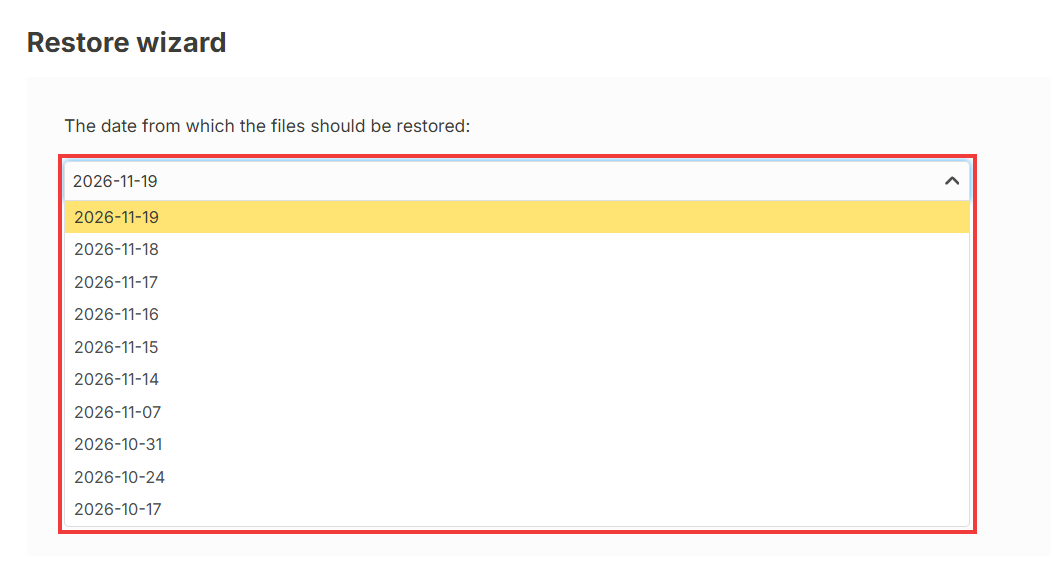
If the domain directory contains subdomains, they are restored too. - From the The date from which the files should be restored: list, select the date of the backup, then click Next.
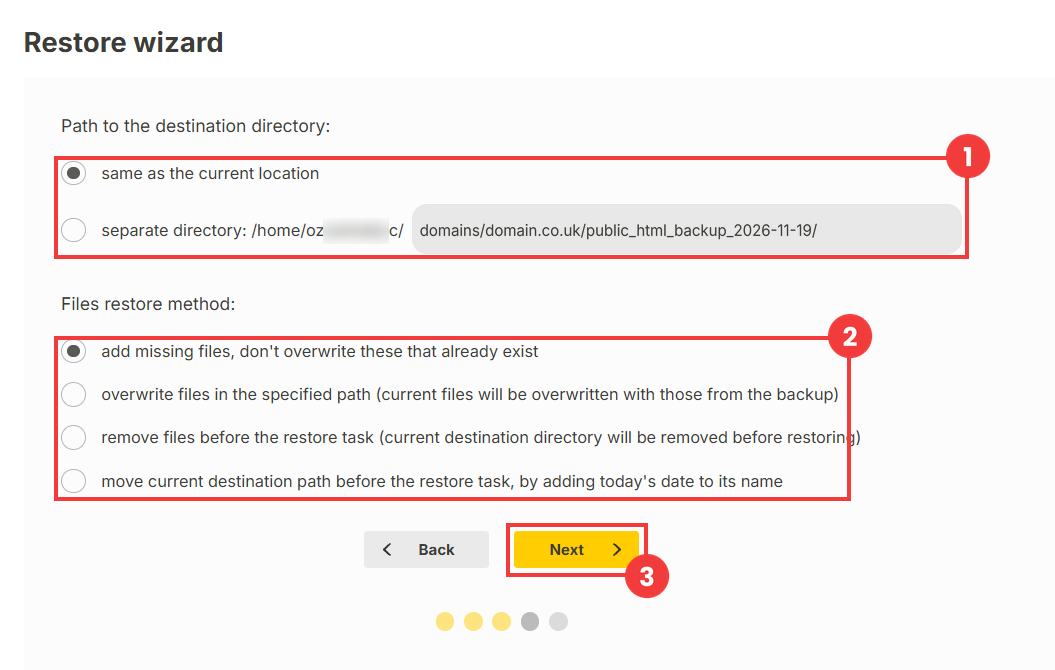
- Choose where to restore the files (1) and the restore method (2), then click Next (3).
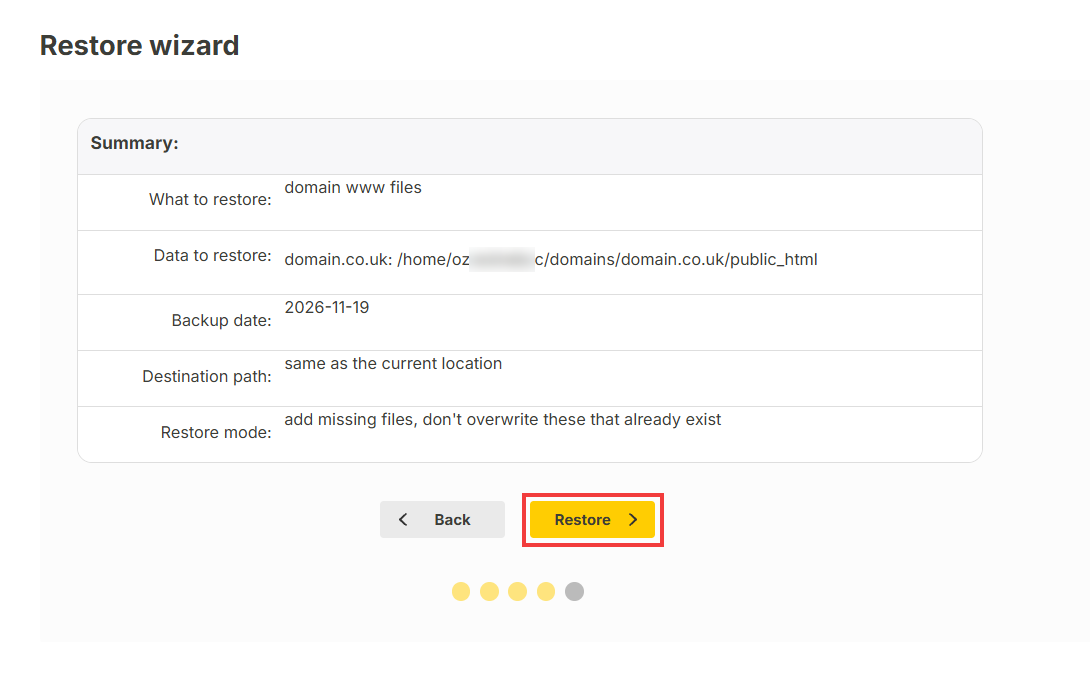
- Check the summary (Summary:), then click Restore.
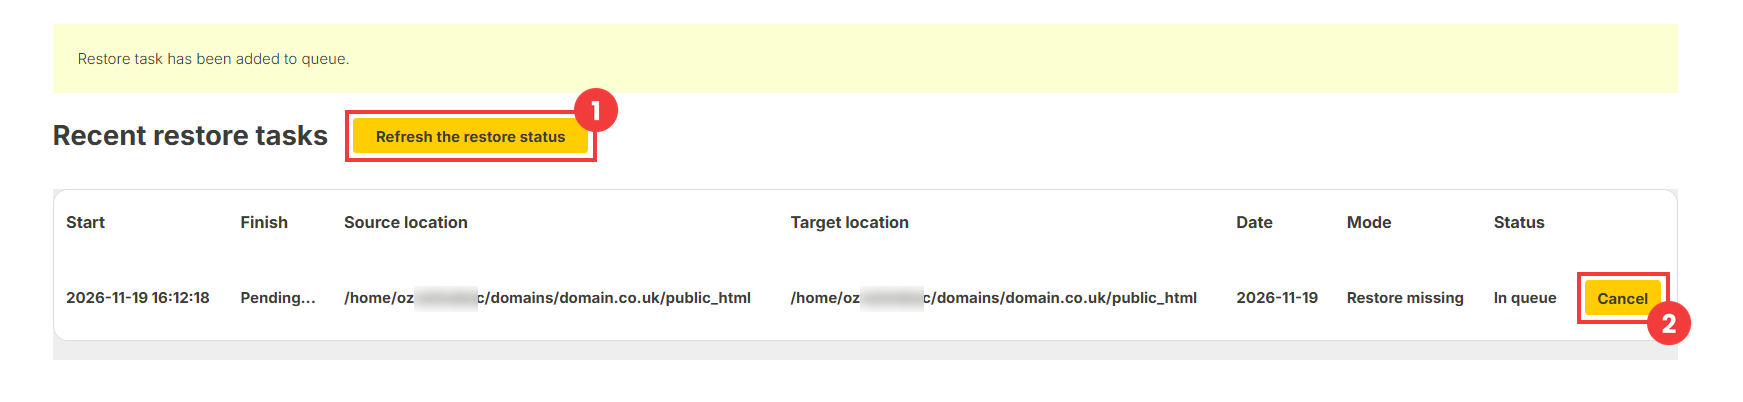
- The restore task is added to the queue. You can follow its progress in the Recent restore tasks section, in the Status column. To refresh the status, click Refresh the restore status (1). While the task is waiting in the queue, you can cancel it with the Cancel button (2).
 Good to know! Once you are logged in to the panel, you can also ask our assistant robo_Folks for help – it can perform many operations for you.
| Location (1) | Description |
| same as the current location | The files are restored to their original location. |
| separate directory | The files are restored to another folder, entered in the field on the right. By default, the panel suggests a folder whose name contains the date of the backup. |
| Method (2) | Description |
| add missing files | Only missing files are added. Existing files are not changed. |
| overwrite files | The current files are replaced with those from the backup. |
| remove files | The current destination directory is deleted before the restore. |
| move current destination path | The current directory is kept under a new name, with today’s date added, and then the backup is restored. |
Important! The overwrite files and remove files methods replace or delete your current files. If in doubt, choose add missing files or restore the backup to a separate folder (separate directory).