
cyber_Boost™ is our optimization module designed for PrestaShop stores. It lets you apply the recommended settings, enable LiteSpeed Cache, optimize the database and compress images to WebP. You install it from the hosting panel and then configure it in the PrestaShop administration panel.
Install the module
- Log in to your hosting panel: Log in to your new hosting service
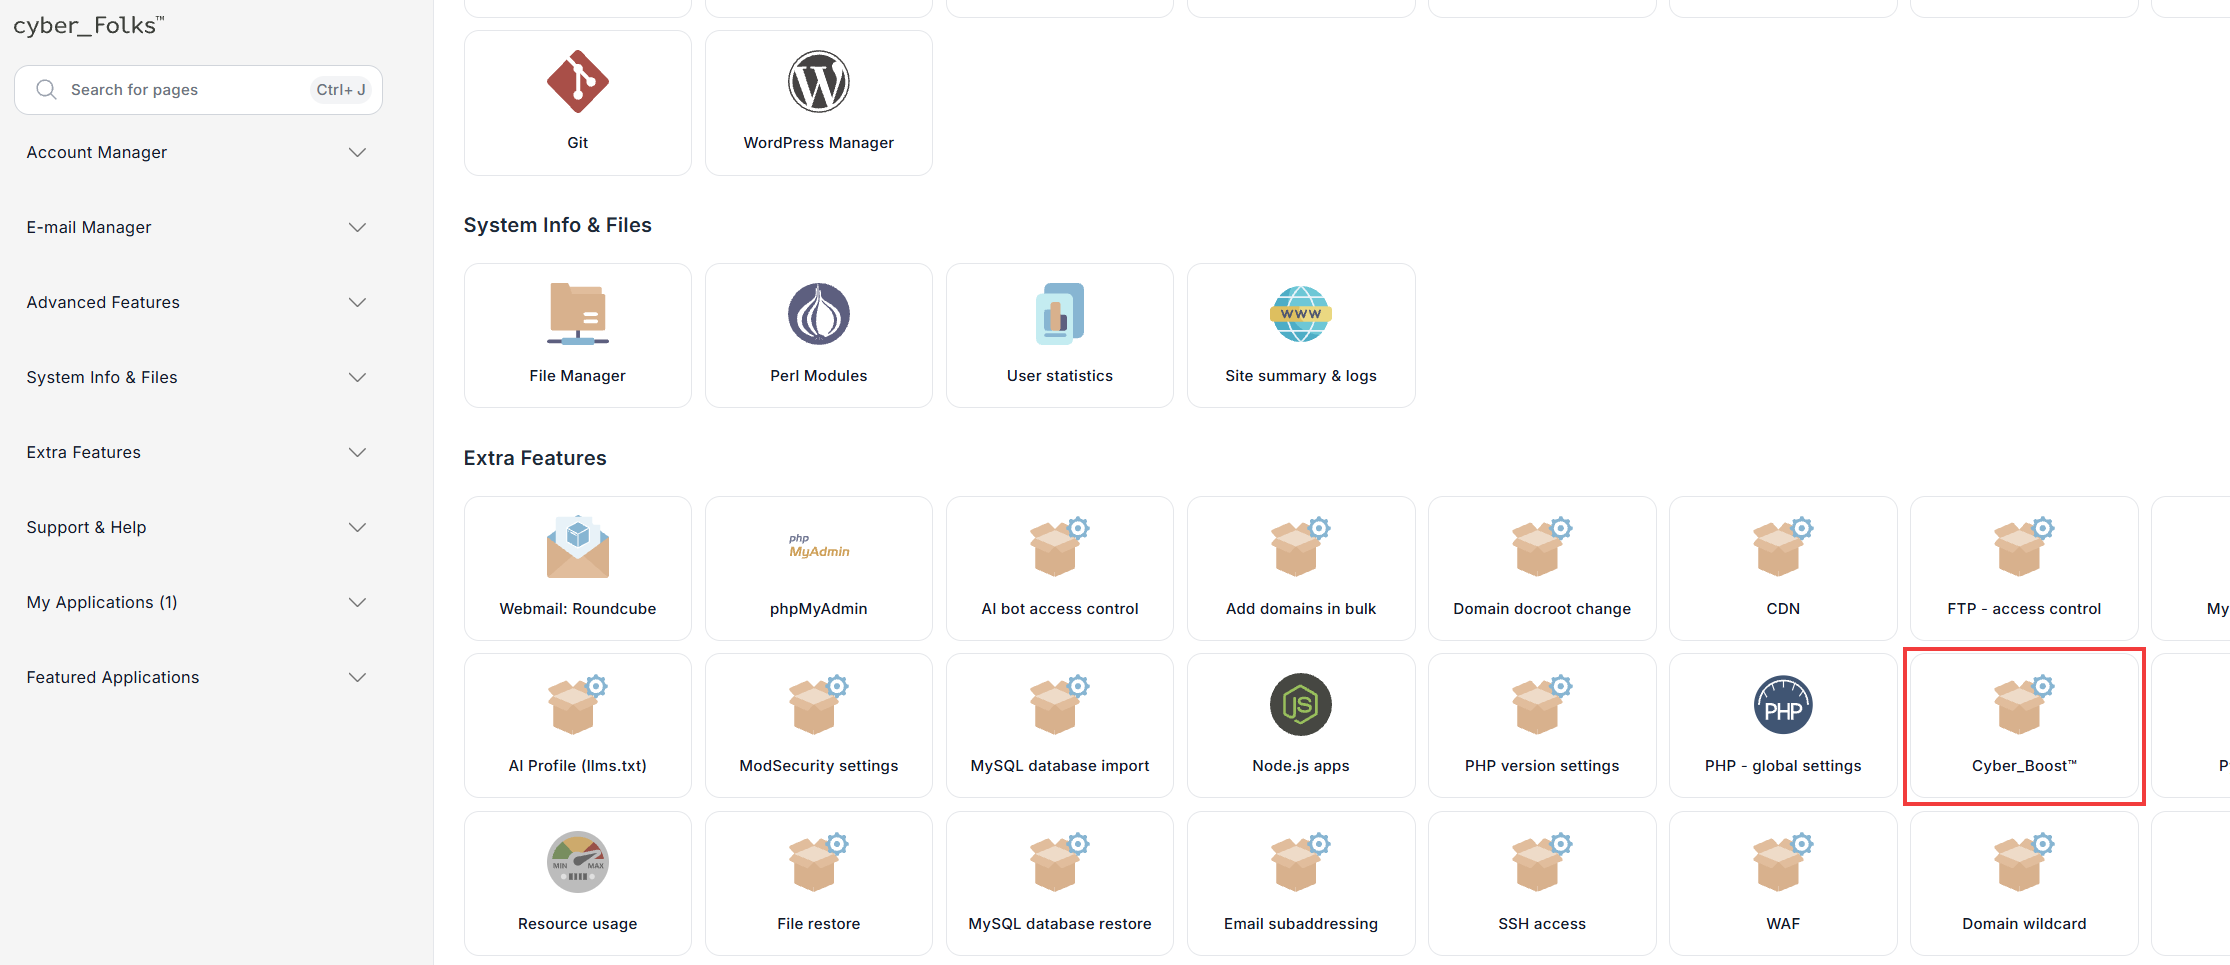
- In the Extra Features section, click Cyber_Boost™.
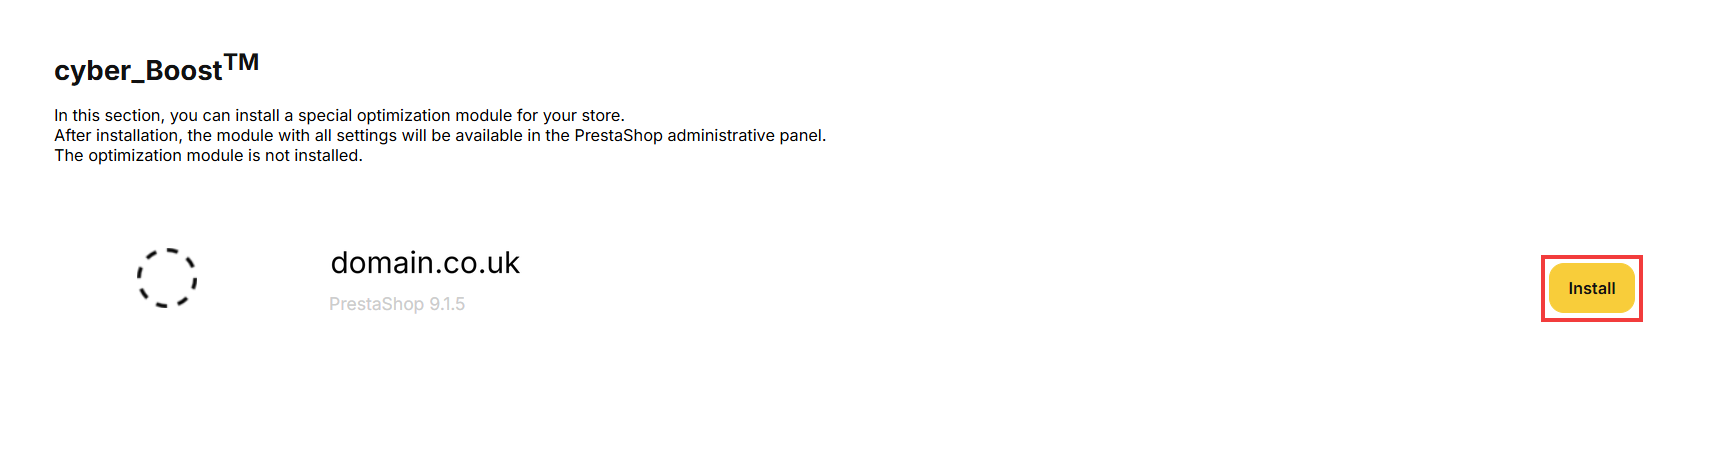
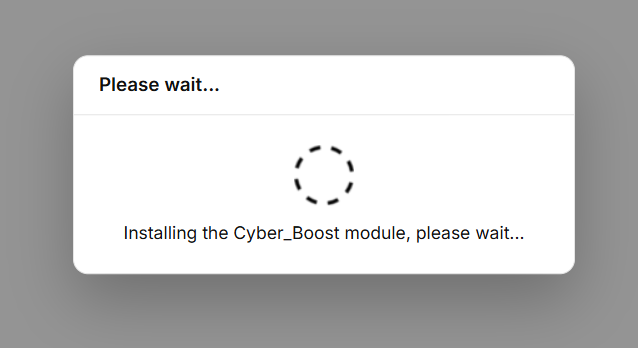
- A list of your PrestaShop stores appears. Click the Install button next to the store you want to optimize. A window confirms that the module is being installed.
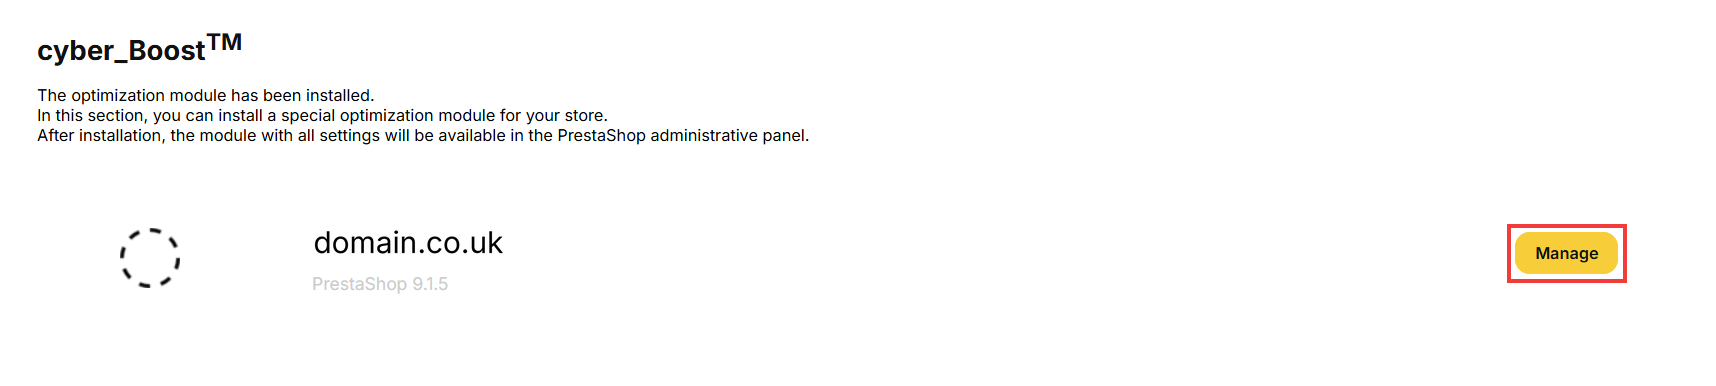
If the list is empty and the panel tells you there are no PrestaShop stores on your account, no PrestaShop store has been detected on your hosting account, so the module cannot be installed yet. - When the installation is complete, the message The optimization module has been installed. appears. The module and all its settings are now available in the PrestaShop administration panel: click Manage to go there.
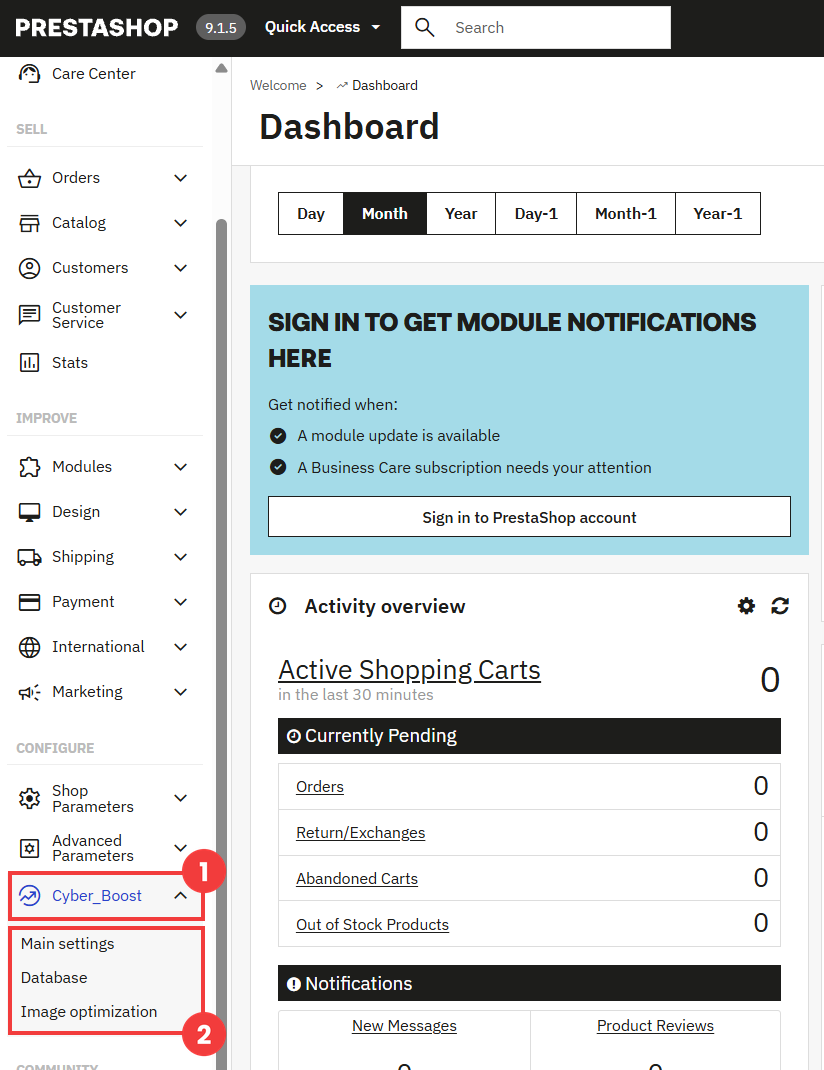
- In the PrestaShop left-hand menu, in the CONFIGURE section, click Cyber_Boost (1). The module has three pages (2): Main settings, Database and Image optimization.
- Open the Main settings page. The indicators at the top of the page summarize the state of your store: values in red show the elements that are not optimized yet. In the Settings section, enable the options you want (set to Yes) (1):
- Save with the Save button (2).
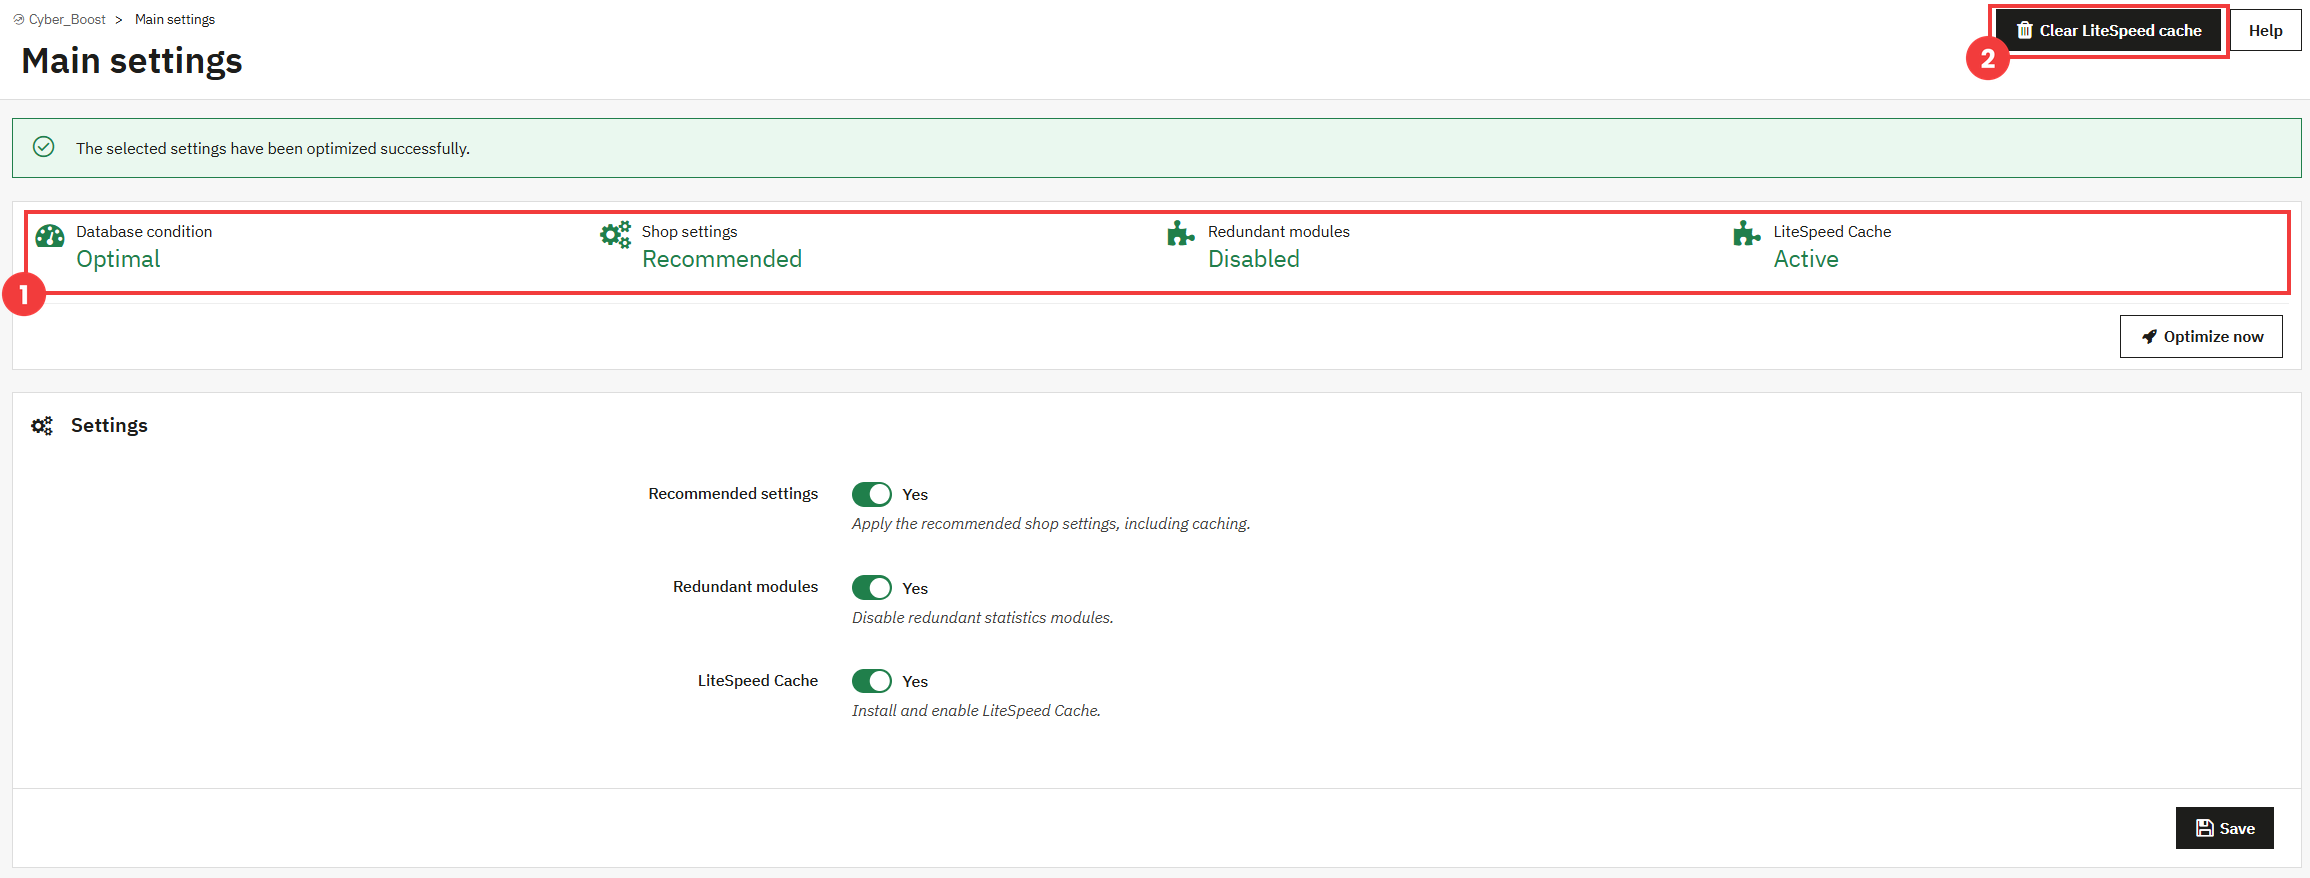
- The indicators turn green (1). When LiteSpeed Cache is active, the Clear LiteSpeed cache button (2) appears at the top of the page: use it if a change to your store doesn’t show up right away.
- In the Cyber_Boost menu, click Database. The indicators at the top of the page show the condition of the database, the date of the last optimization, and the number of records and amount of data to optimize. In the Settings section, choose the optimization options (1):
- Save with the Save button (2).
- To run the optimization right away, click Optimize now (3).
Before the first optimization, we recommend making a backup of your store. - In the Cyber_Boost menu, click Image optimization. The indicators at the top of the page show the compression status, the total number of images and the number of images already optimized. In the Settings section, set up the compression (1):
- Save with the Save button (2).
- To compress existing images, click Optimize now (3) in the Compress images section. Compression to WebP runs in the background and does not change the original images.
- If you want to go back to the original images, click Delete all compressed images (4).
 Good to know! Once you are logged in to the panel, you can also ask our assistant robo_Folks for help – it can perform many operations for you.
Main settings
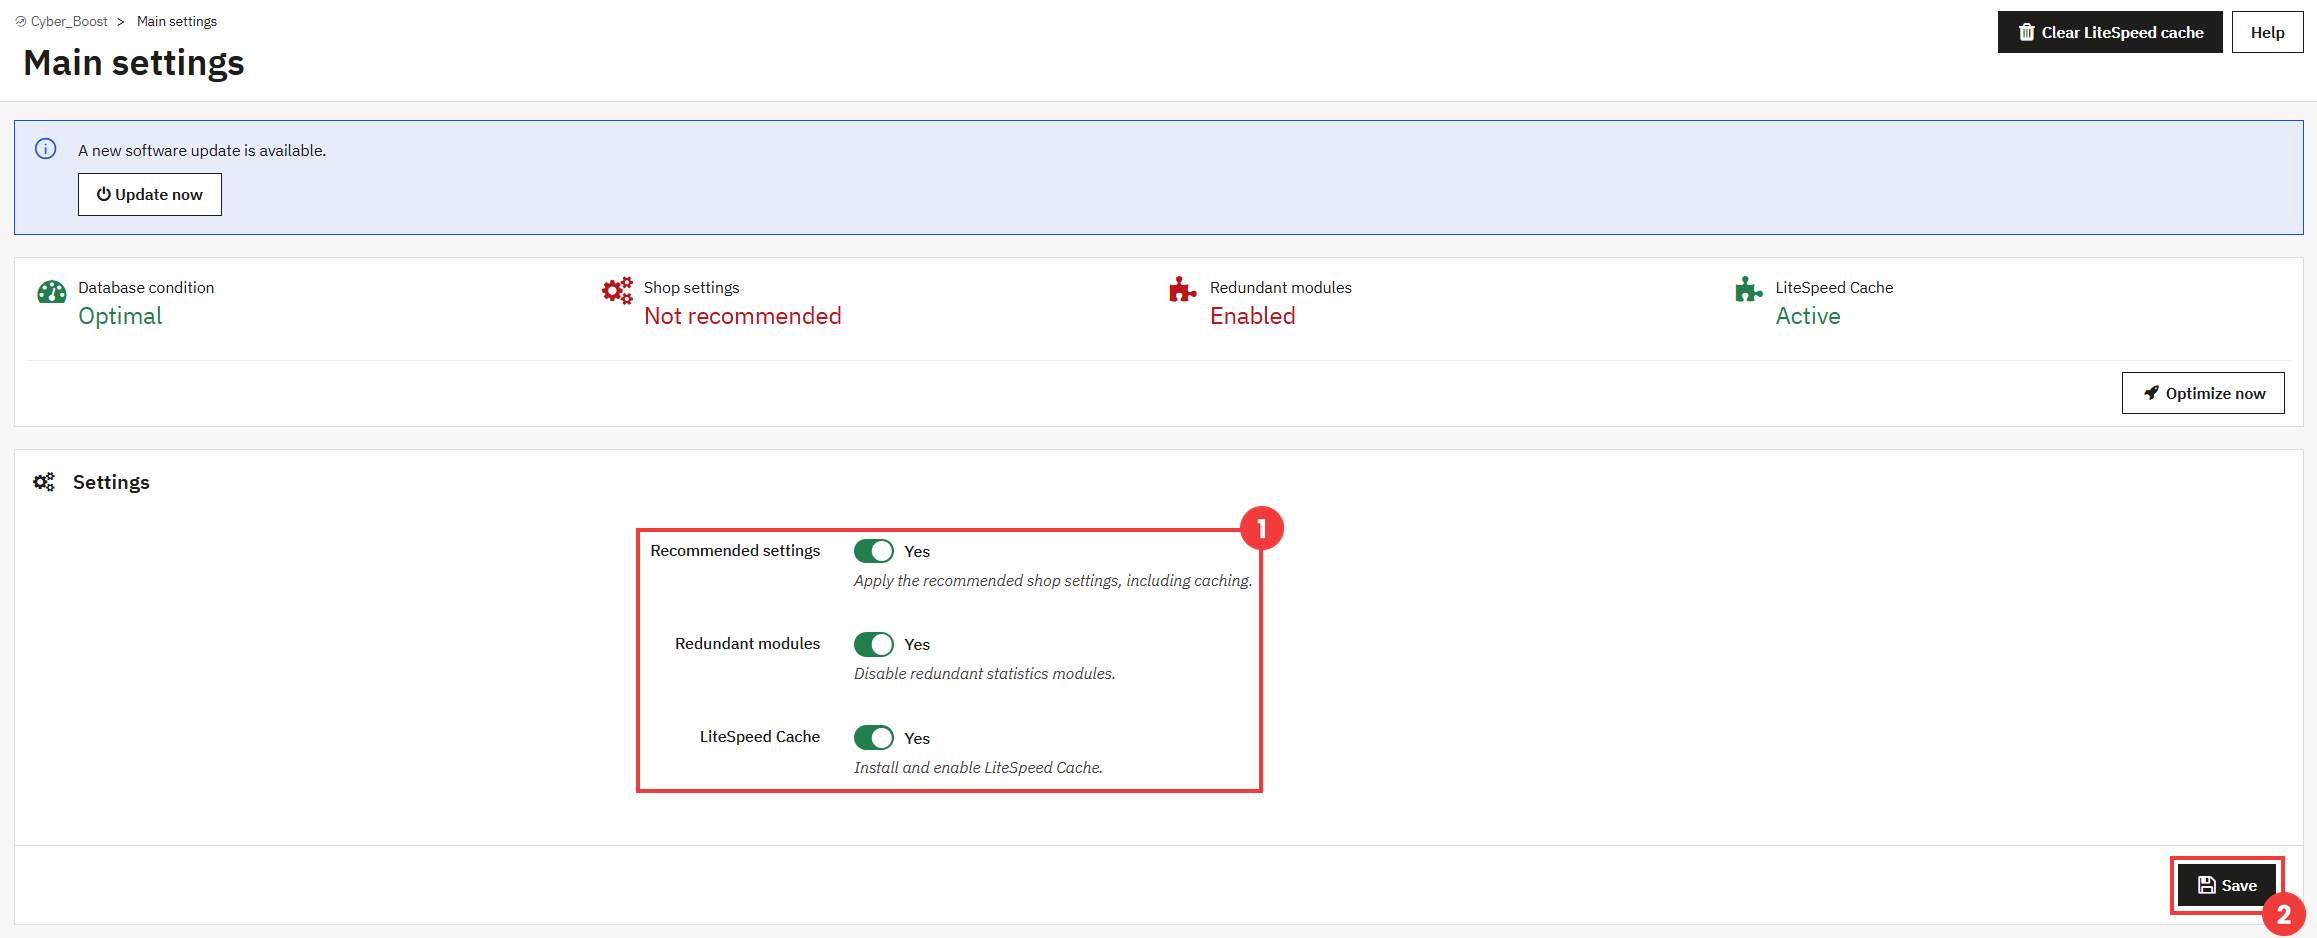
| Option | Description |
| Recommended settings | Applies the recommended store settings, including caching. |
| Redundant modules | Disables redundant statistics modules. |
| LiteSpeed Cache | Installs and enables LiteSpeed Cache. |
Optimize the database
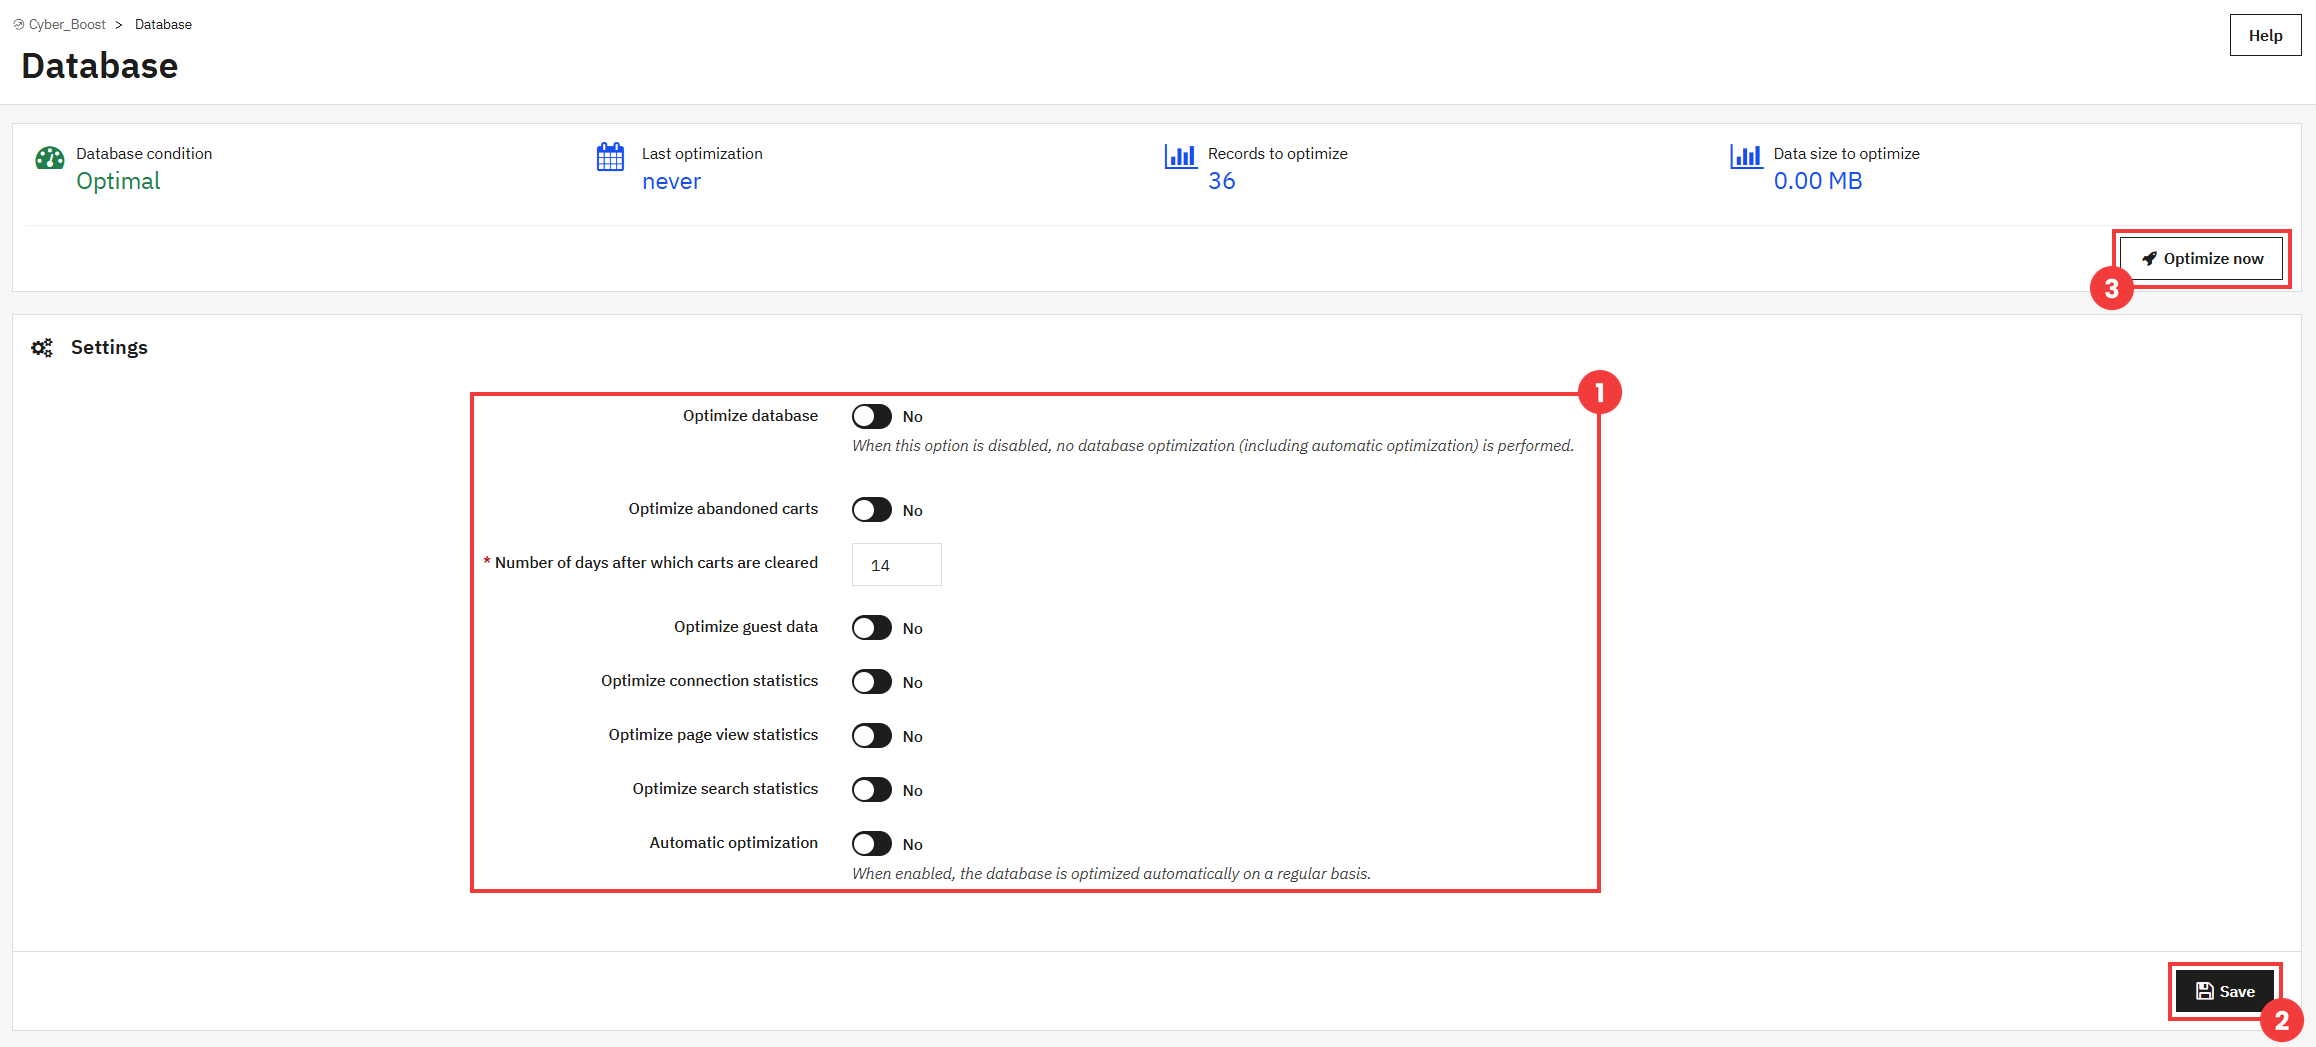
| Option | Description |
| Optimize database | The main option: when it is disabled, no database optimization (including automatic optimization) is performed. |
| Optimize abandoned carts | Includes abandoned carts in the optimization. |
| Number of days after which carts are cleared | The age, in days, after which abandoned carts are deleted. |
| Optimize guest data | Includes visitor data in the optimization. |
| Optimize connection / page view / search statistics | Includes the corresponding statistics in the optimization. |
| Automatic optimization | The database is optimized automatically on a regular basis. |
Optimize images
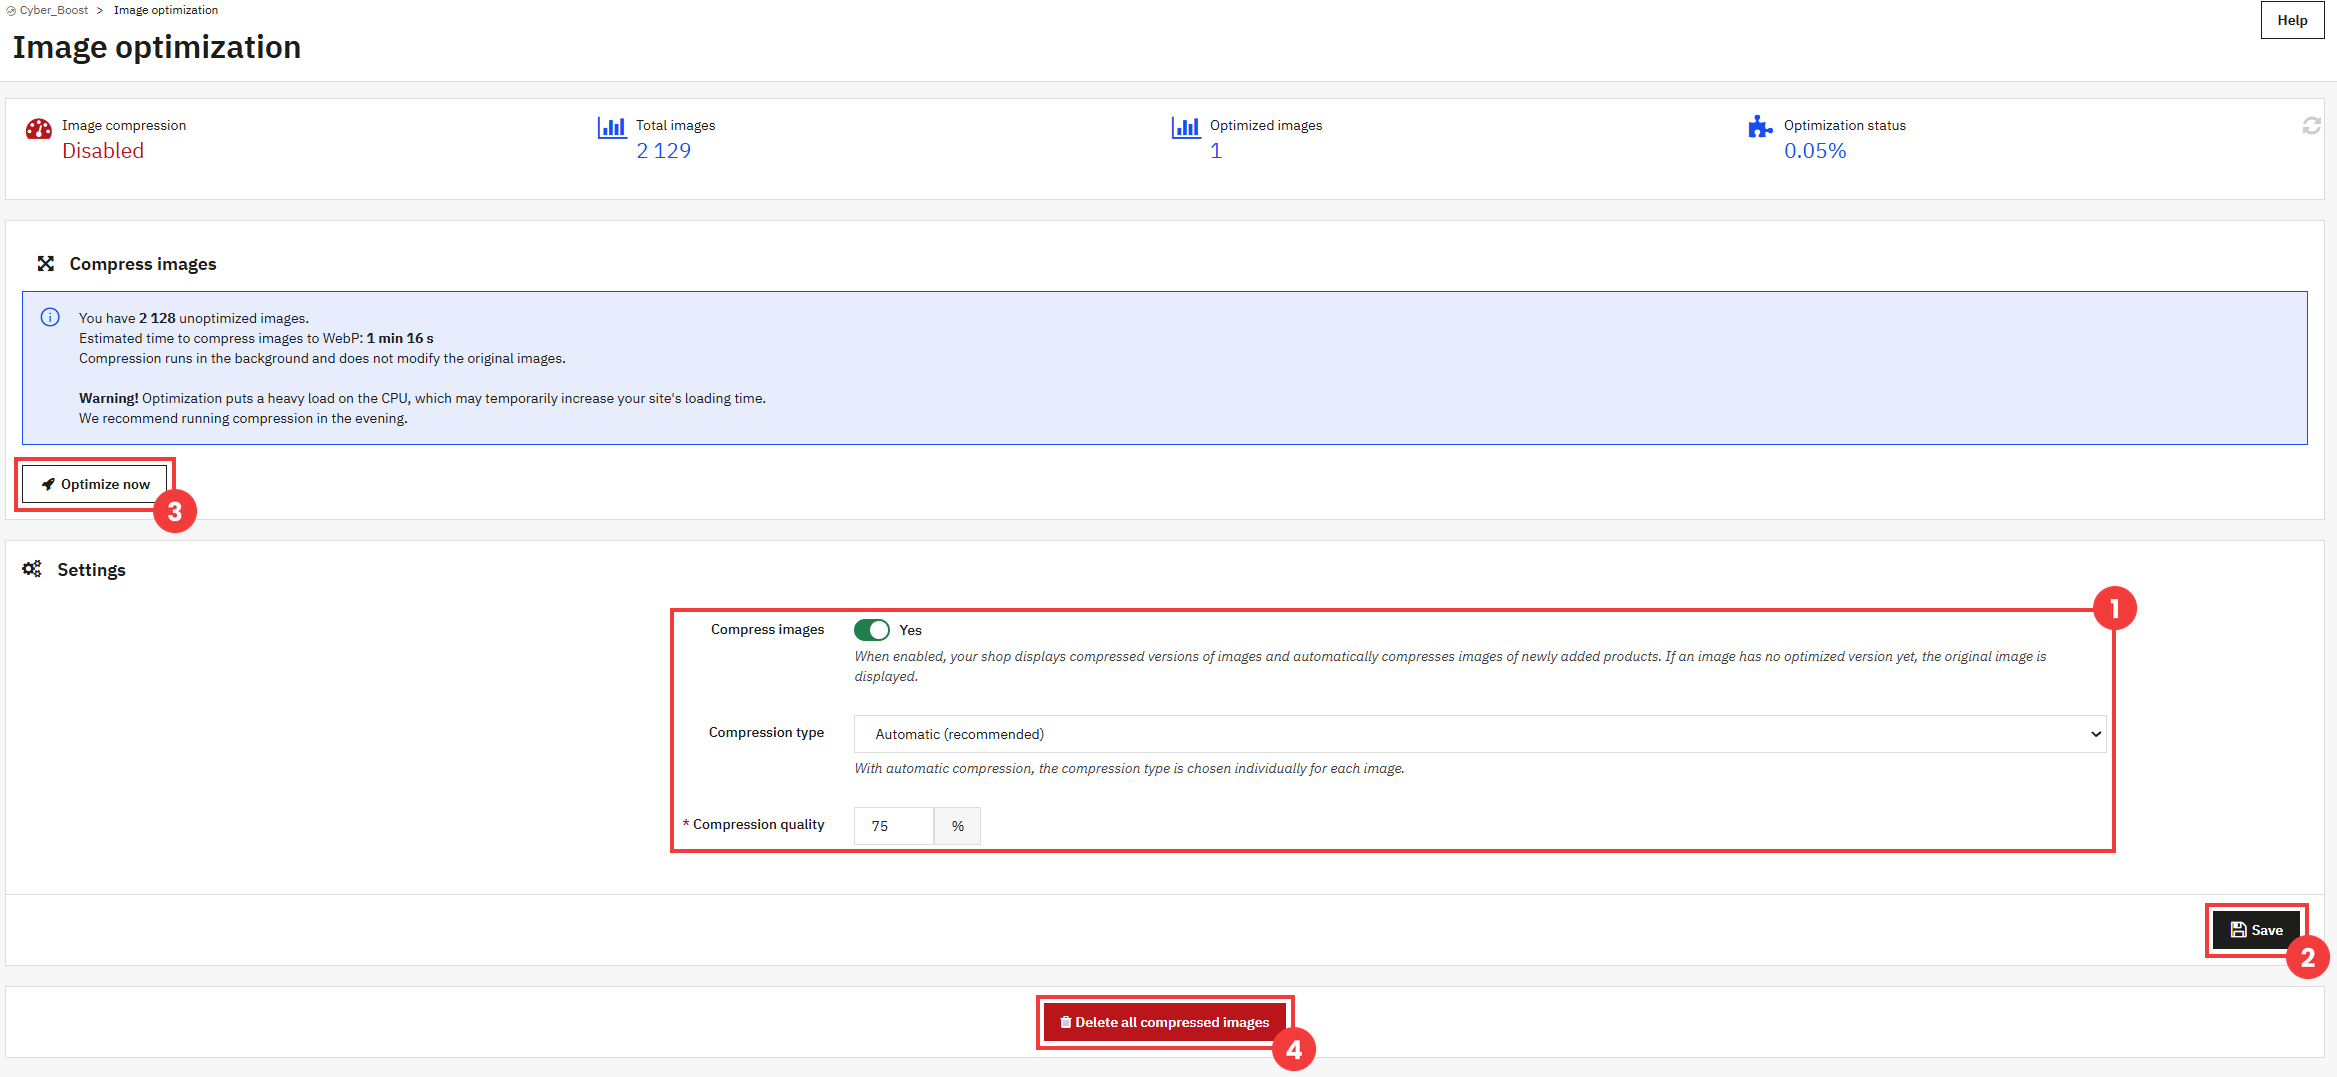
| Option | Description |
| Compress images | When enabled, your store displays compressed versions of images and automatically compresses images of newly added products. If an image has no optimized version yet, the original image is displayed. |
| Compression type | With Automatic (recommended), the compression type is chosen individually for each image. |
| Compression quality | The quality of compressed images, as a percentage (for example 75%). |
Important! Optimization puts a heavy load on the CPU, which may temporarily increase your website’s loading time. We recommend running the compression in the evening.
