
An FTP account lets you upload and download files on your hosting with an FTP client (for example FileZilla). You can create additional FTP accounts, for example for a web developer, and limit each of them to a selected folder. Here is how to do it in the hosting panel.
- Log in to your hosting panel: Log in to your new hosting service
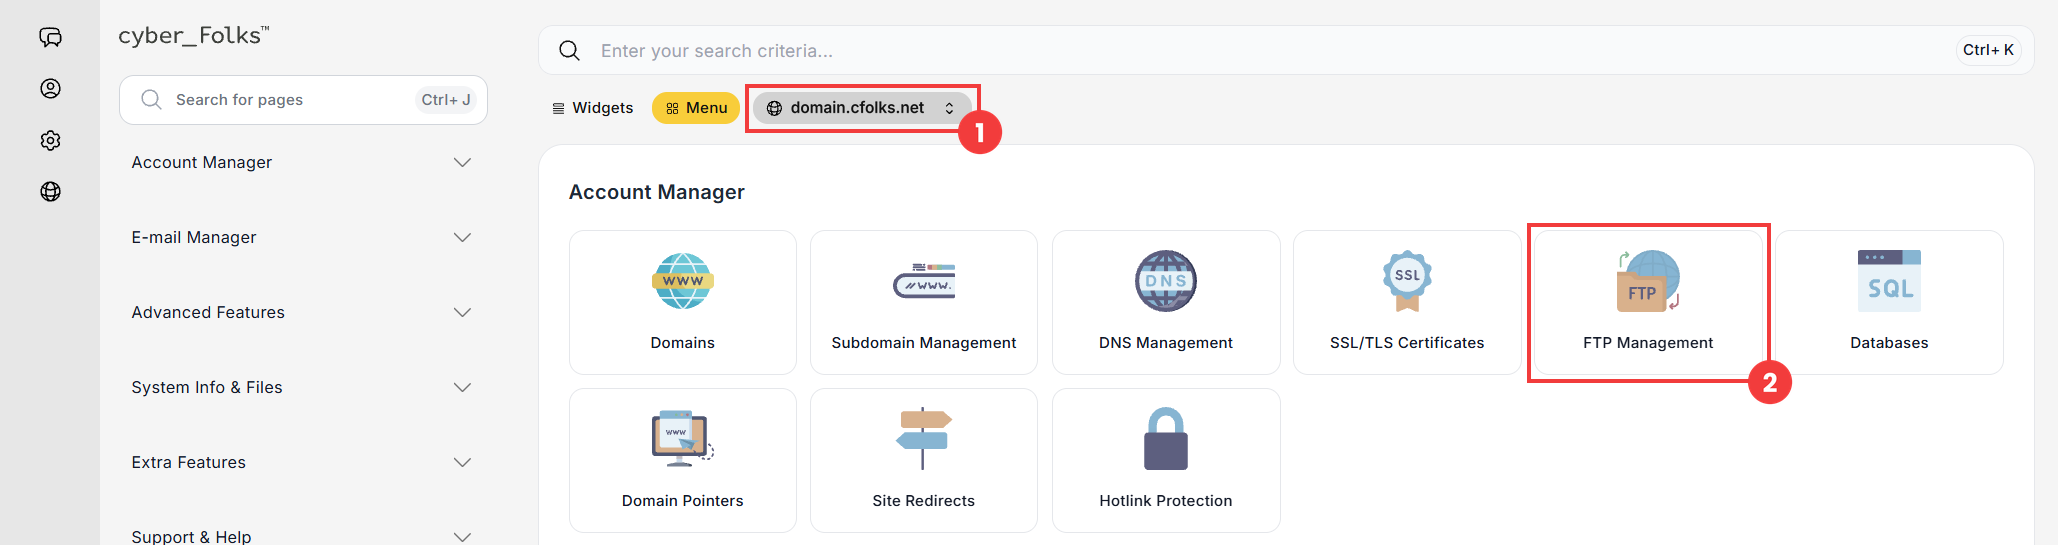
- If you have several domains, select the one for which you want to create the FTP account from the list (1). Then click the FTP Management option (2).
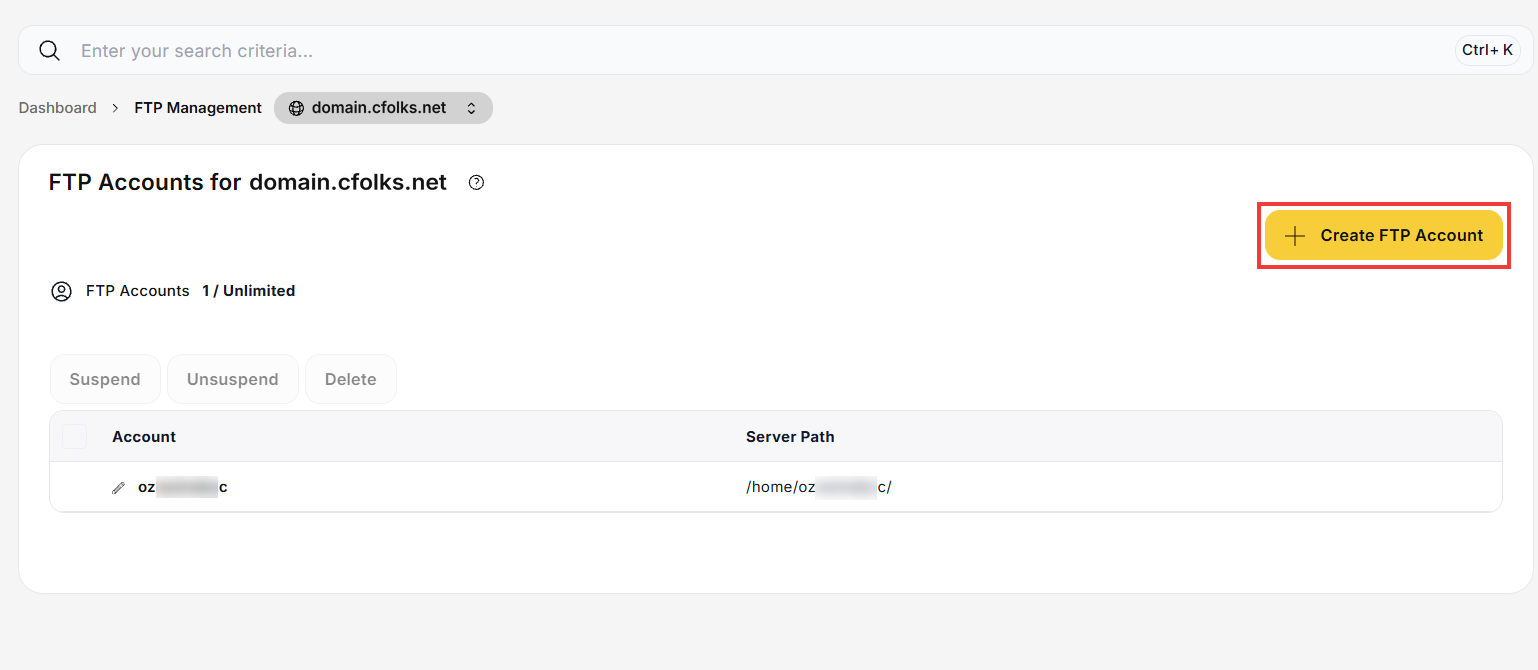
- A list of FTP accounts for the domain appears. Click the Create FTP Account button.
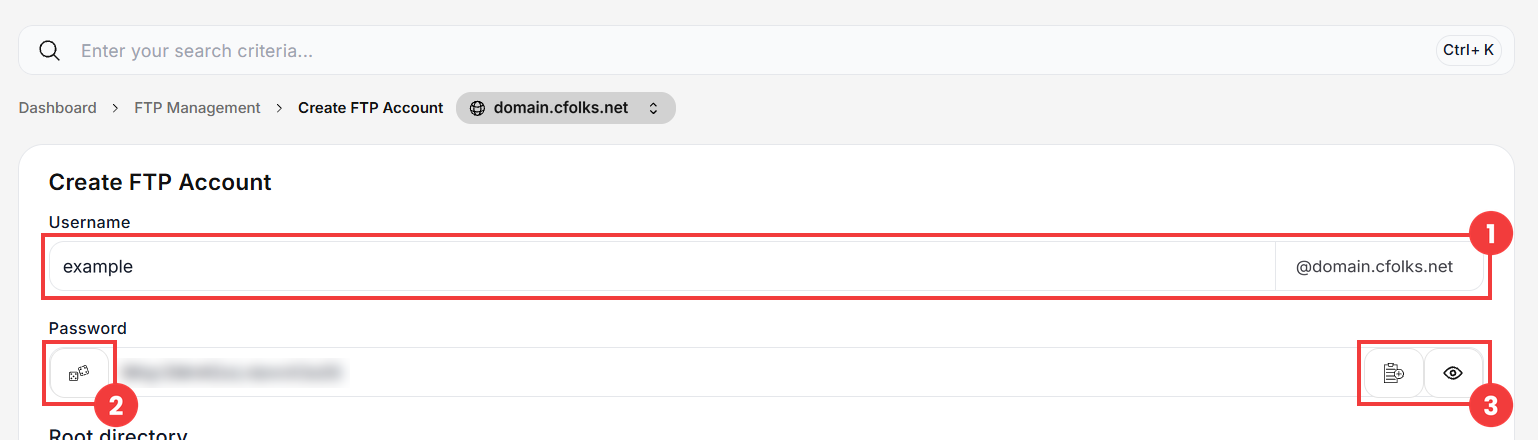
- In the Username field, enter the name of the account (1), for example example. The domain name is added automatically, so the full login will be example@domain.cfolks.net.
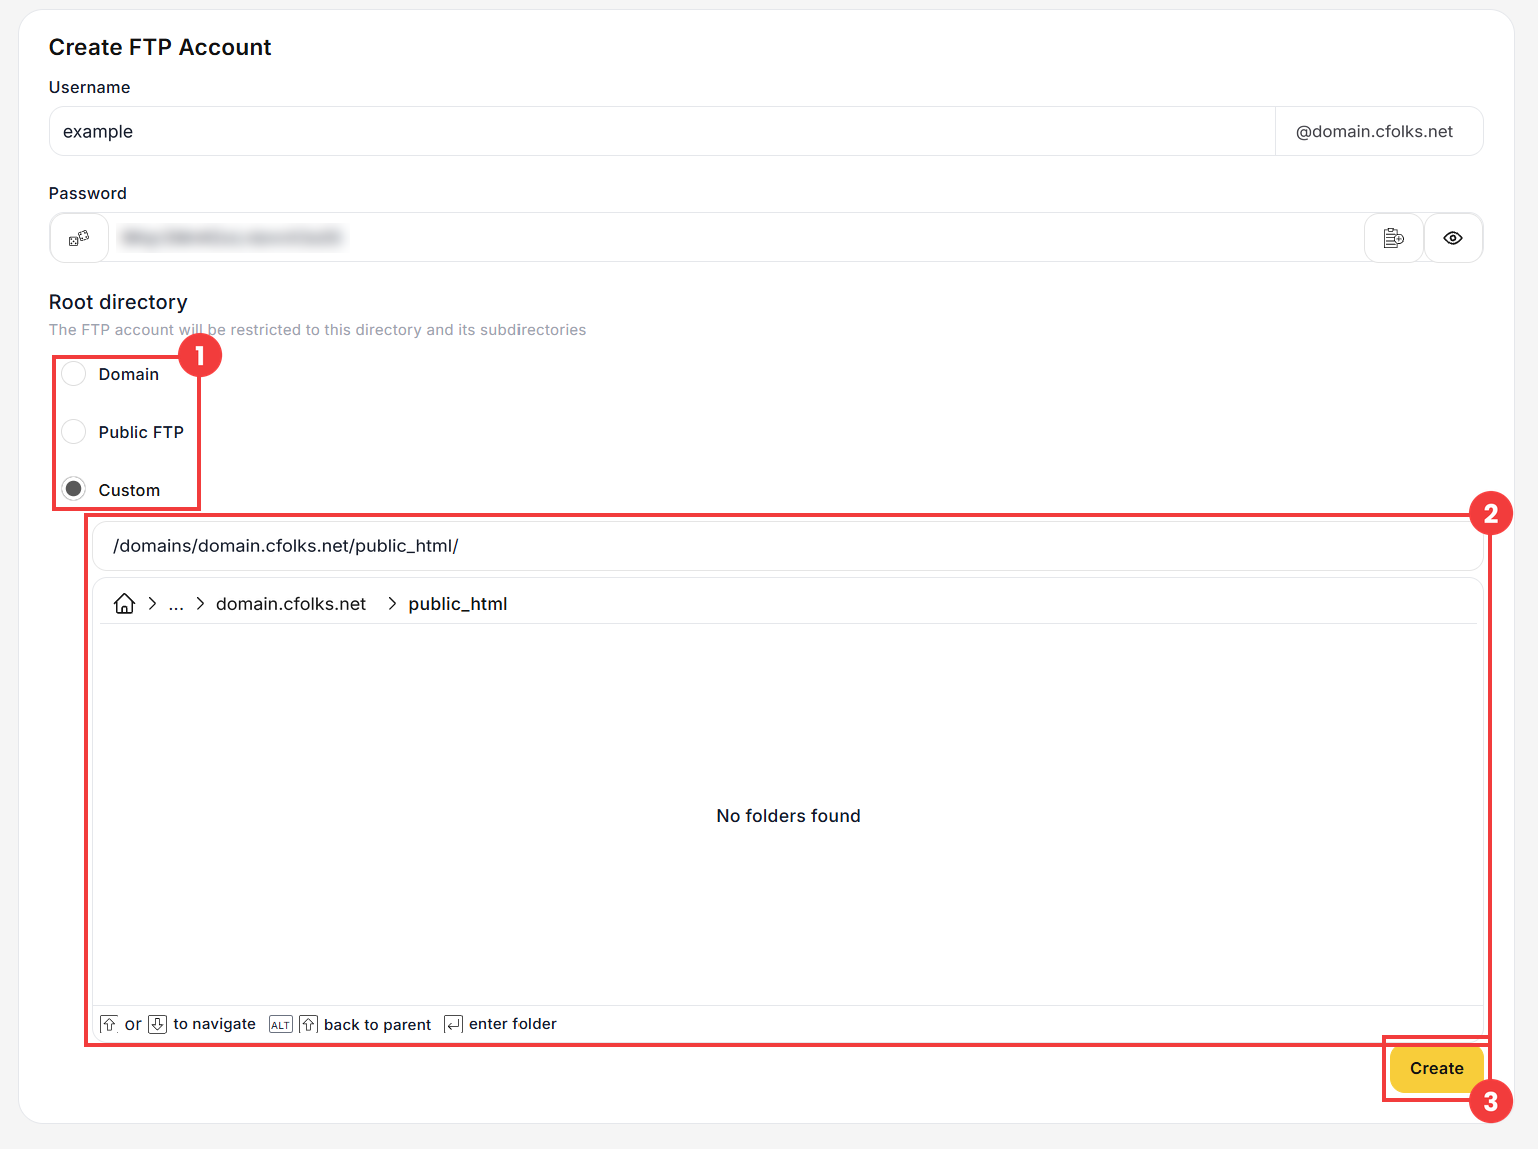
Enter a password or generate a strong one with the icon next to the Password field (2). The buttons on the right (3) let you copy the password and show or hide it. - In the Root directory section, select the folder the account will have access to (1). The FTP account will be restricted to this folder and its subfolders.
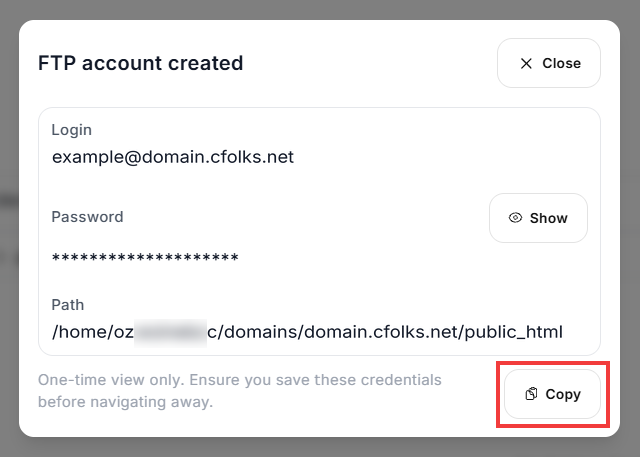
- A window with the login details appears: Login, Password and Path. The password is shown only once, so save the details right away, for example with the Copy button.
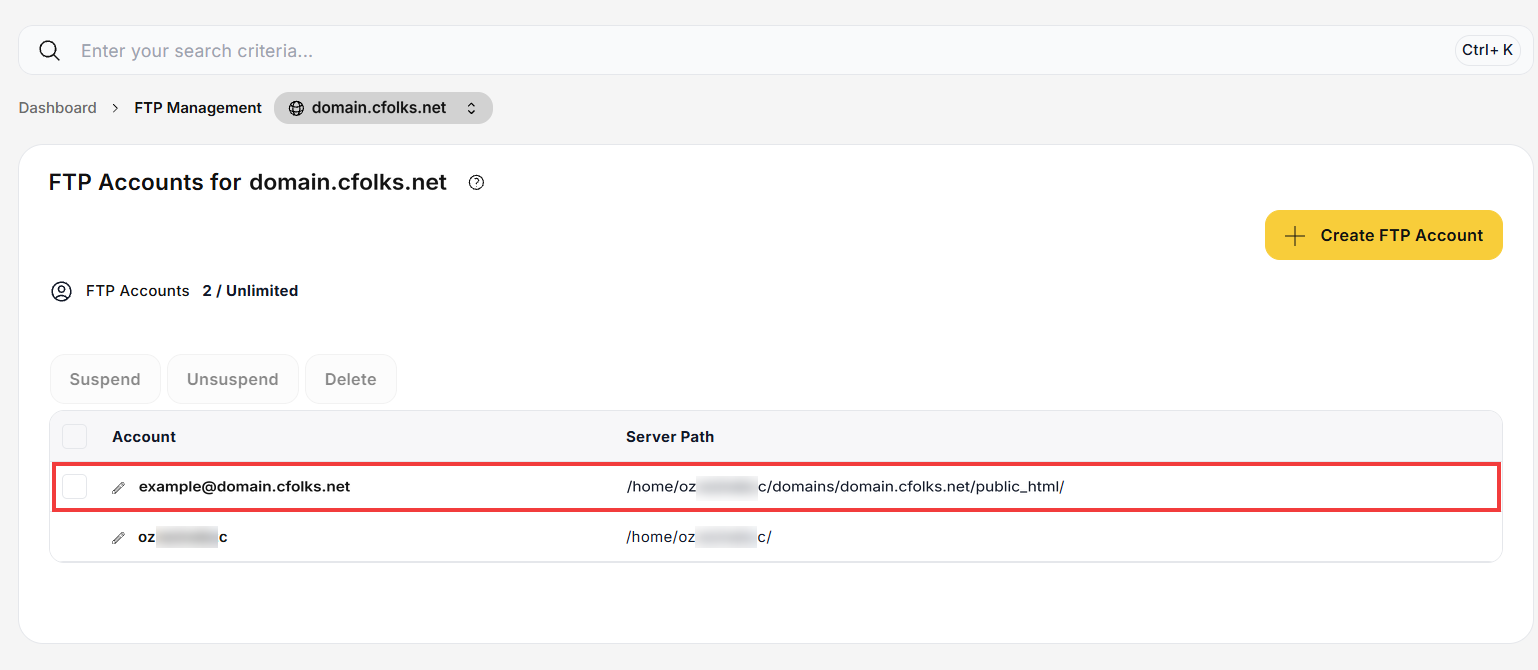
- The new account appears in the list of FTP accounts, together with the folder it has access to (Server Path).
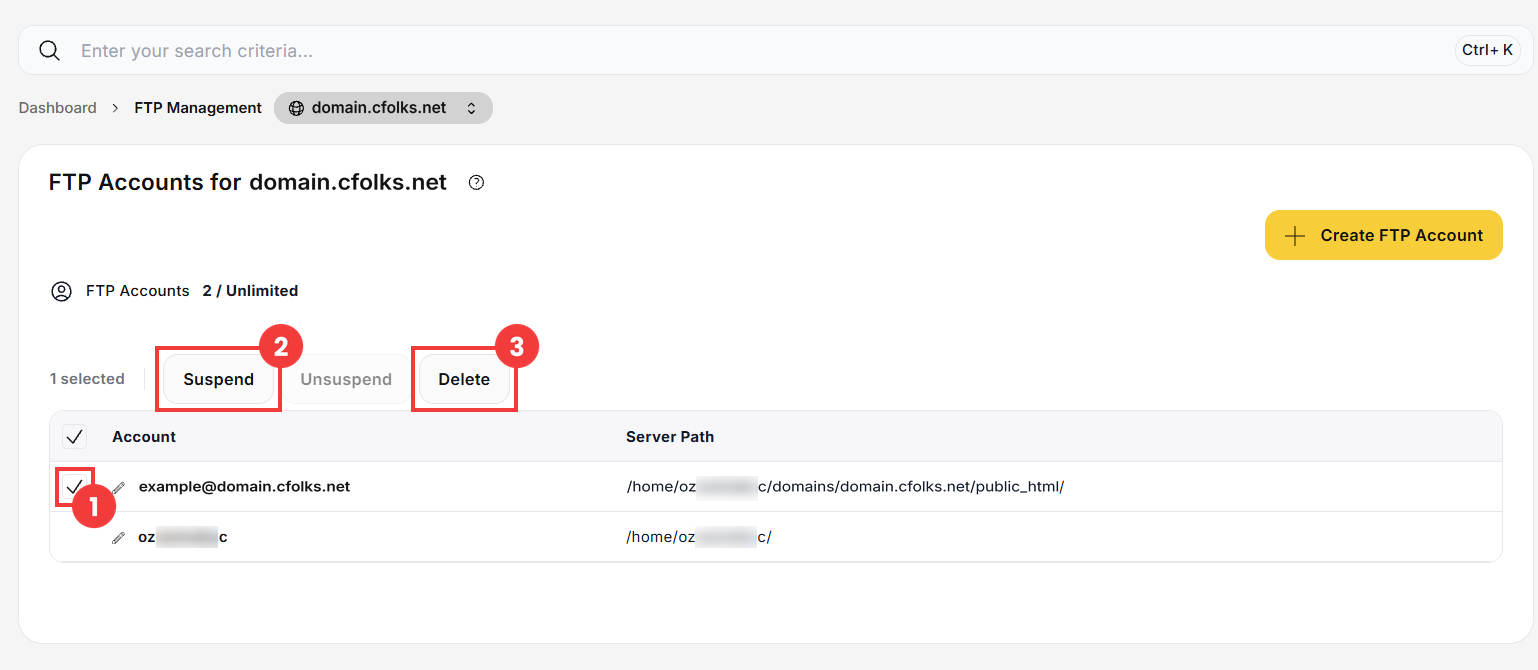
- To suspend or delete an account, select the checkbox next to it (1), then click Suspend (2) or Delete (3).
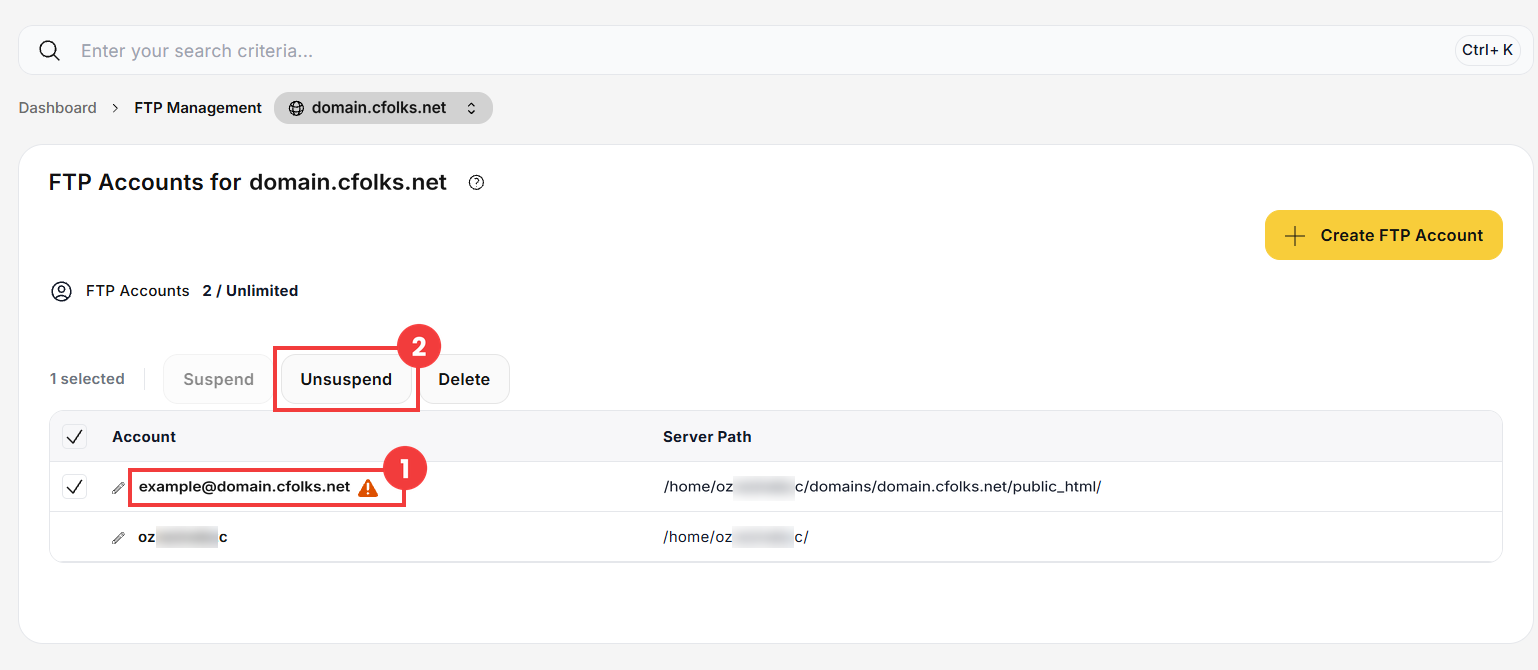
- A suspended account is marked with a warning icon (1) and cannot be used to log in. To restore access, select it and click Unsuspend (2).
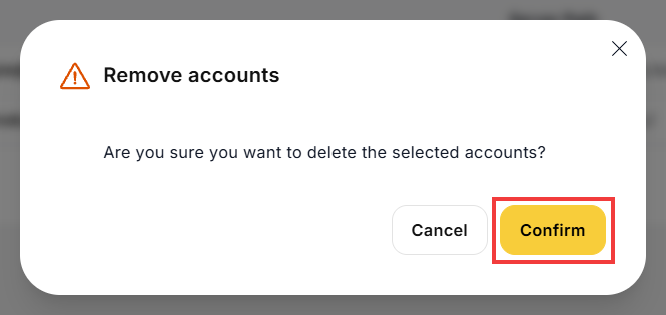
- When you delete an account, confirm the deletion with the Confirm button.
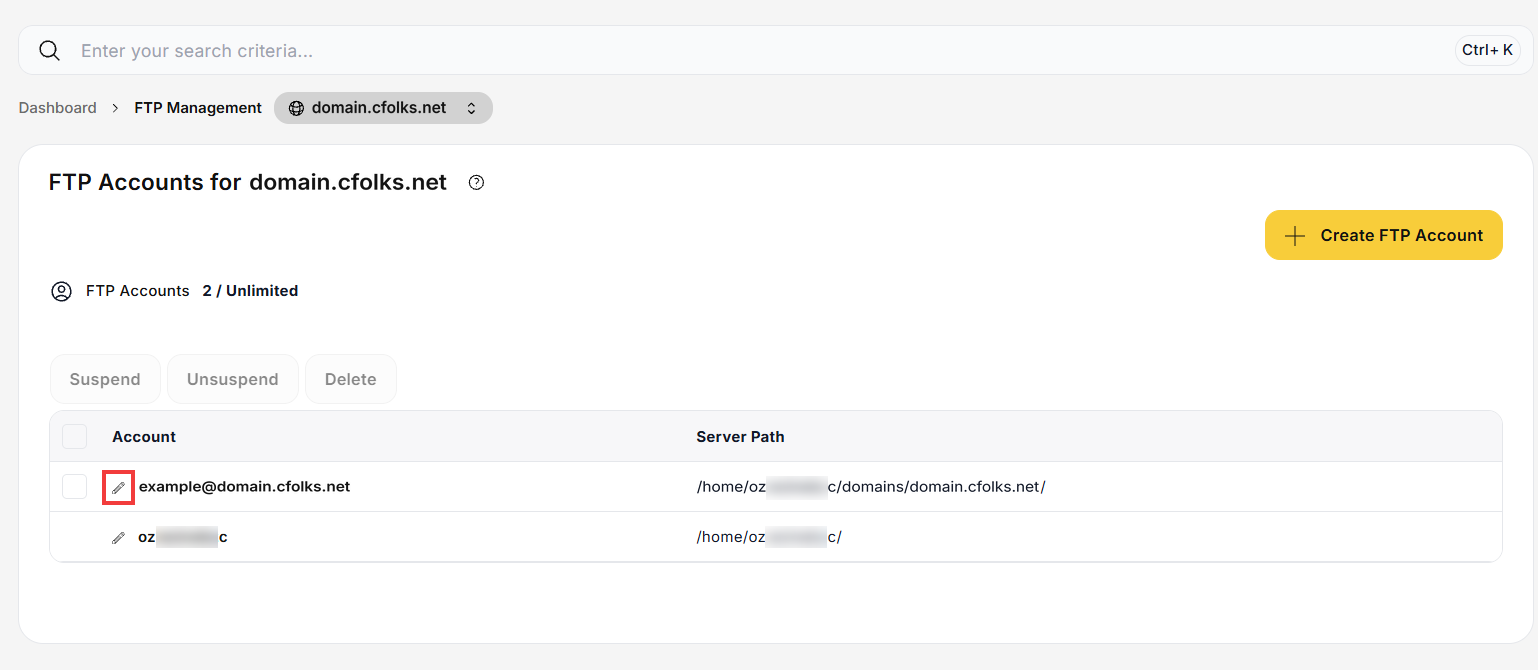
- To change the password or the folder of an account, click the pencil icon next to it.
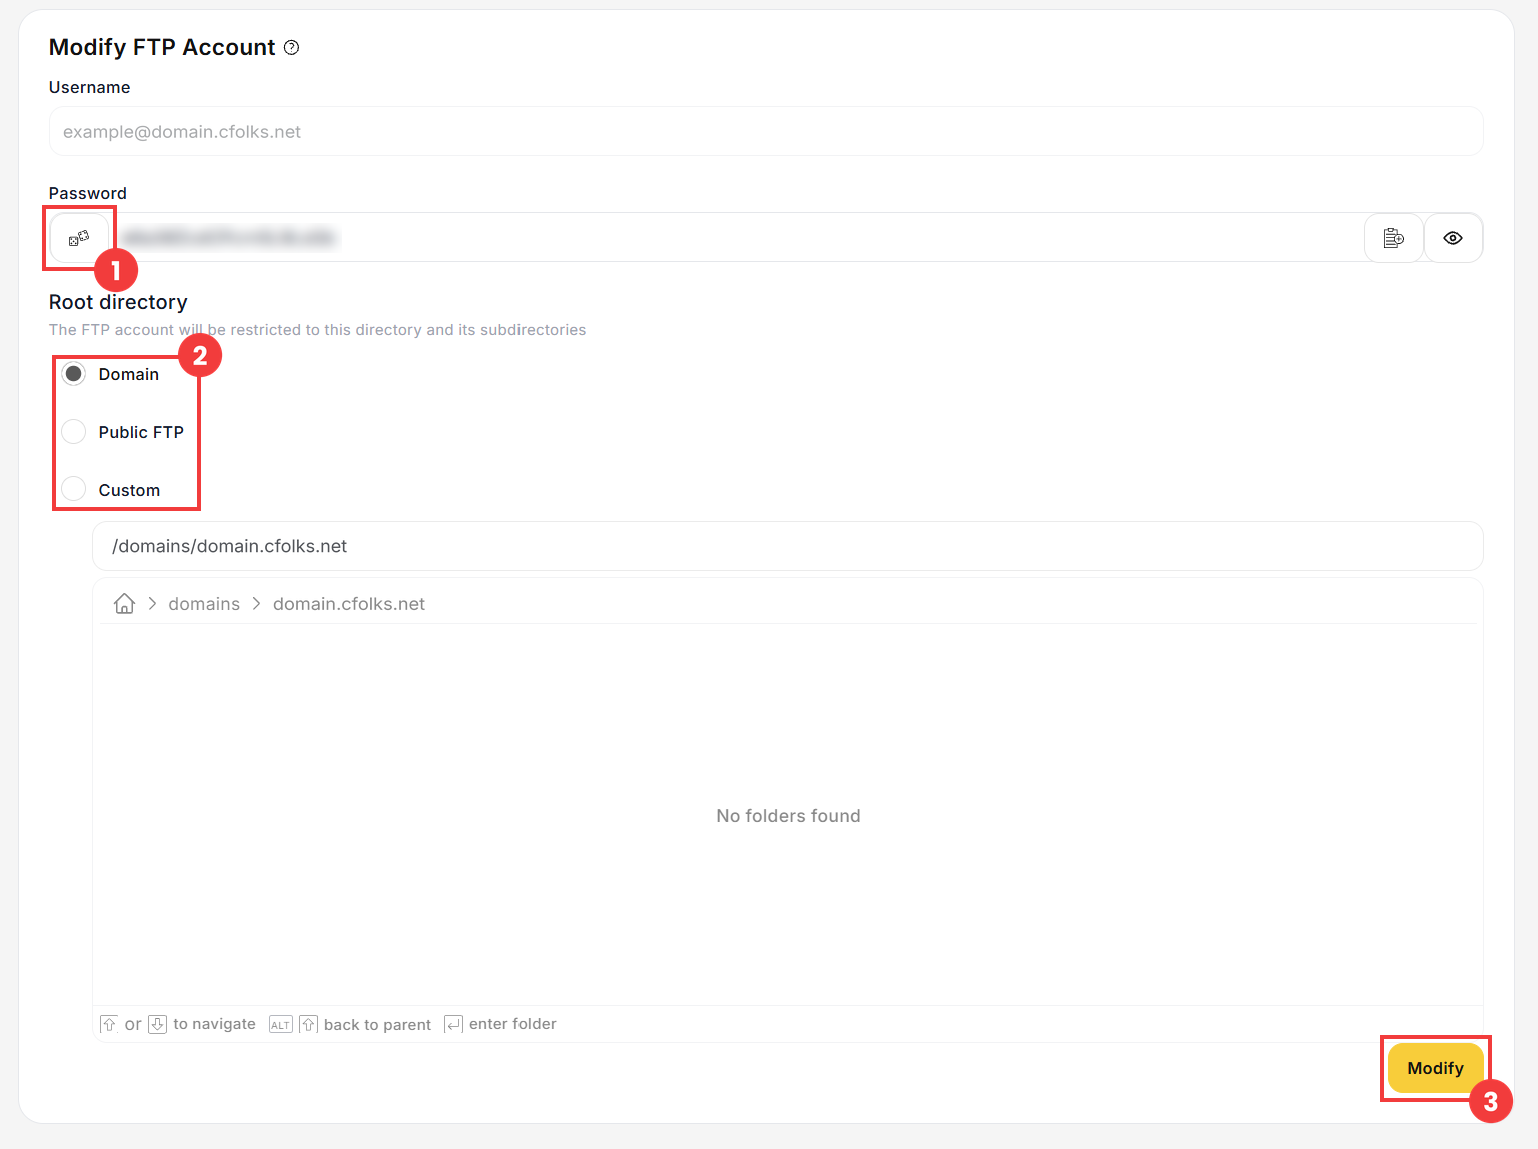
- The Modify FTP Account form appears. You can generate a new password (1) or choose a different root directory (2). Save the changes with the Modify button (3).
 Good to know! Once you are logged in to the panel, you can also ask our assistant robo_Folks for help – it can perform many operations for you.
| Option | Folder the account can access |
| Domain | The whole domain folder (/domains/your-domain/), including the website files. |
| Public FTP | Only the public_ftp folder of the domain, for example for sharing files. |
| Custom | Any folder you choose, for example public_html or a subfolder of your website. |
If you select Custom, enter the path or choose the folder in the folder browser below (2). Then click Create (3).
Done! You can now connect to your hosting with an FTP client, using the login and password of the new account.
Suspend, delete or modify an FTP account
Note: an FTP account has access to all files in its root directory and subfolders. Only give FTP access to people you trust, and suspend or delete accounts that are no longer needed.
