
An additional database user is useful, for example, when you want to give a web developer access to a database without sharing your main details. Here is how to create a user and give it access to a database.
- Log in to your hosting panel: Log in to your new hosting service
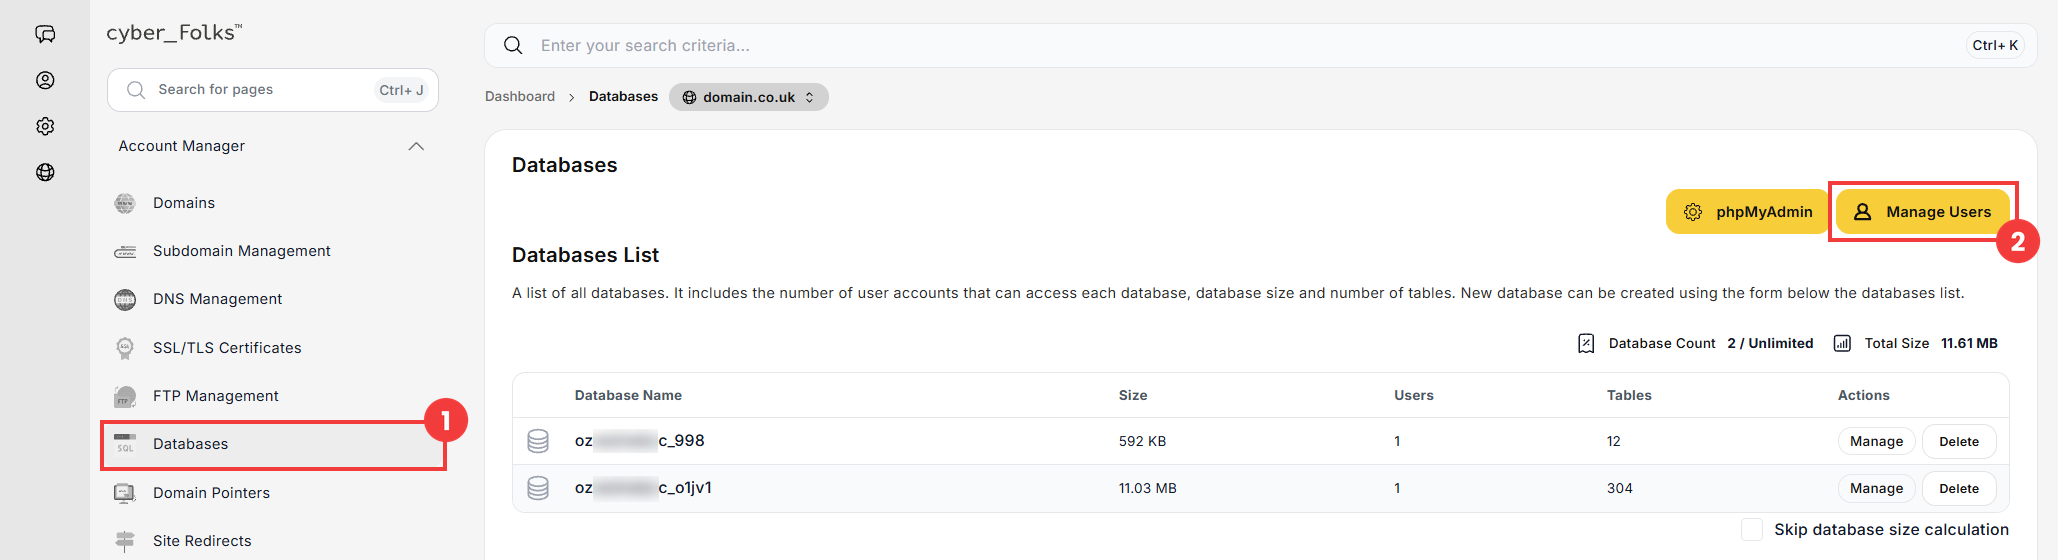
- In the left-hand menu, click Account Manager > Databases (1), then click the Manage Users button (2).
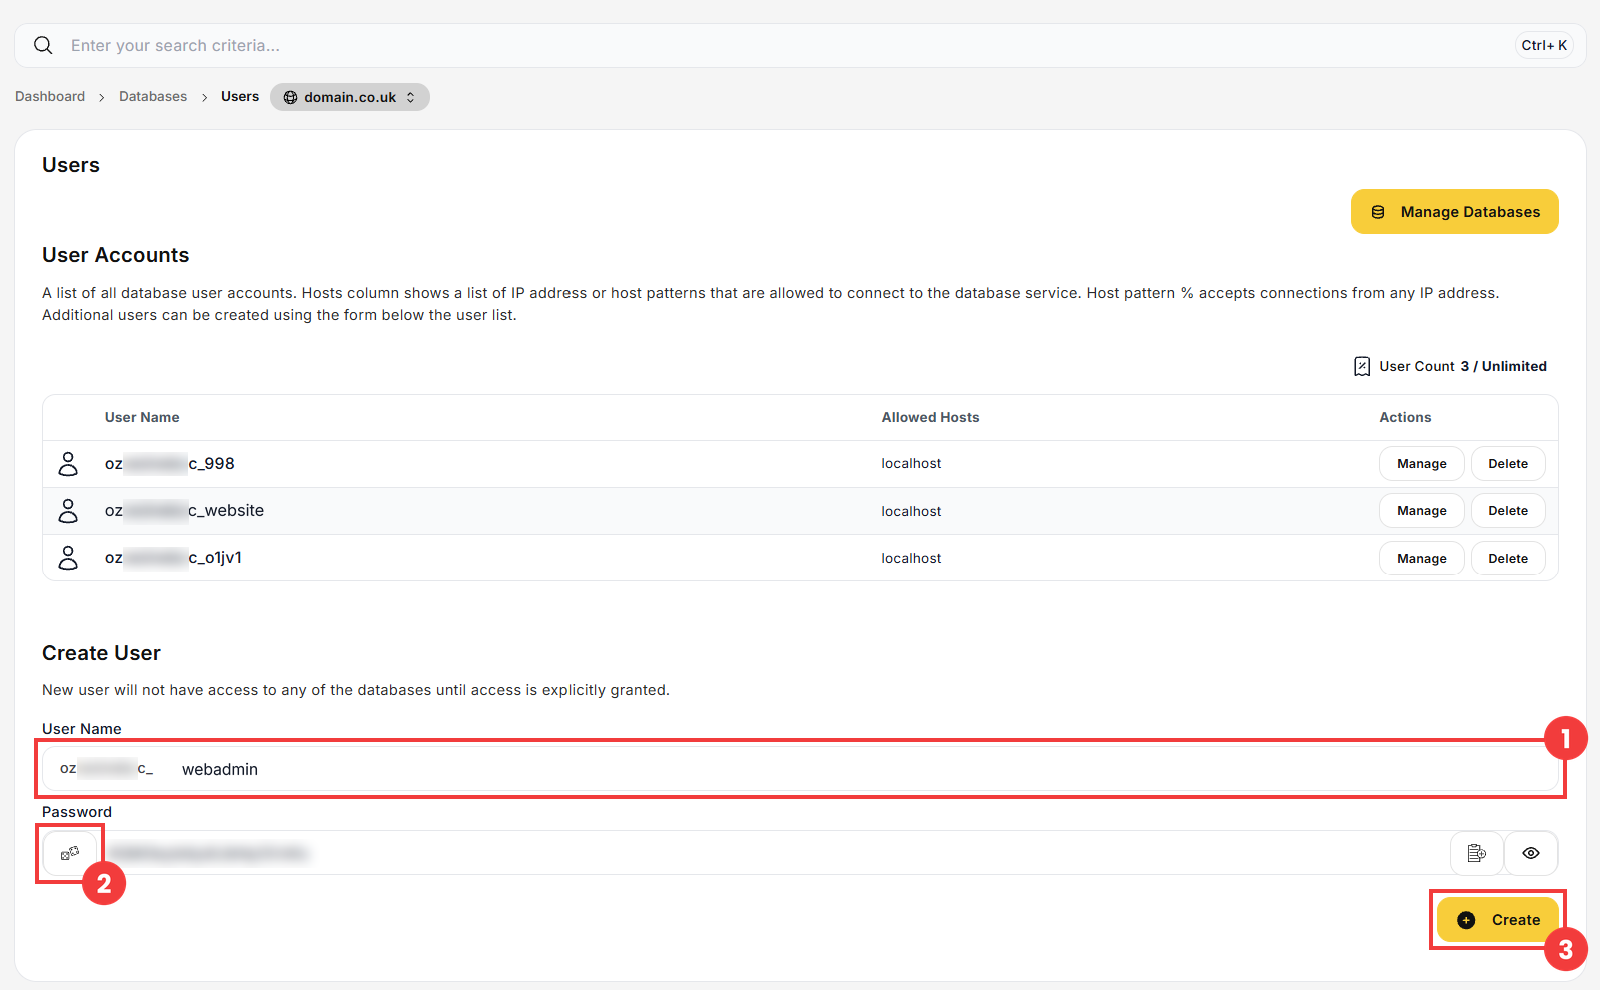
- In the Create User section, enter the user name (1), for example webadmin. Generate a password with the icon next to the Password field (2), then click Create (3).
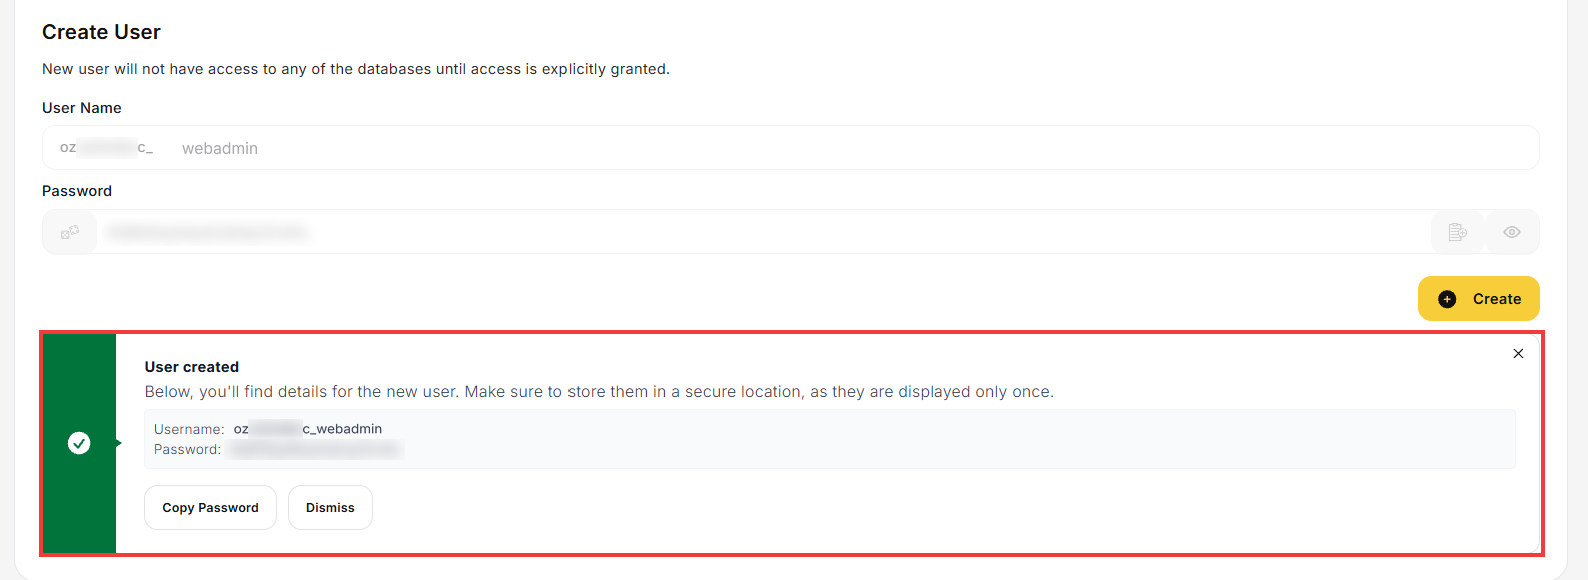
- The details of the new user appear. The password is shown only once, so save it right away, for example with the Copy Password button.
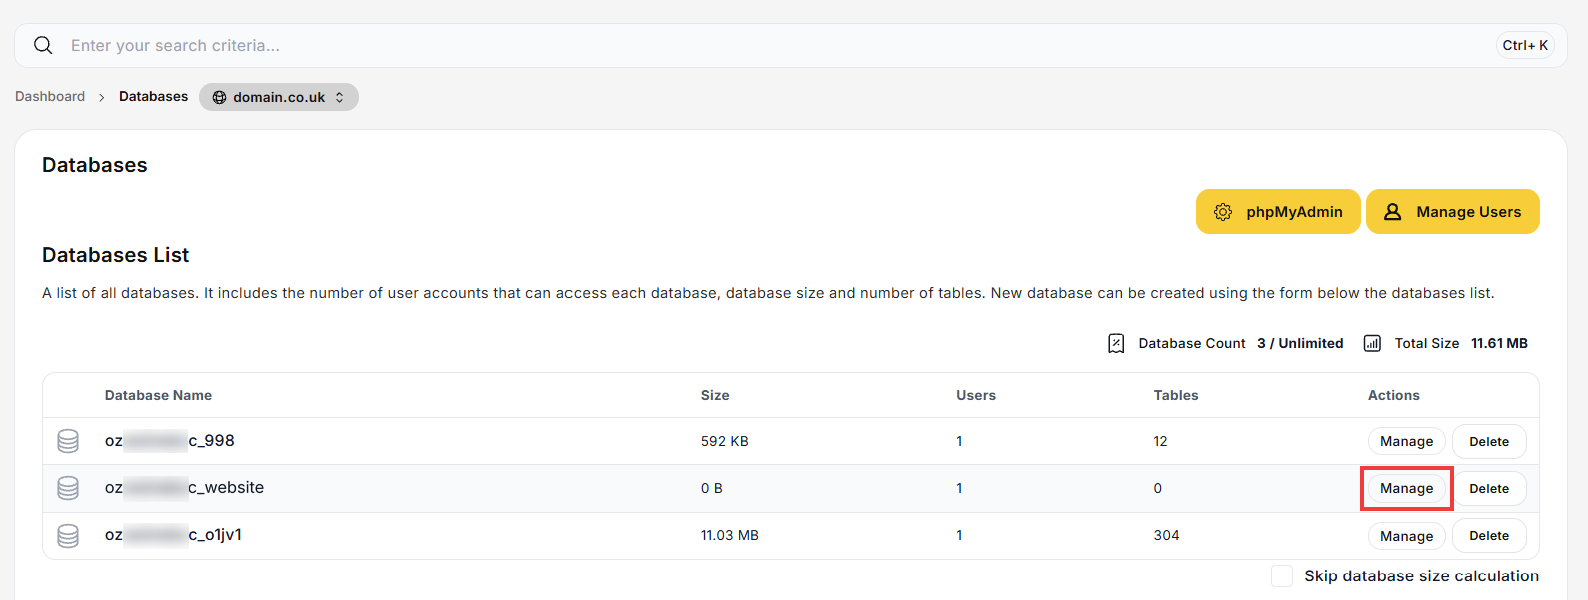
- A new user does not have access to any database yet. To give it access, go back to Databases and click Manage next to the database.
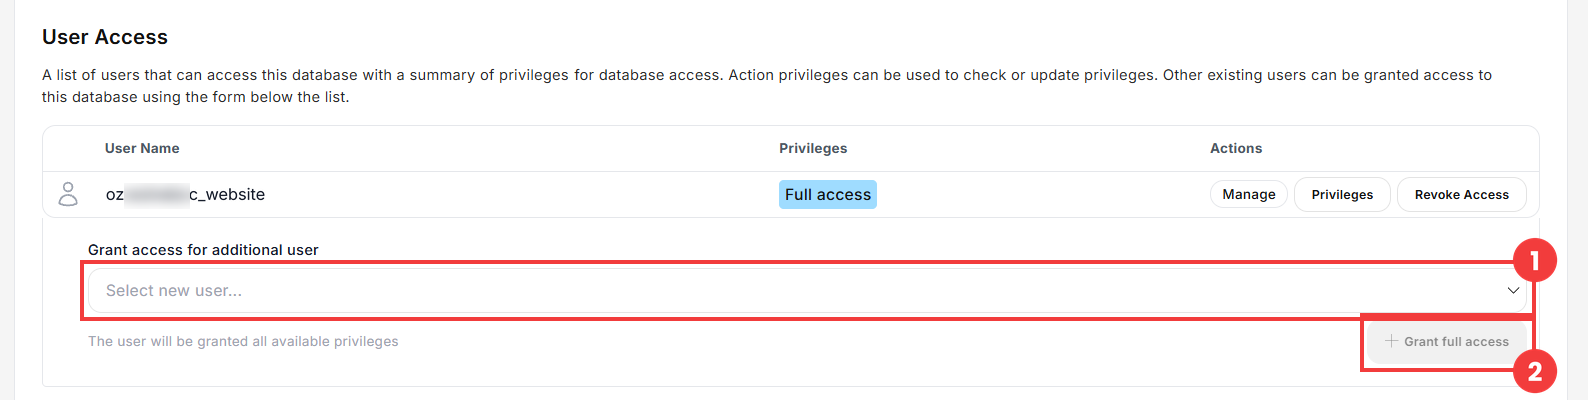
- In the User Access section, select the user from the Grant access for additional user list (1), then click Grant full access (2).
 Good to know! Once you are logged in to the panel, you can also ask our assistant robo_Folks for help – it can perform many operations for you.
Done! The user can now connect to the database with its user name and password.
