The DNS delegation determines which name servers handle your domain, and therefore where its records (website, email, etc.) are set. In the client area, you can choose between three modes:
| Mode | DNS servers | When to choose it |
| cyber_Folks hosting | ns1.cyberfolks.com, ns2.cyberfolks.com | Your website and email are hosted at cyber_Folks: the domain is connected automatically, without setting any records. The hosting must be on the same client account as the domain. |
| External servers | Your provider’s servers (for example Cloudflare) | You manage the DNS zone at another provider: records are then changed in its panel. |
| FreeDNS | dns1.tld.pl, dns2.tld.pl, dns3.tld.pl | You want to manage the A, MX, TXT and other records yourself, for free, in the client area. |
A mode change takes effect within a few minutes, but full propagation can take up to 48 hours. During this time, your website and email may be unstable.
- Log in to your client area: https://cyberfolks.com/client-login-panel/
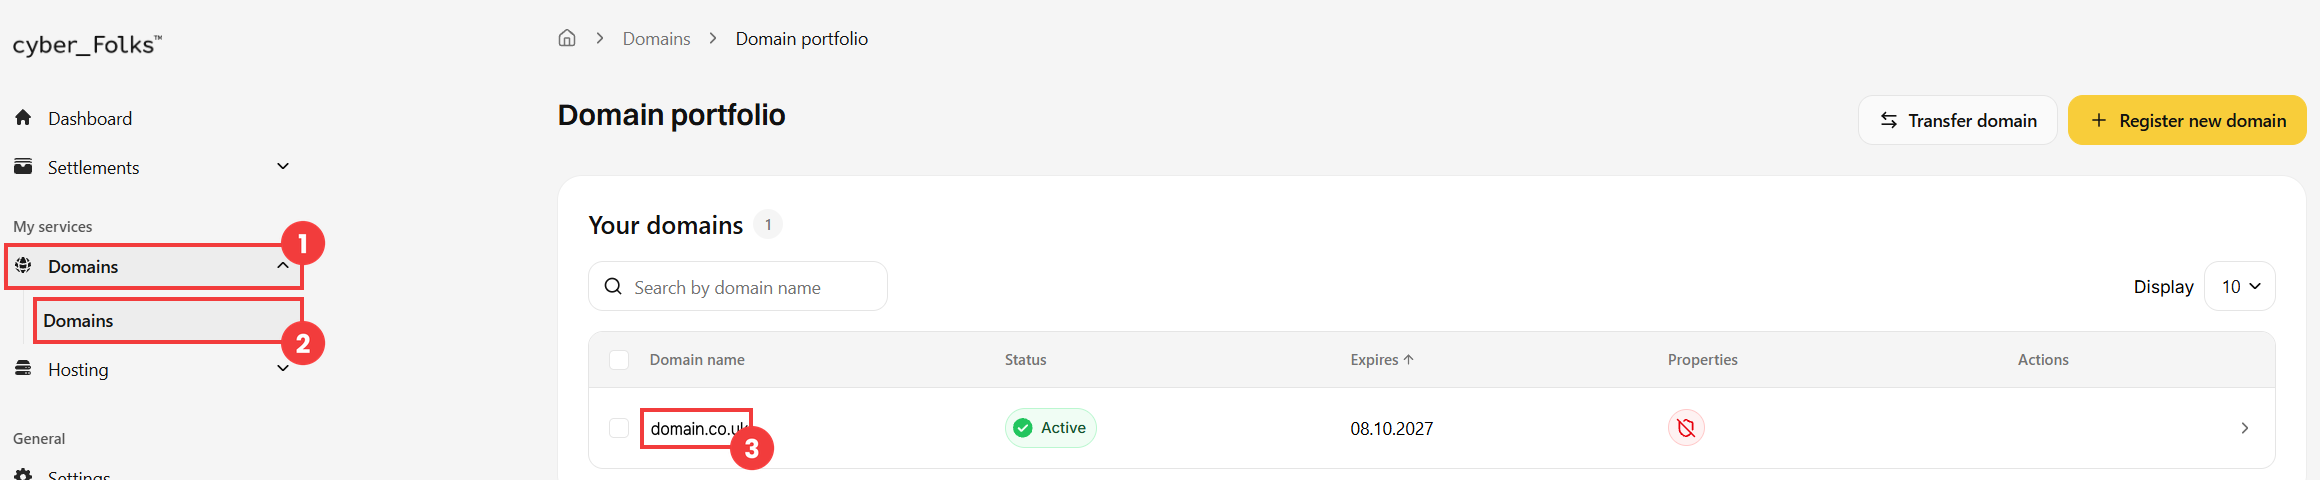
- In the left-hand menu, expand Domains (1), then click Domains (2). Then click the name of the domain (3).
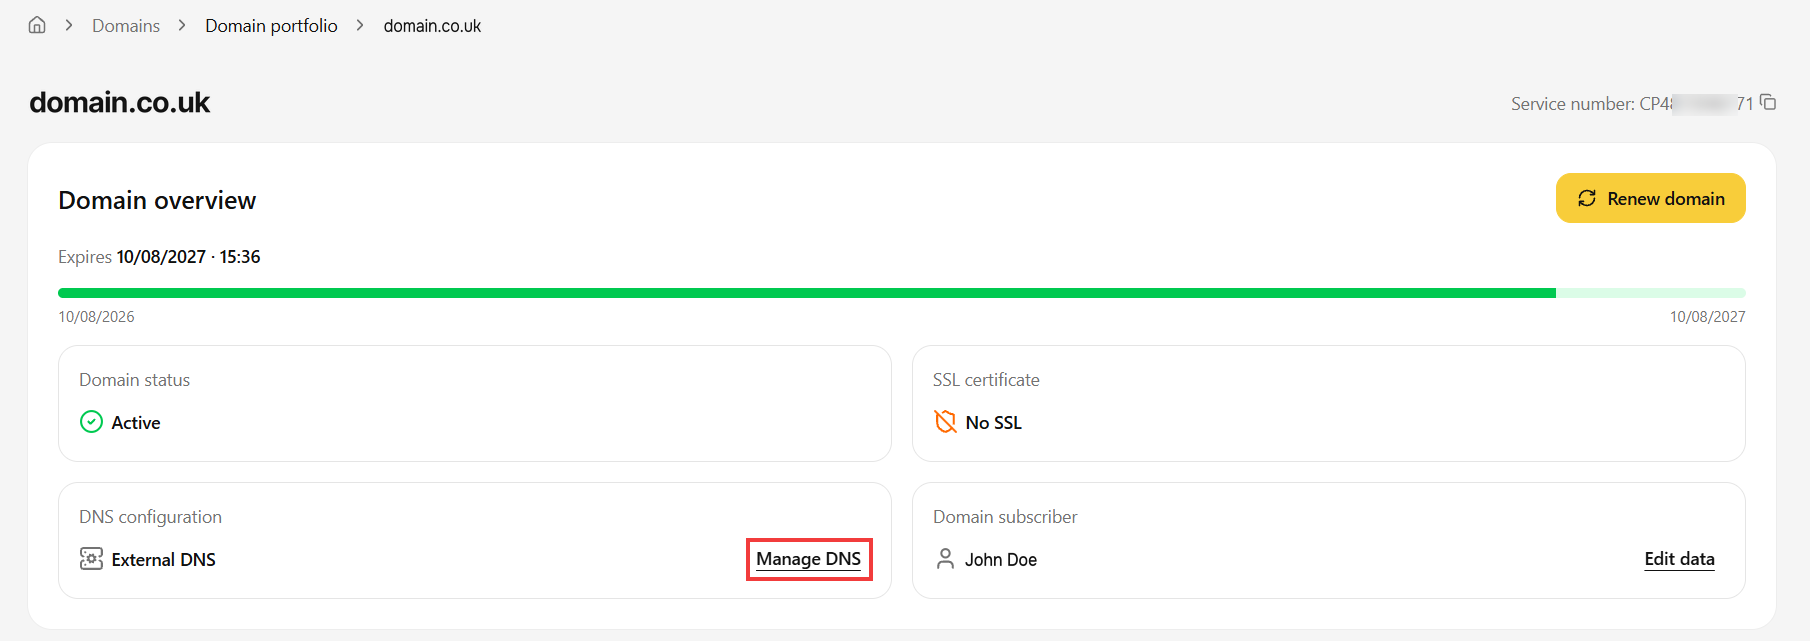
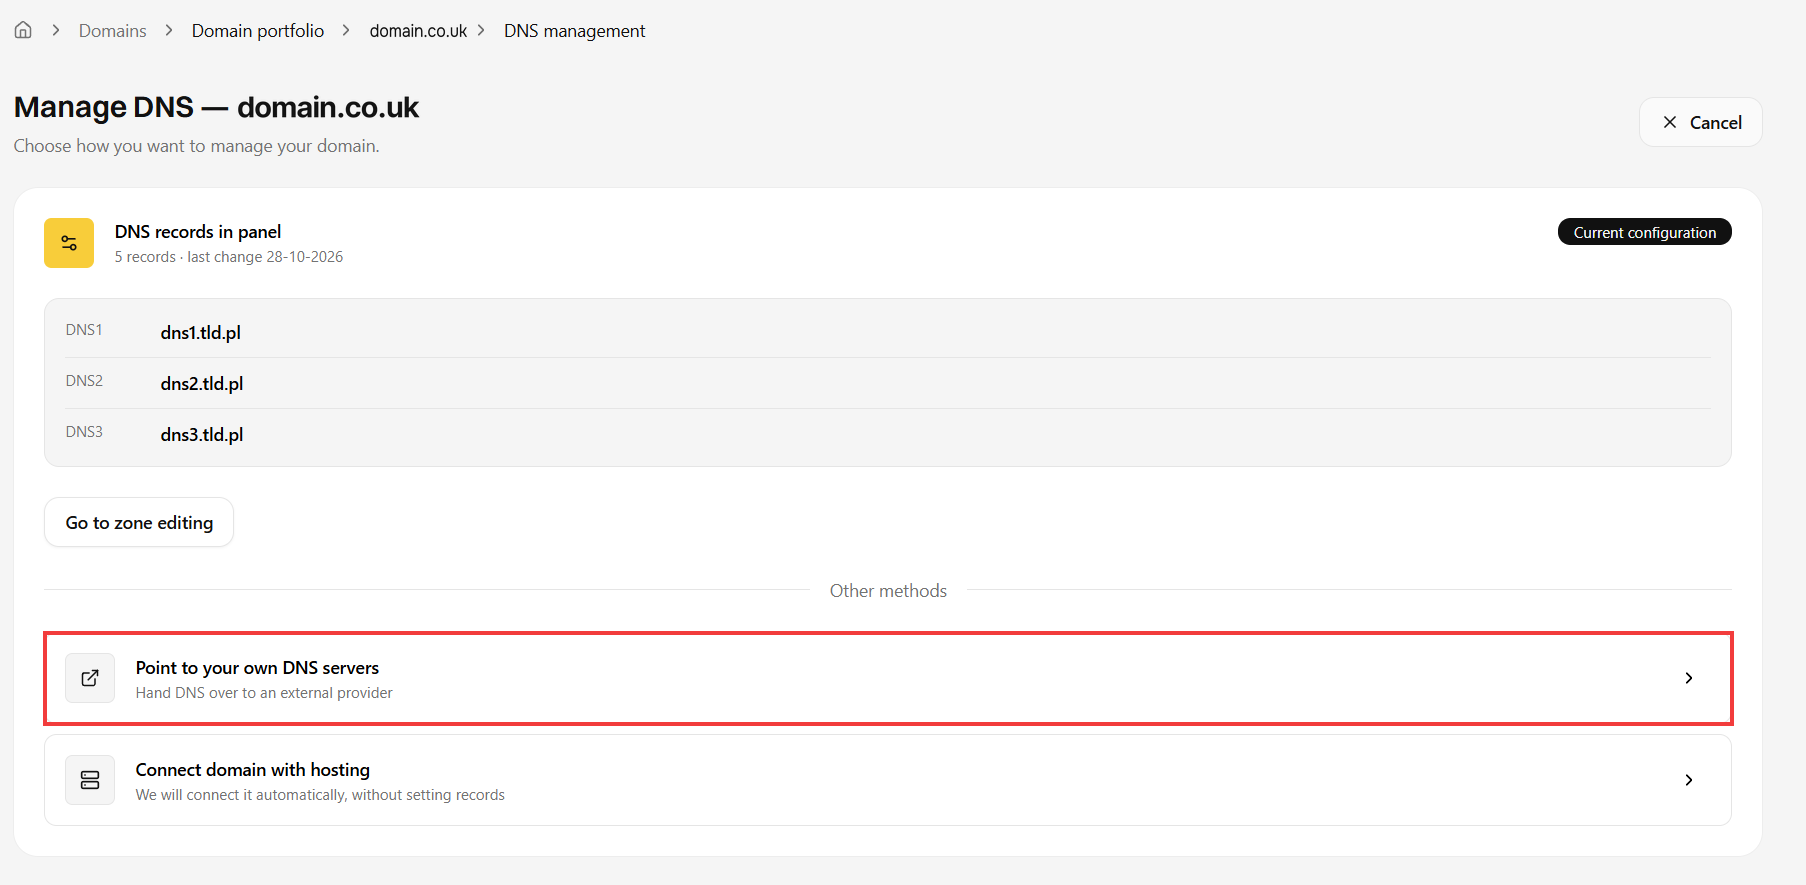
- In the DNS configuration section, click Manage DNS. The page shows the current configuration of the domain (Current configuration) and the other available modes (Other methods).
- In the Other methods section, click Point to your own DNS servers.
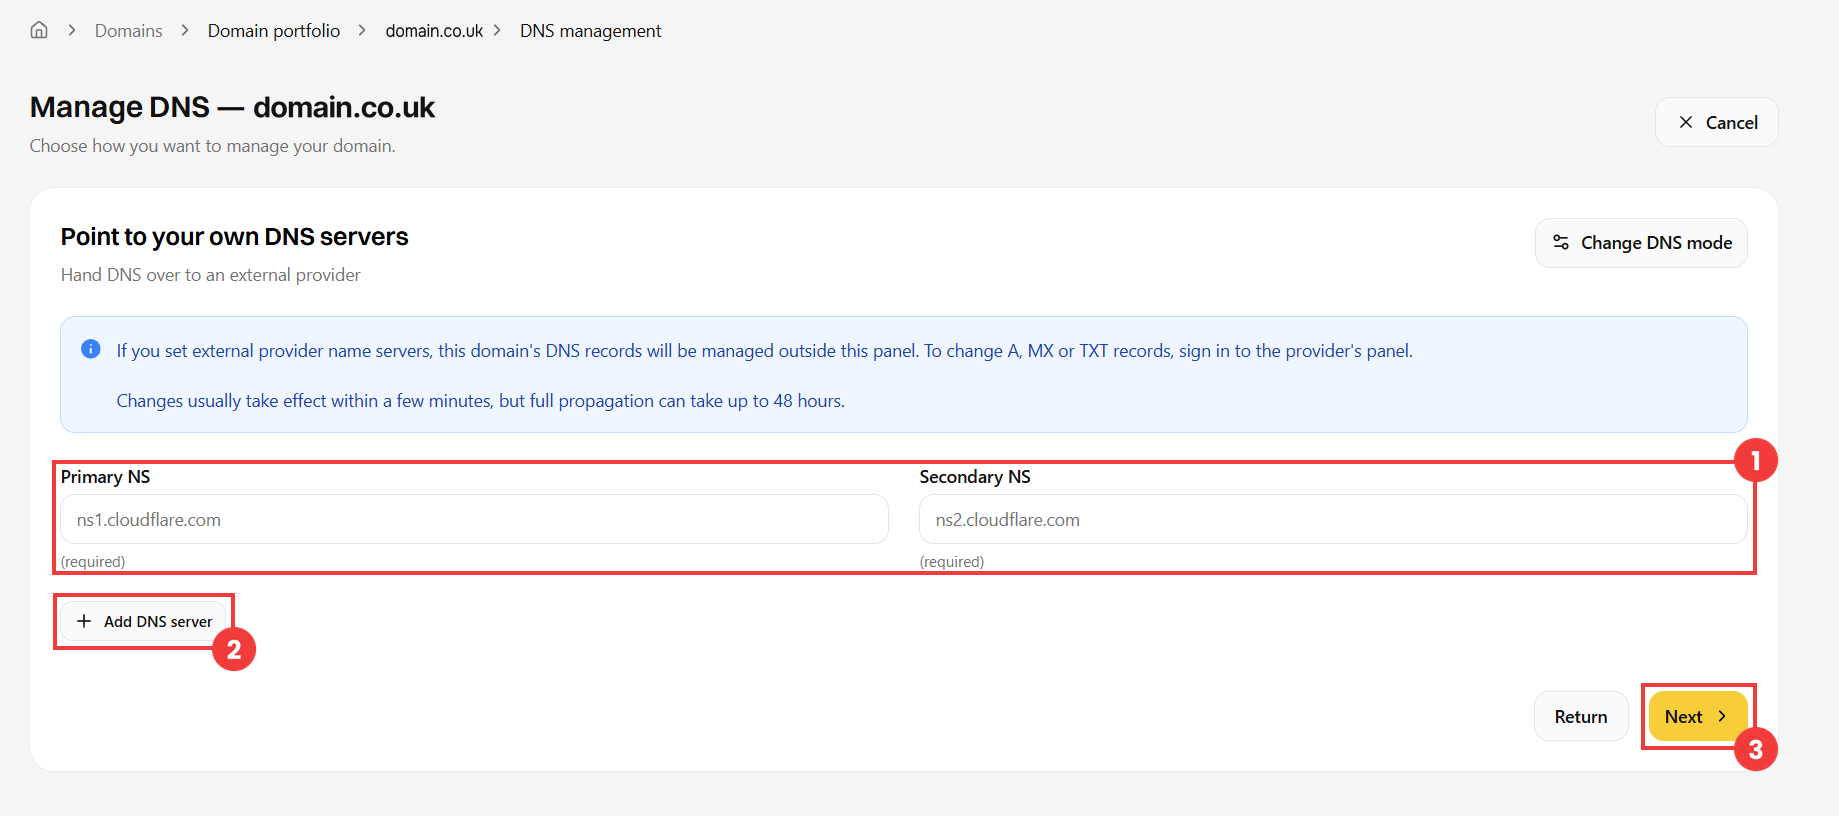
- Enter your provider’s name servers in the Primary NS and Secondary NS fields (1). If your provider gives you more, add them with the Add DNS server button (2). Then click Next (3).
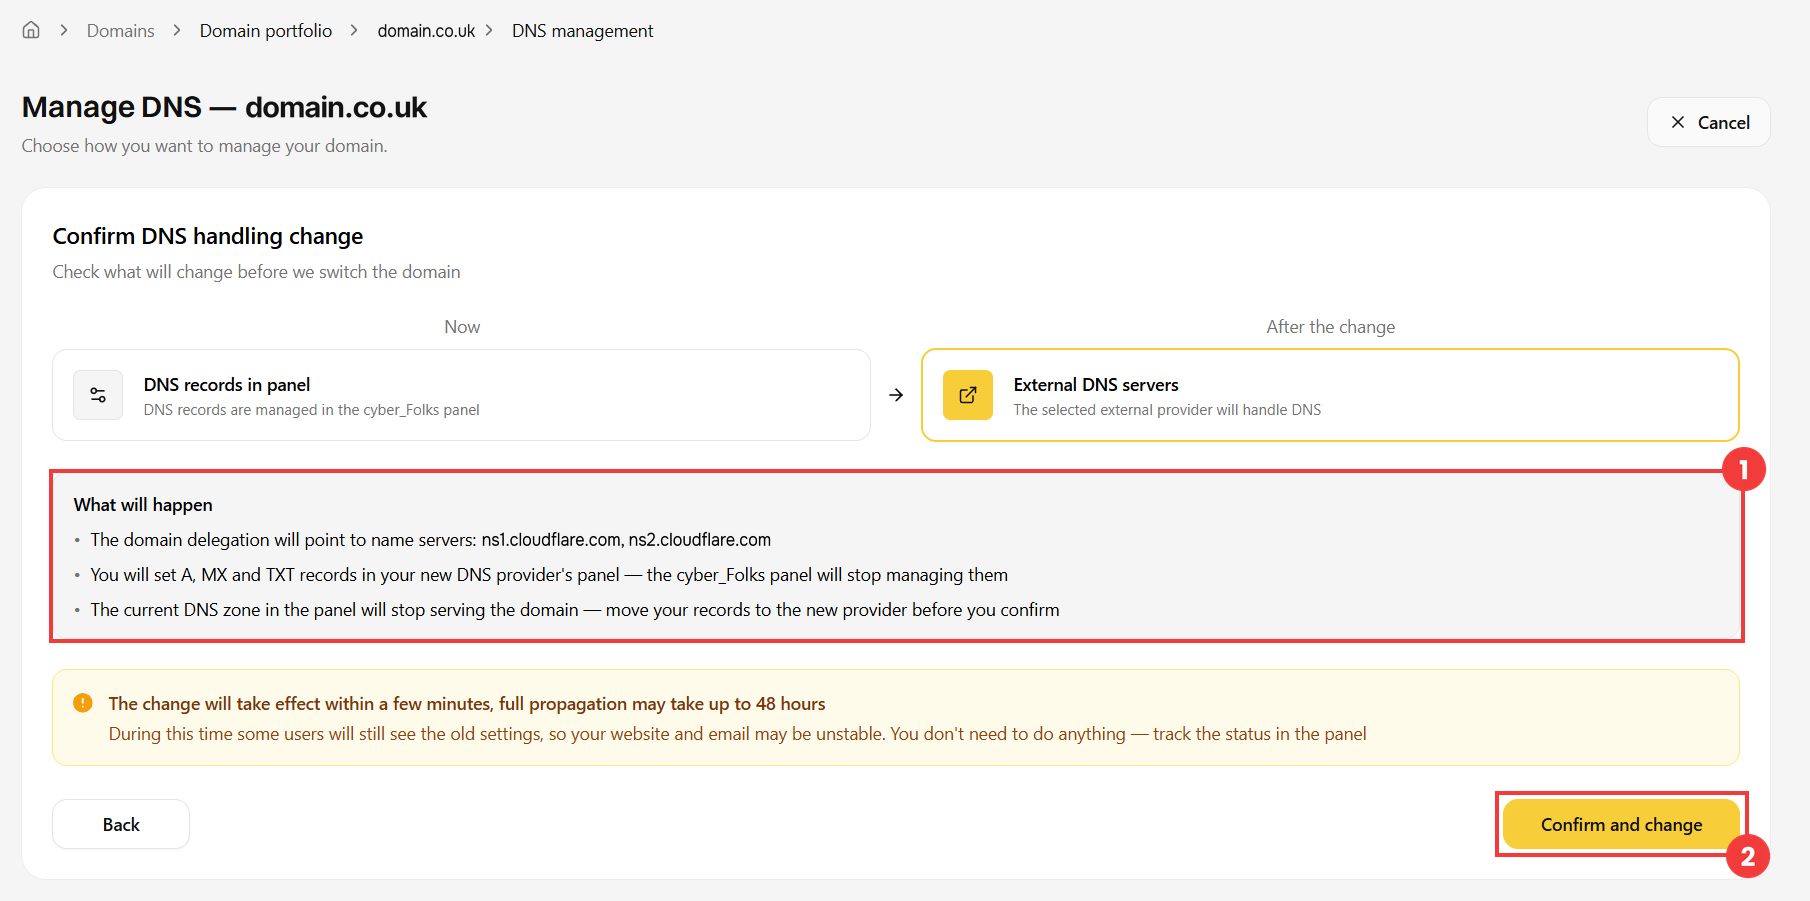
- Check the summary of the changes (What will happen) (1), then confirm with the Confirm and change button (2).
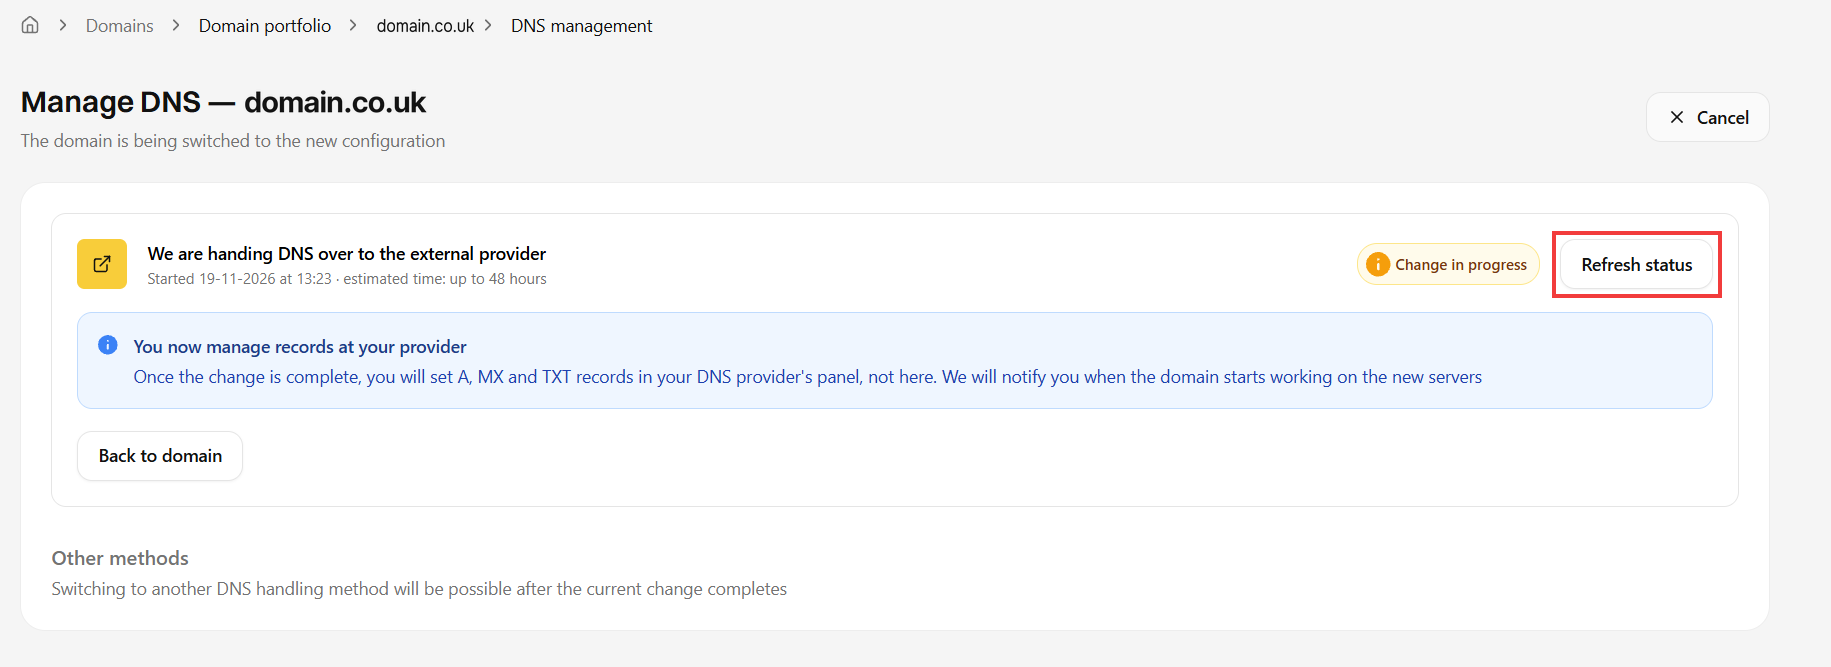
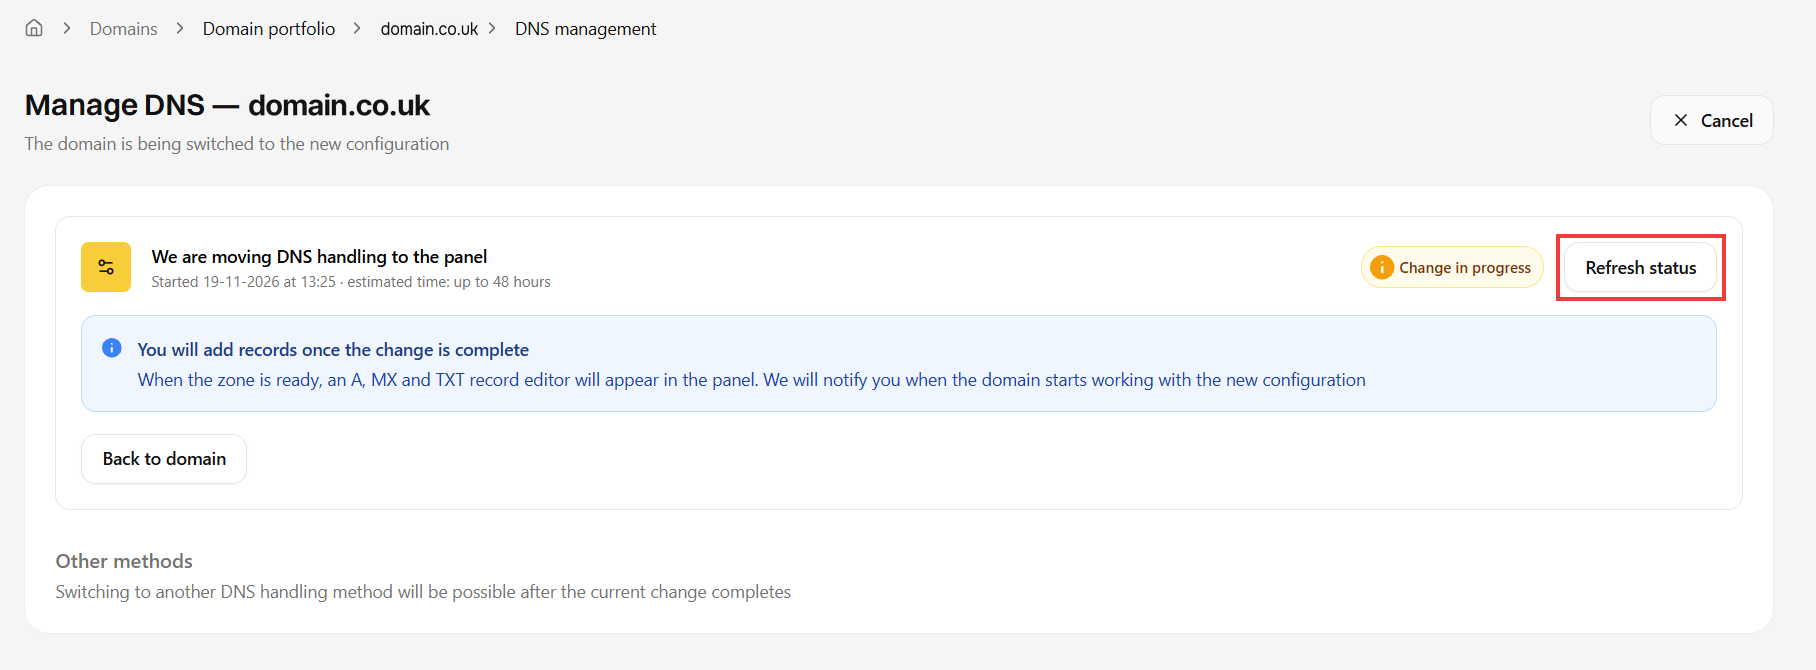
- The change is in progress. You don’t need to do anything: the status updates automatically, but you can also check it with the Refresh status button. Once the change is complete, your servers appear in the current configuration, and the DNS records (A, MX, TXT, etc.) are managed in your DNS provider’s panel.
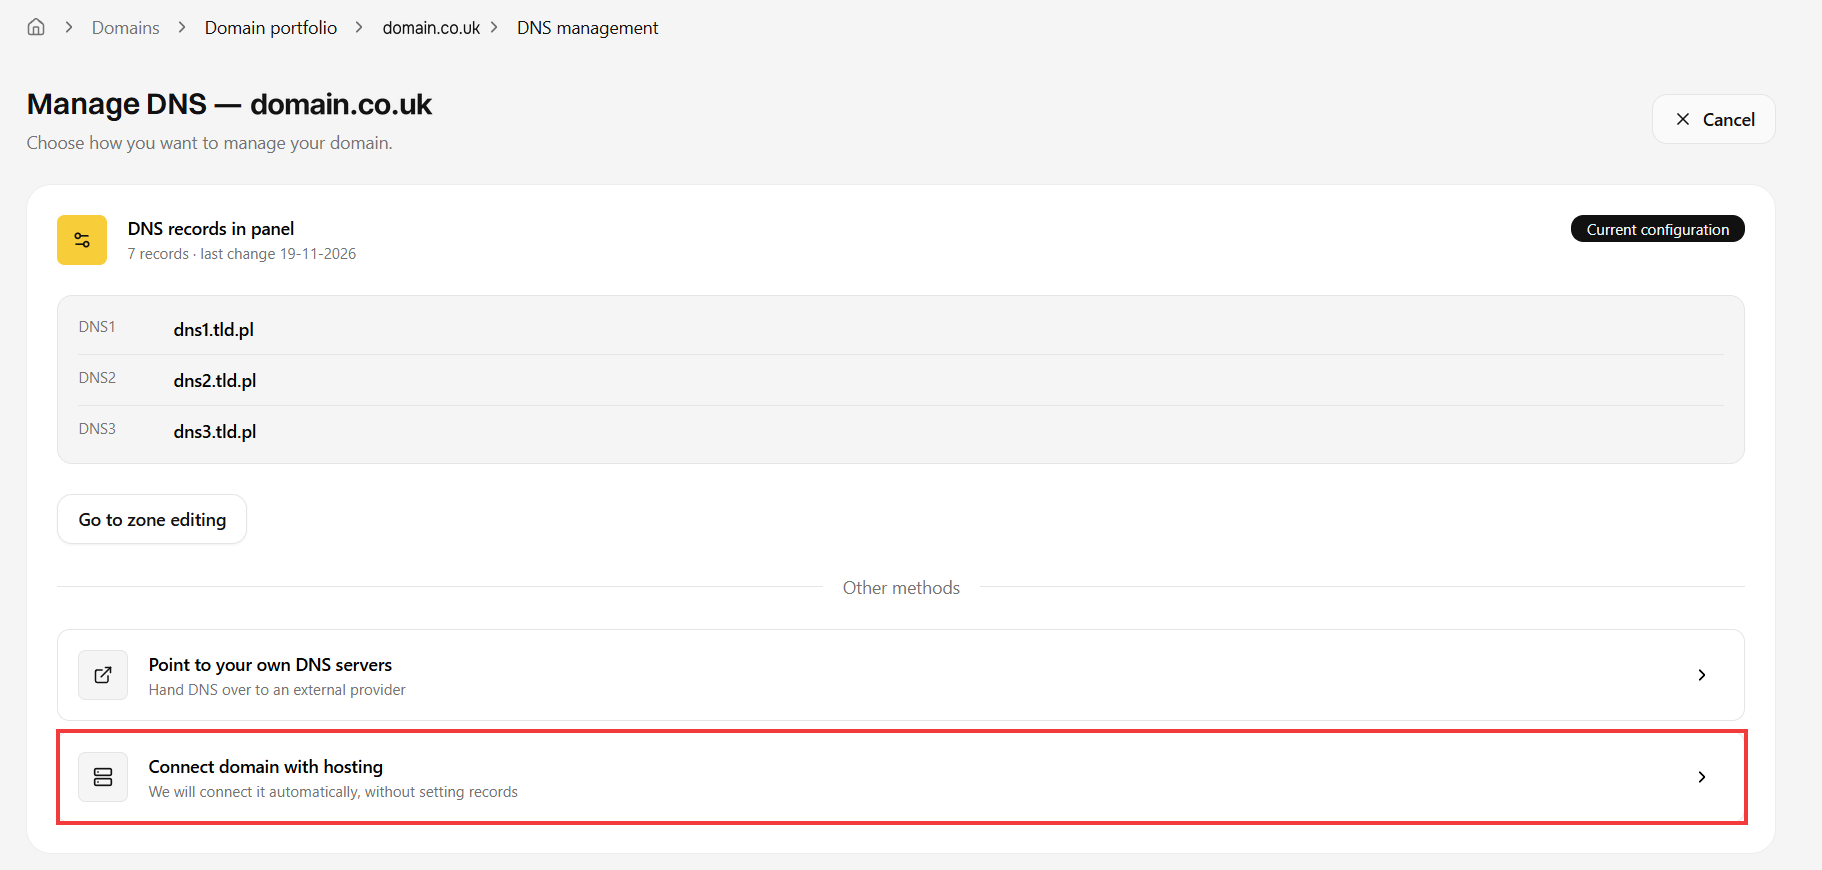
- In the Other methods section, click Connect domain with hosting.
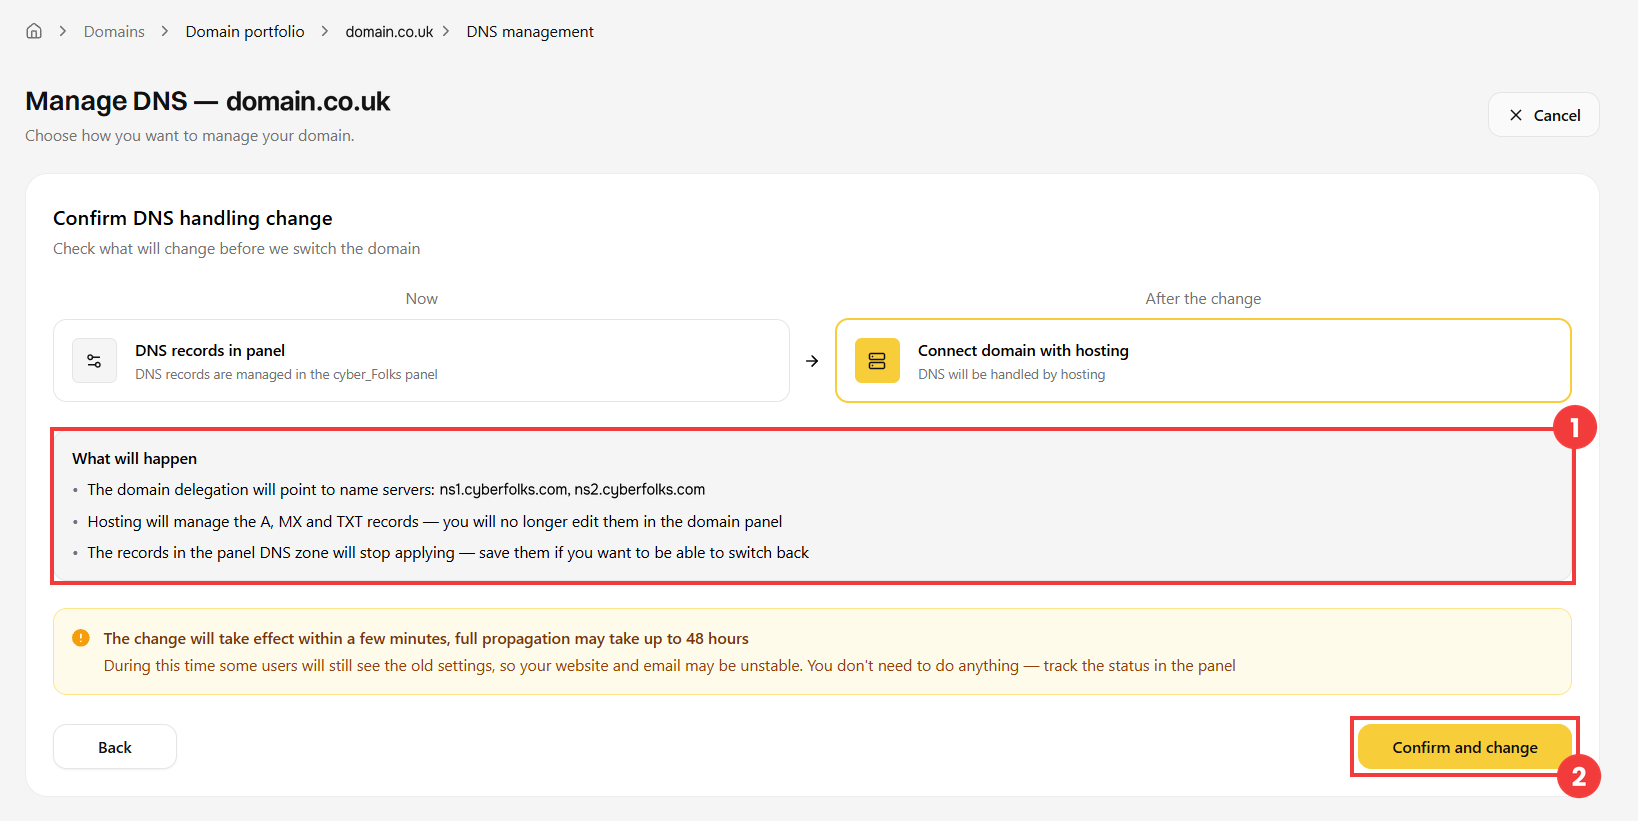
- Check the summary of the changes (1): the domain will point to the servers ns1.cyberfolks.com and ns2.cyberfolks.com. Confirm with the Confirm and change button (2).
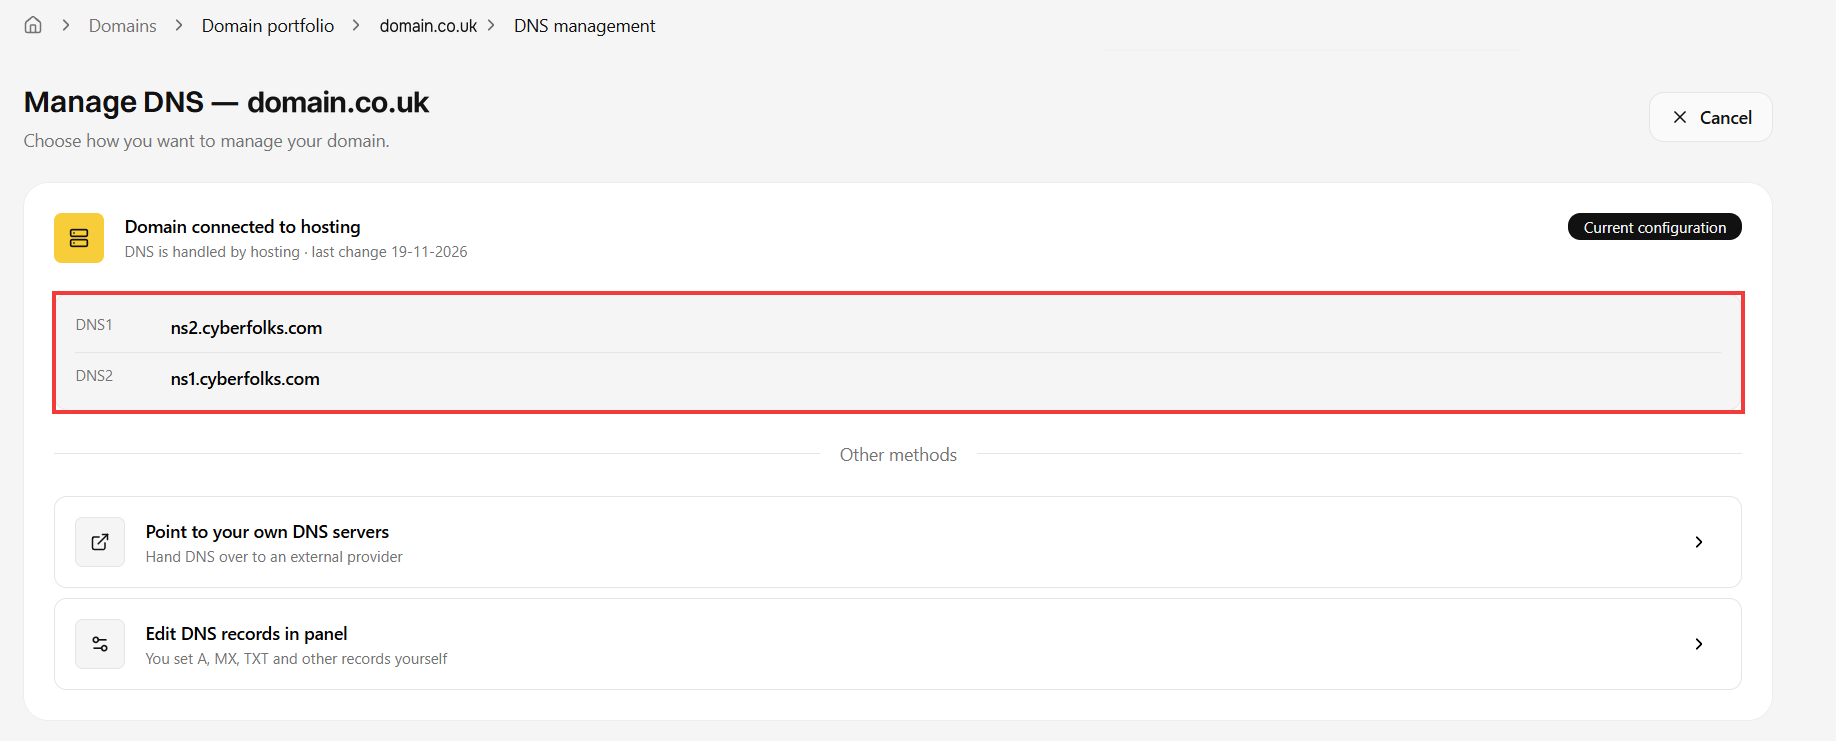
- You can follow the progress with the Refresh status button. Once the change is complete, the current configuration shows Domain connected to hosting and the cyber_Folks DNS servers. The records are now handled automatically by the hosting.
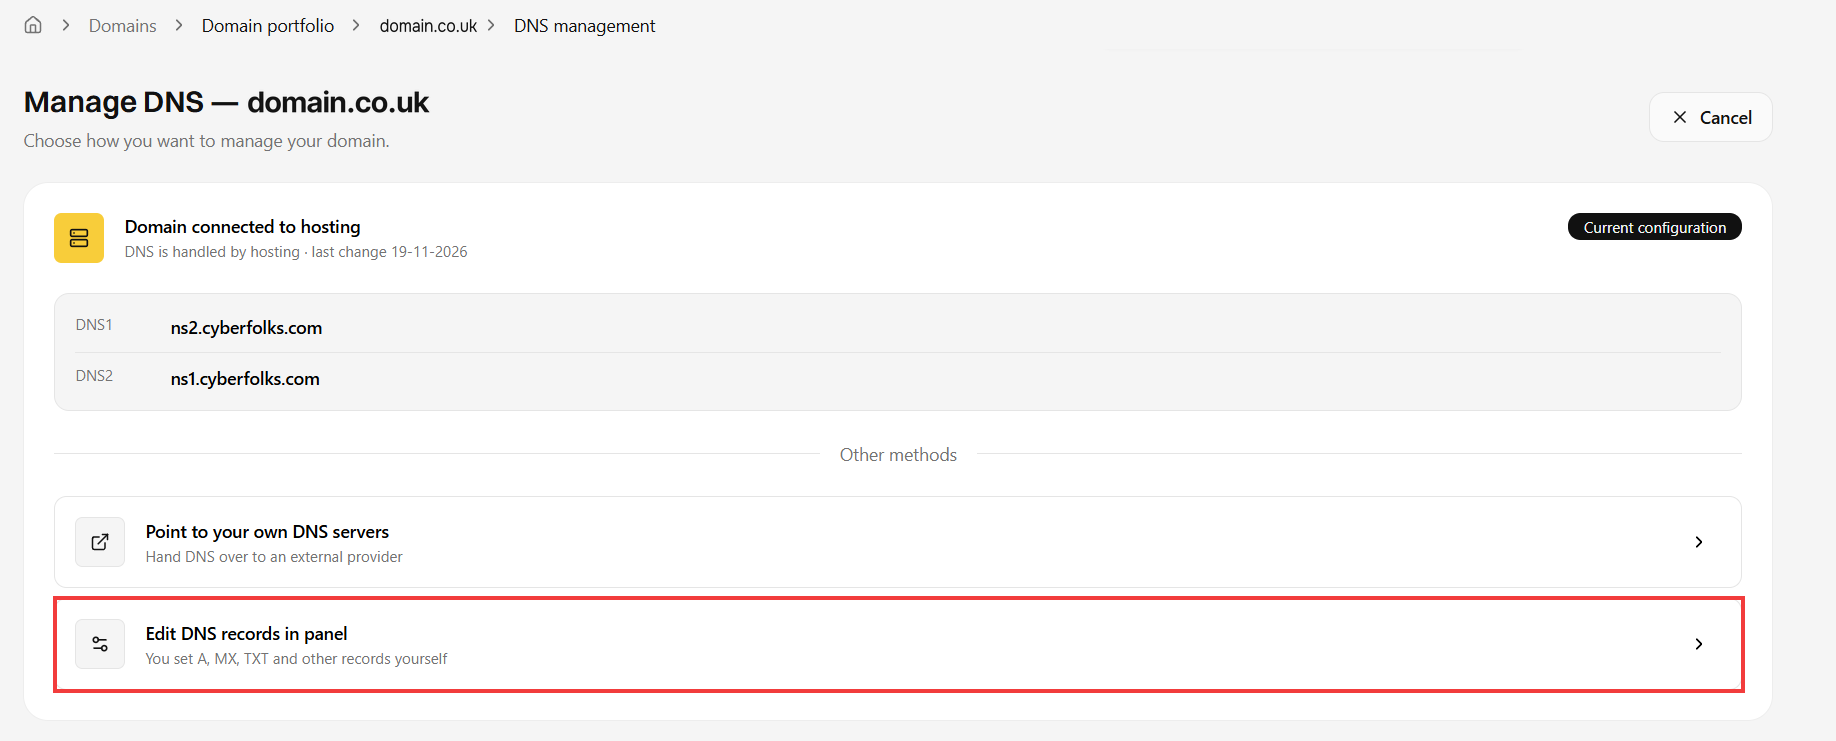
- In the Other methods section, click Edit DNS records in panel.
- Check the summary of the changes (1), then confirm with the Confirm and change button (2).
- The change is in progress. You will be able to add records once it is complete.
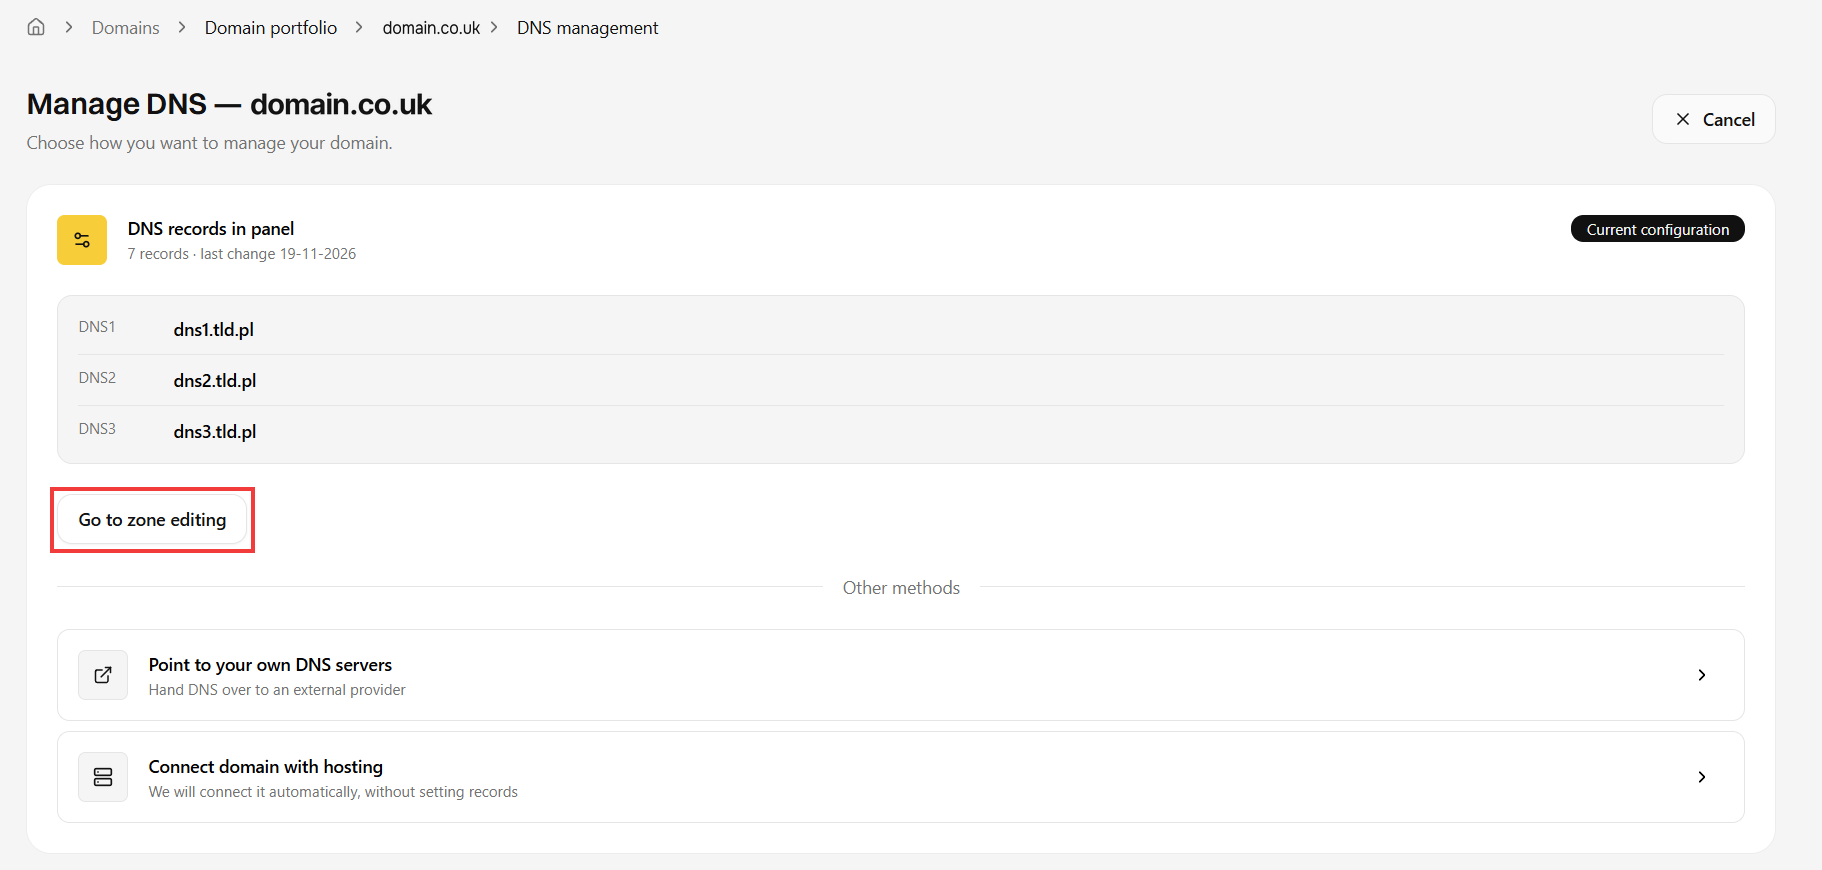
- Once the change is complete, the current configuration shows DNS records in panel and the FreeDNS servers. To manage the records, click Go to zone editing.
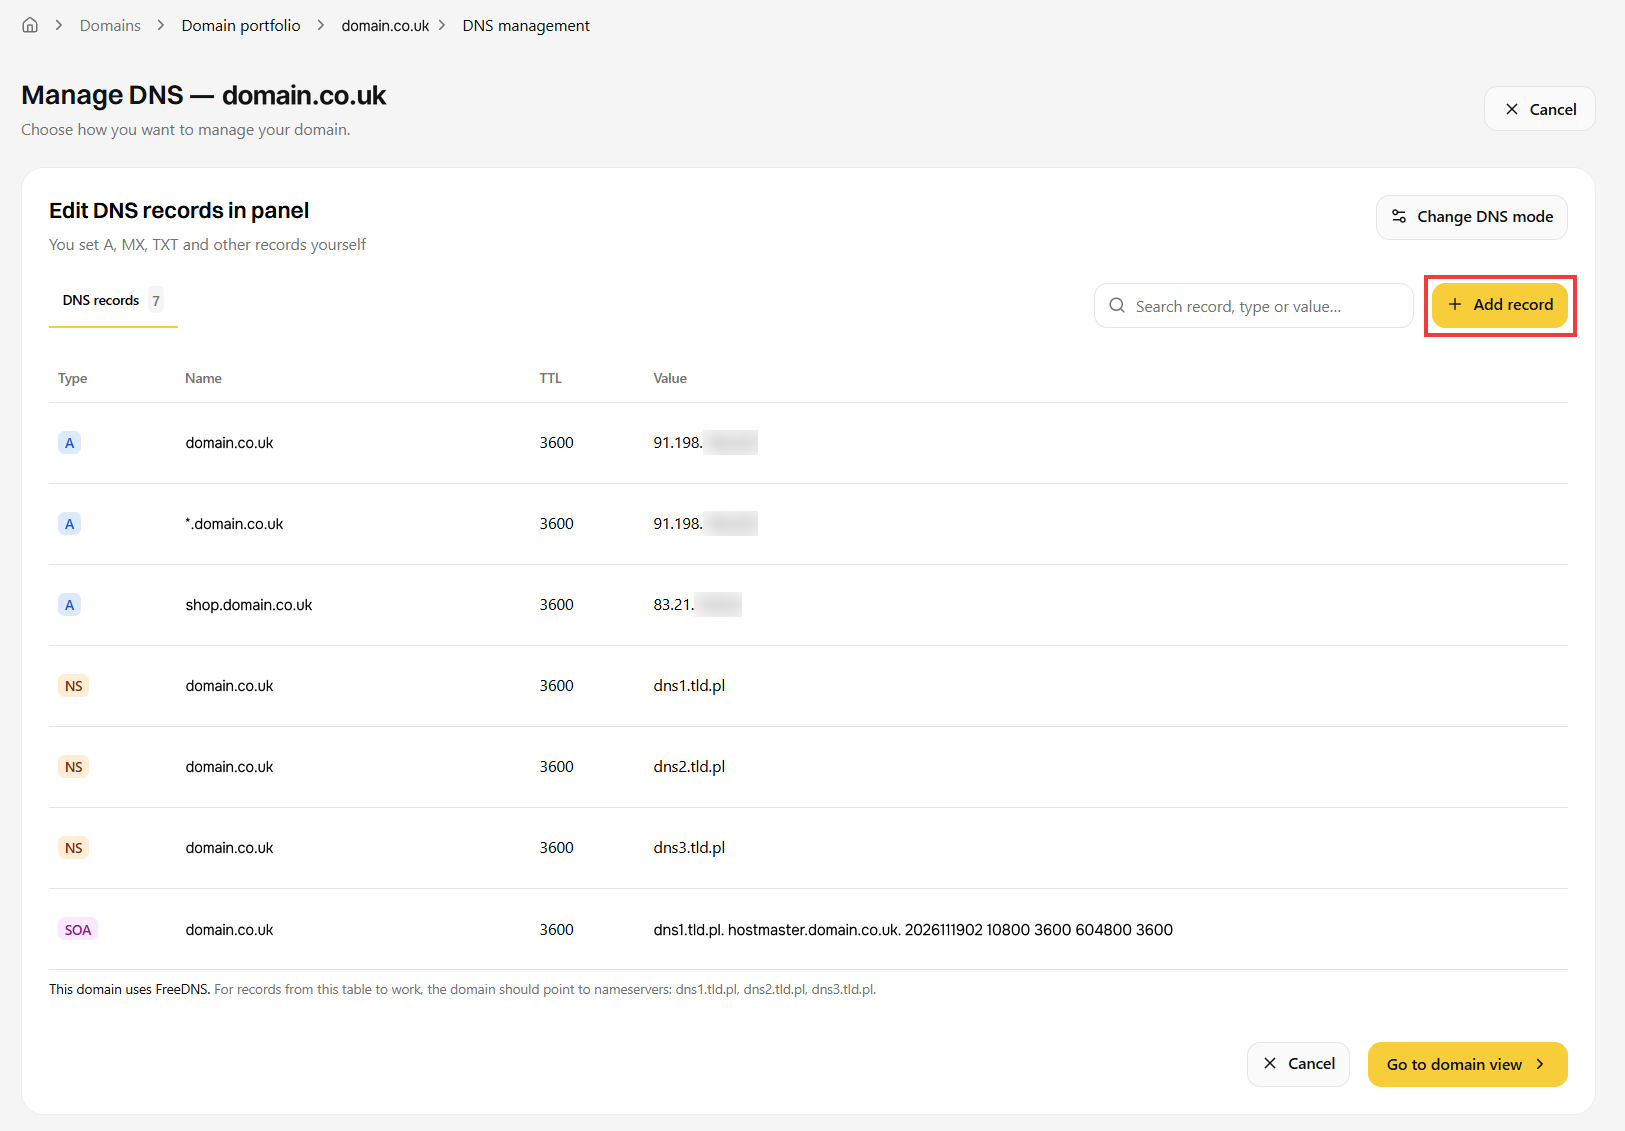
- In the zone editor, click the Add record button.
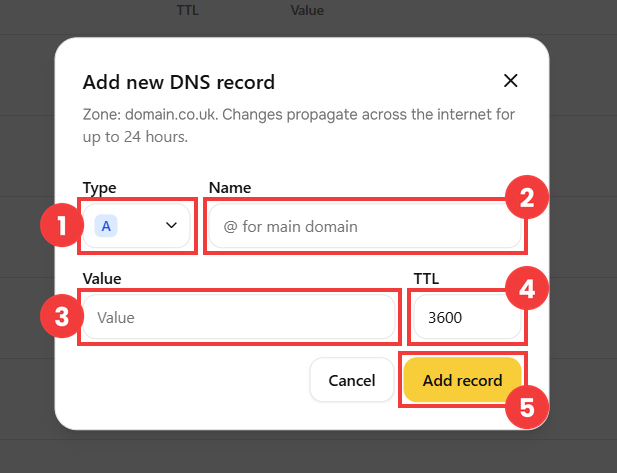
- Fill in the form:
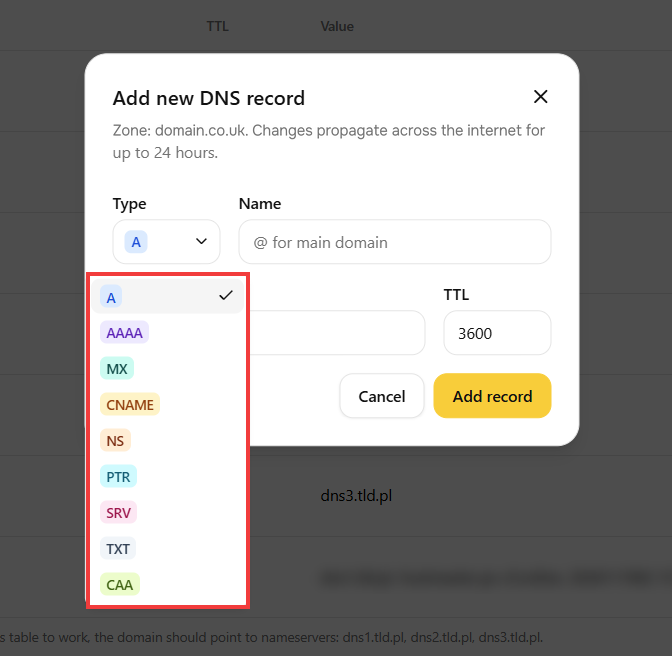
- Confirm with the Add record button (5). Changes propagate across the internet within 24 hours.
- The new record appears in the list. To edit or delete it, hover over its row and click the pencil or bin icon.
 Good to know! Once you are logged in to the client area, you can also ask our assistant robo_Folks for help – it can perform many operations for you.
Point to your own DNS servers
Connect the domain to cyber_Folks hosting
This mode is only available if the hosting is on the same client account as the domain.
Manage the DNS zone in the panel for free (FreeDNS)
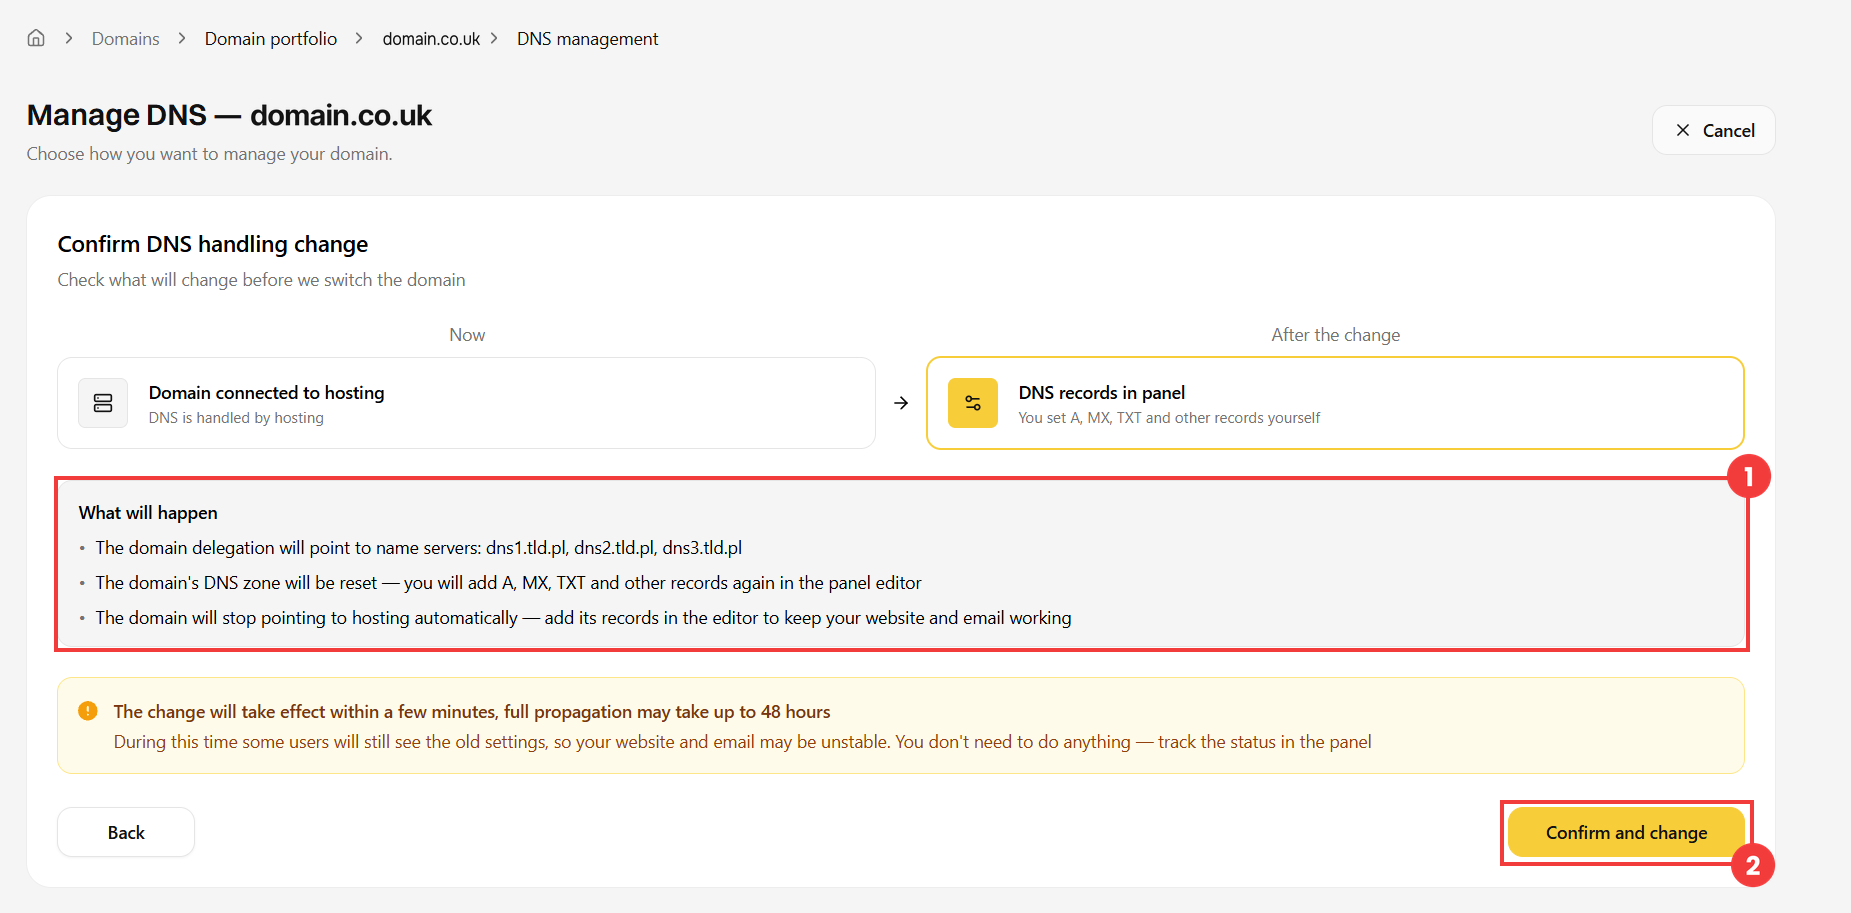
Important! The domain’s DNS zone is reset and the domain stops pointing to the hosting automatically. To keep your website and email working, add their records (A, MX, TXT, etc.) in the zone editor.
Add a record to the DNS zone
| Field | Description |
| 1 Type | Record type: A, AAAA, MX, CNAME, NS, PTR, SRV, TXT or CAA. |
| 2 Name | For the main domain, enter @ (this is the only accepted form). For a subdomain, enter only its name, for example shop for shop.domain.co.uk. |
| 3 Value | For example the IP address of the server (A, AAAA) or the name of a server (CNAME, MX). There is no need to add a dot at the end of names. |
| 4 TTL | How long the record is cached, in seconds. The default value (3600) is fine in most cases. |